
How to Make a Techy Roller Bass in Serum
To make a techy roller bass in Serum, start with two sine waves and run FM from oscillator B into A, then add the sub and a touch of noise. Give it punch with an envelope on the master tune, distort it, and put the movement in a band-pass filter and notch EQ modulated by an LFO and automation. Finish with OTT, parallel layers and pitch bends. Below is every step with the settings shown in our video.
Prefer to watch? The full 6-minute video builds the bass from an initialised patch.
What you'll need
- Serum. The bass is built in Serum, a paid wavetable synth. All the synth steps use Serum's own oscillators, matrix and FX rack.
- Ableton Live (or your DAW). The automation, OTT and parallel processing happen in Ableton in the video. Any DAW with automation, an EQ and a multiband compressor can do the same job.
- OTT. Three instances of the OTT multiband compressor sit after the synth. Ableton's Multiband Dynamics has an OTT preset; the free Xfer OTT plugin works too.
- No Serum? Our roller bass in Vital tutorial builds a similar FM roller in Vital, which is free.
1.Set up two sines with FM, sub and noise
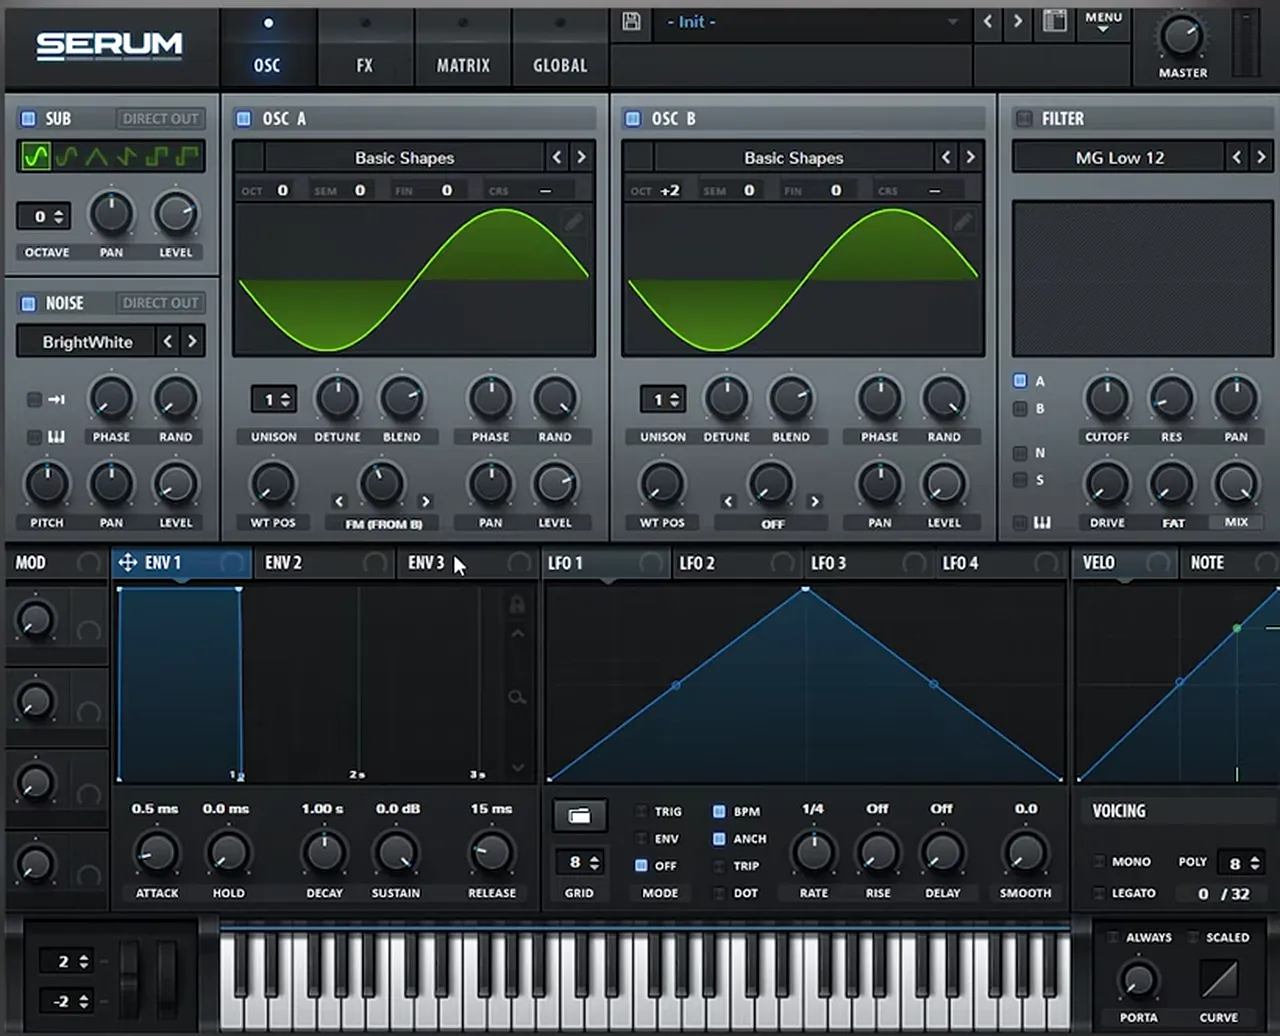
Start from an initialised patch and set up the oscillators:
- Load a sine wave on oscillator A and another sine wave on oscillator B (Basic Shapes).
- Turn the level of oscillator B all the way down. We only want to use it to modulate A.
- On oscillator A, set the warp mode to FM (from B) and leave it around 40%.
- Change the octave of oscillator B (it sits at +2 in the screenshot). The higher the modulator, the brighter and more metallic the FM.
- Turn on the sub for weight, and the noise set to BrightWhite, mixed in low: 5% works.
2.Add a pitch transient with envelope 2
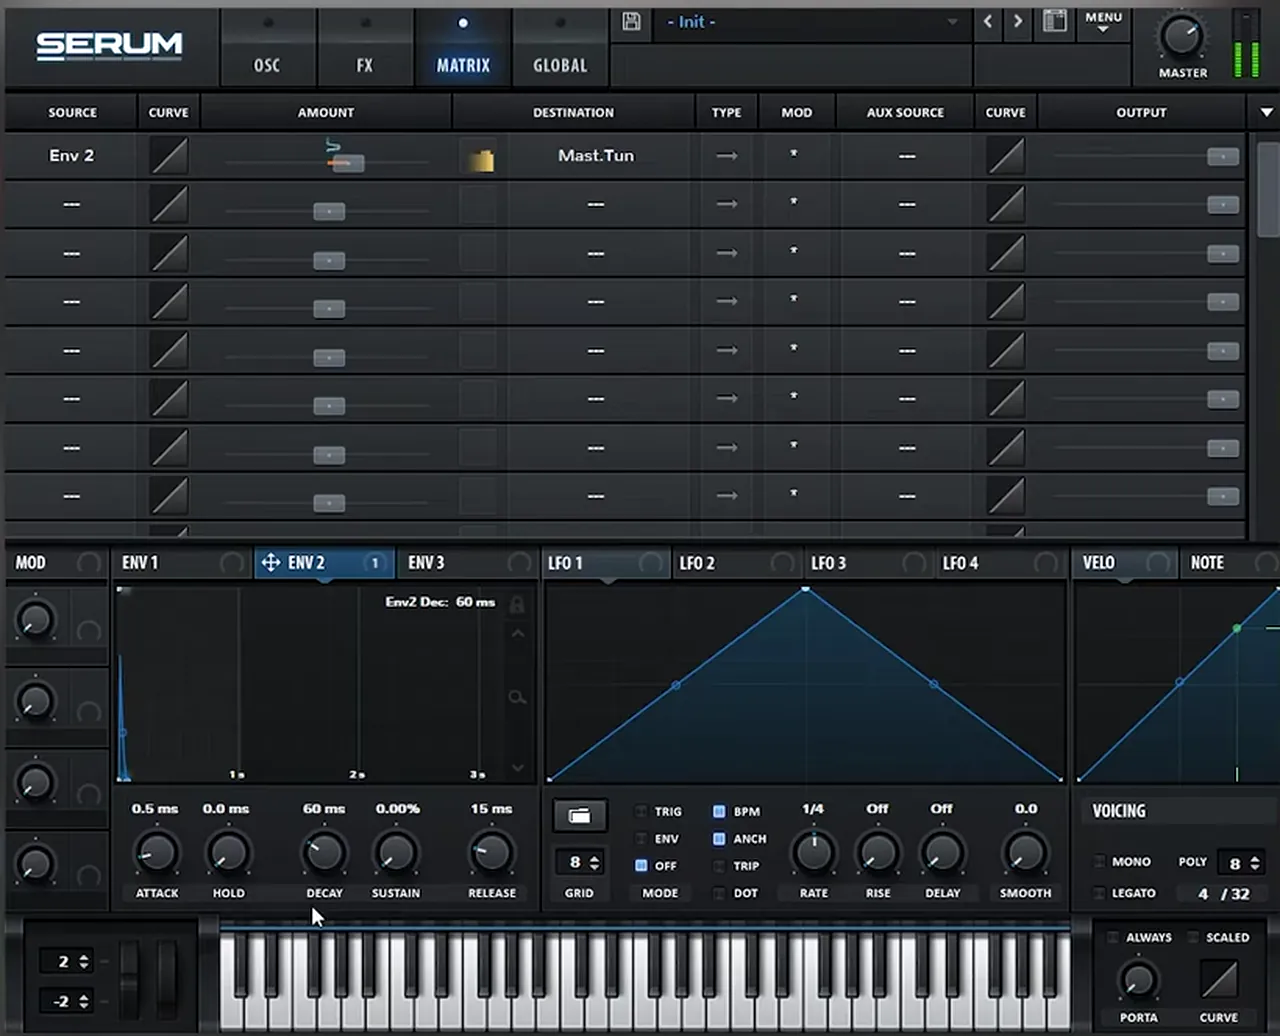
Next, add a transient so the bass punches. Open the Matrix and use envelope 2 to modulate the master tuning (Mast.Tun). Set the amount to an octave.
Then bring down the sustain and the decay of envelope 2. In the screenshot the decay is around 60 ms with 0% sustain. Every note now starts with a very fast pitch drop, which reads as a click or punch rather than an audible pitch slide.
3.Distort it and turn off random phase
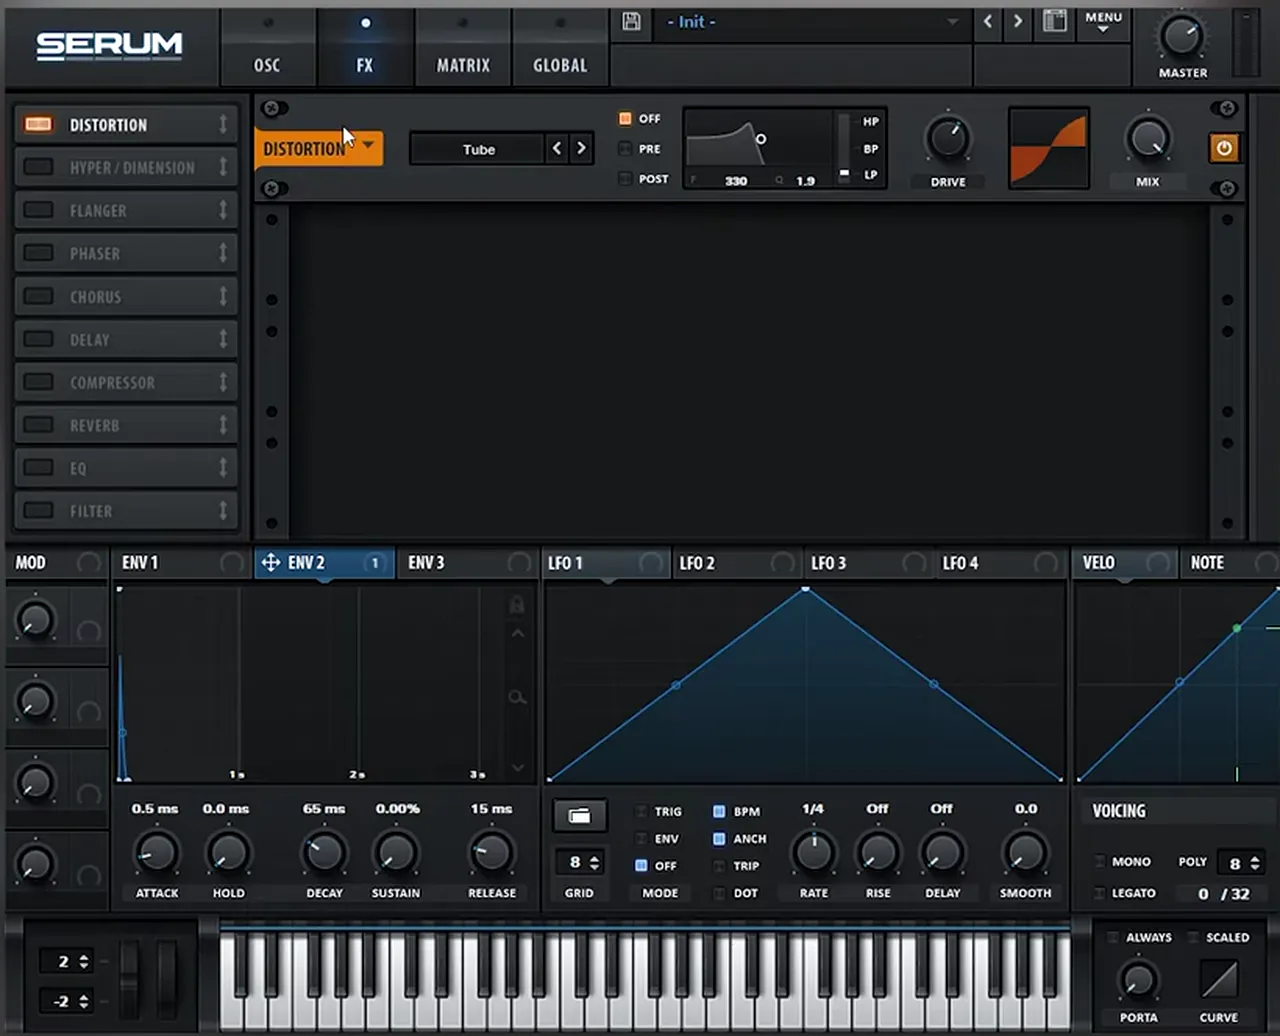
Go to the FX tab and turn on Distortion (Tube mode in the video). The FM harmonics and noise now get thicker and more aggressive.
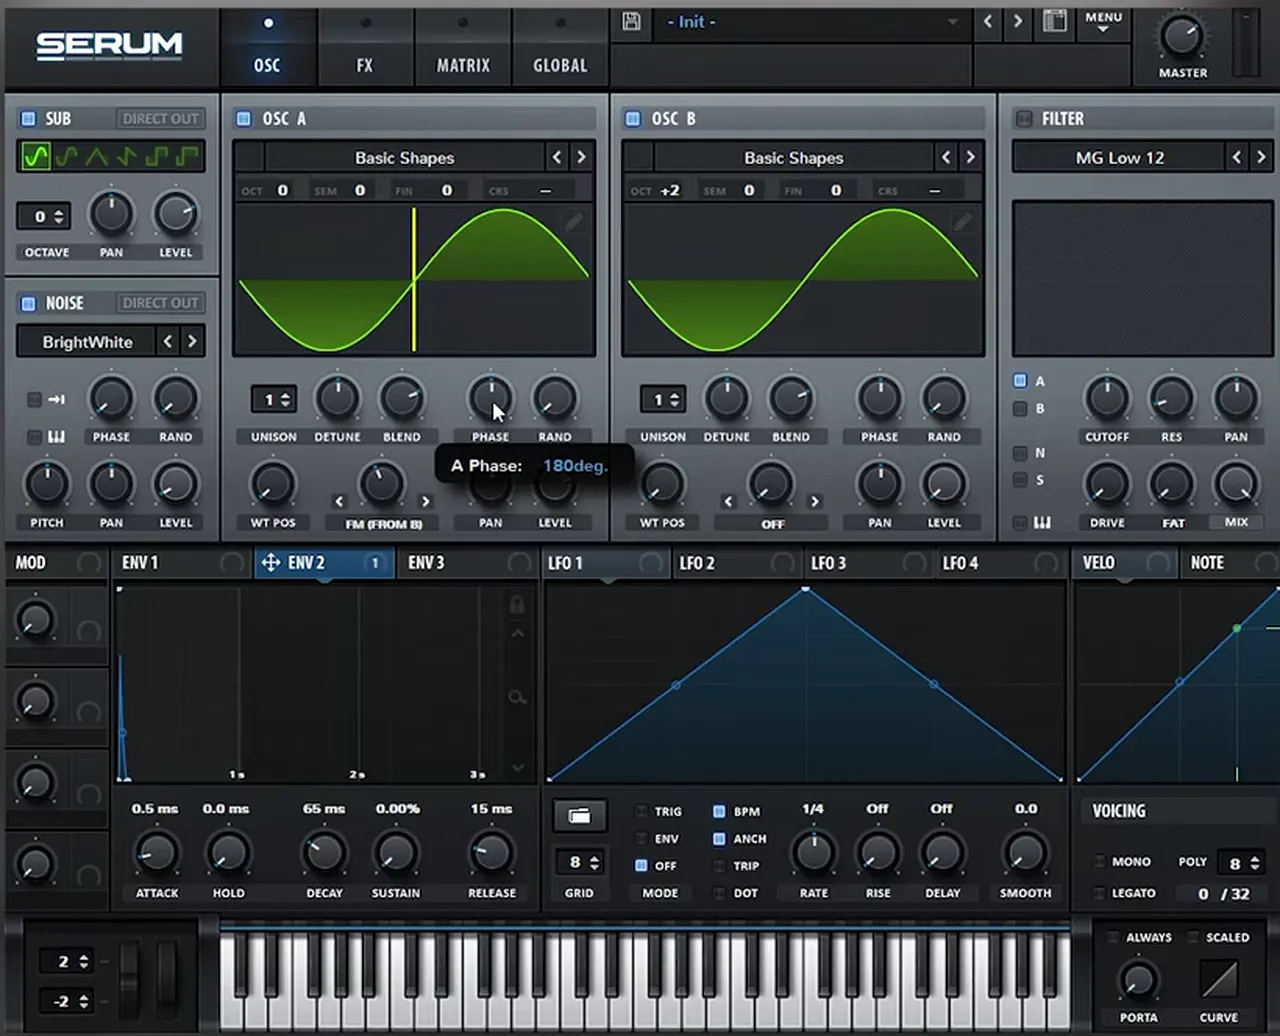
You might notice the bass sounds slightly different each time you play it. That's random phase. Put the RAND knob next to Phase all the way down so you get the same sound every time. With randomisation off, you can also experiment with the phase itself to change the attack.
4.Put the movement in a band-pass filter and notch EQ
This is where the techy movement happens. In the FX rack:
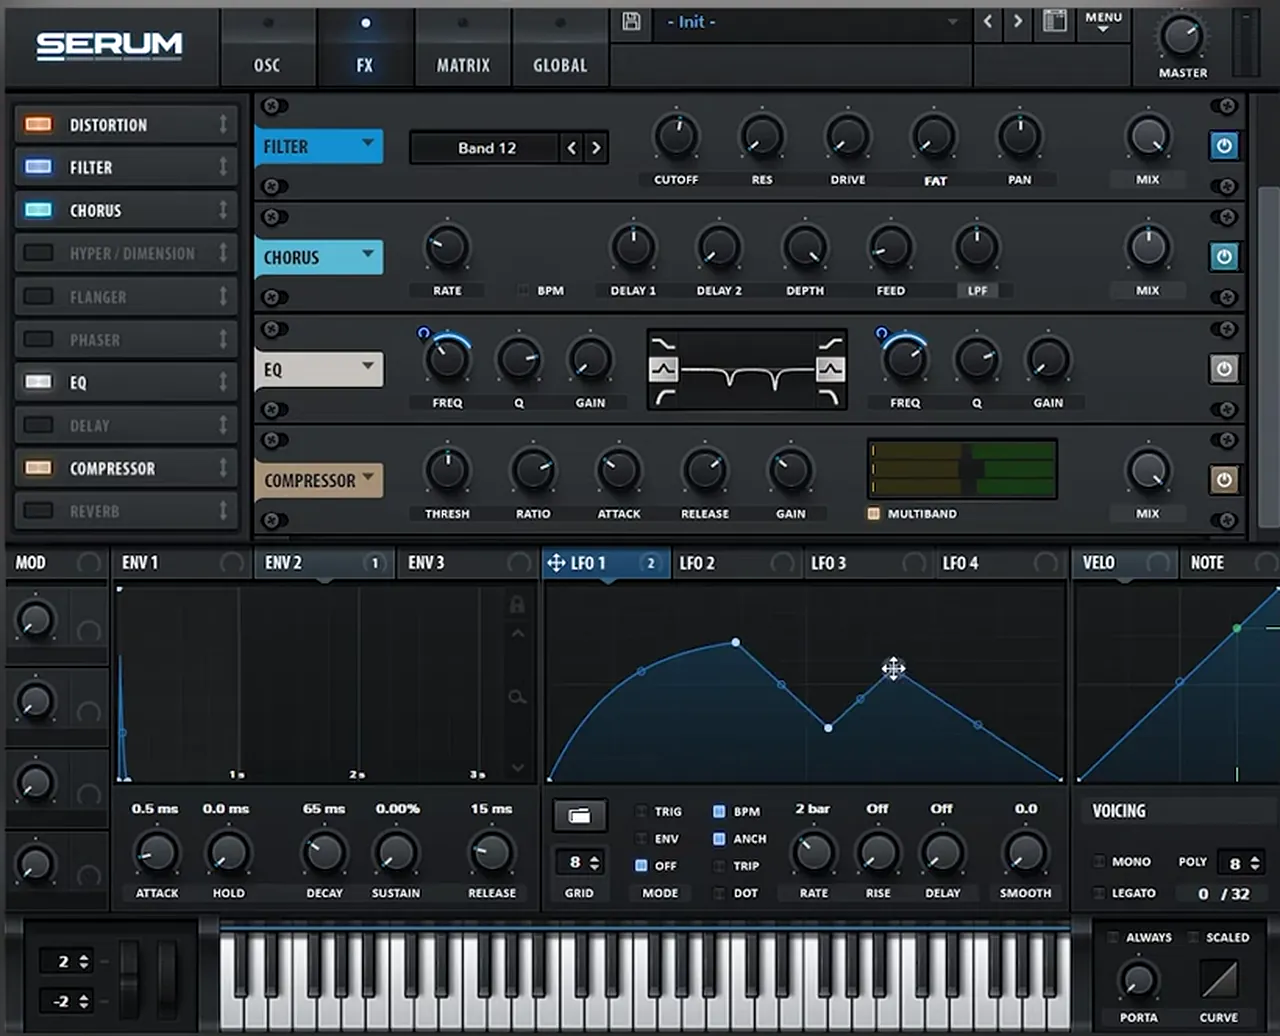
- Add a Filter and select Band 12 (a 12 dB band-pass).
- After the band-pass, add a Chorus.
- Then add a Compressor in multiband mode.
Moving the band-pass cutoff already sweeps the bass. For extra movement, turn on the EQ, select the peak shapes but turn them into notches, and play with the resonance and cutoff.
Now modulate it: drag LFO 1 onto the notch frequency, bring the rate down (2 bar in the screenshot) and change the LFO shape until the notches sweep in a way you like.
5.Sequence the band-pass with automation
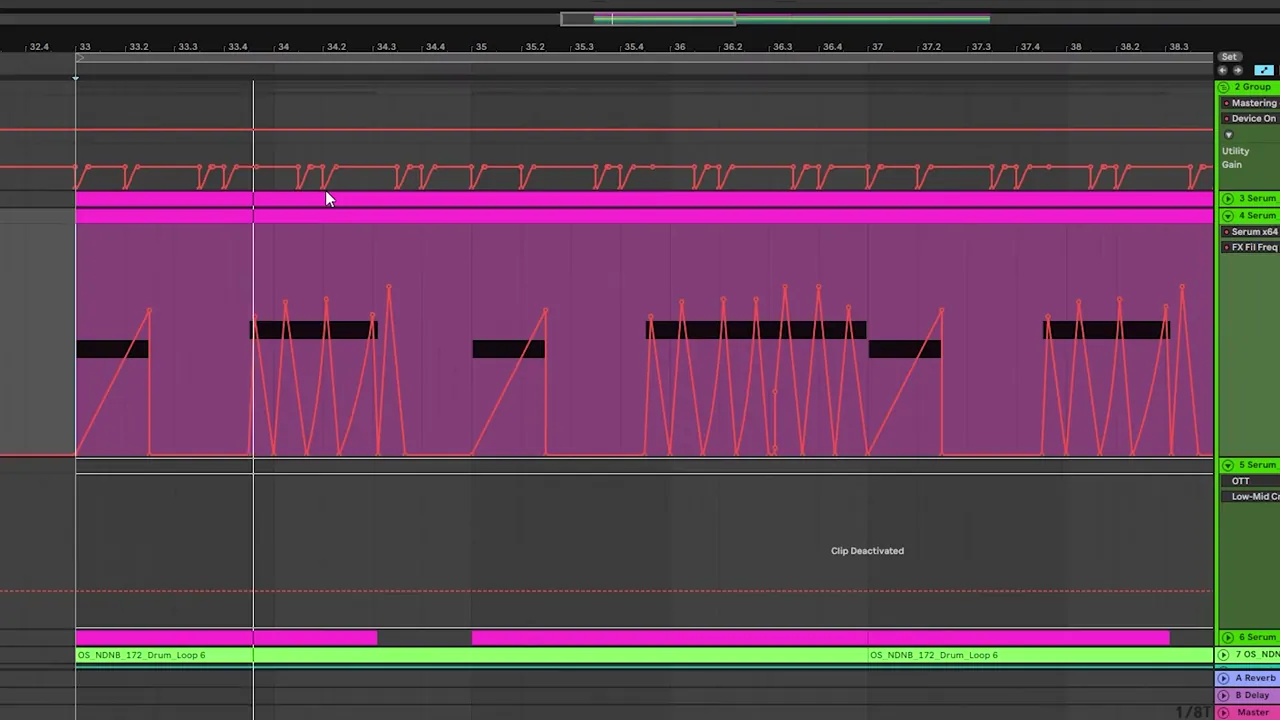
To turn the movement into a sequence, automate the cutoff of the band-pass filter from your DAW. Click the filter cutoff in Serum so the DAW picks it up, then draw the automation in the clip. In Ableton it appears as FX Fil Freq.
The video uses quick ramps and repeated saw-tooth shapes that line up with the notes, so every note gets its own little sweep.
Want to go further with the pattern itself? Our guide to writing DnB bass patterns with call and response covers where to place hits, fills and turnarounds.
6.Post-process: OTT, EQ and parallel layers
Now post-process the sound in the DAW:
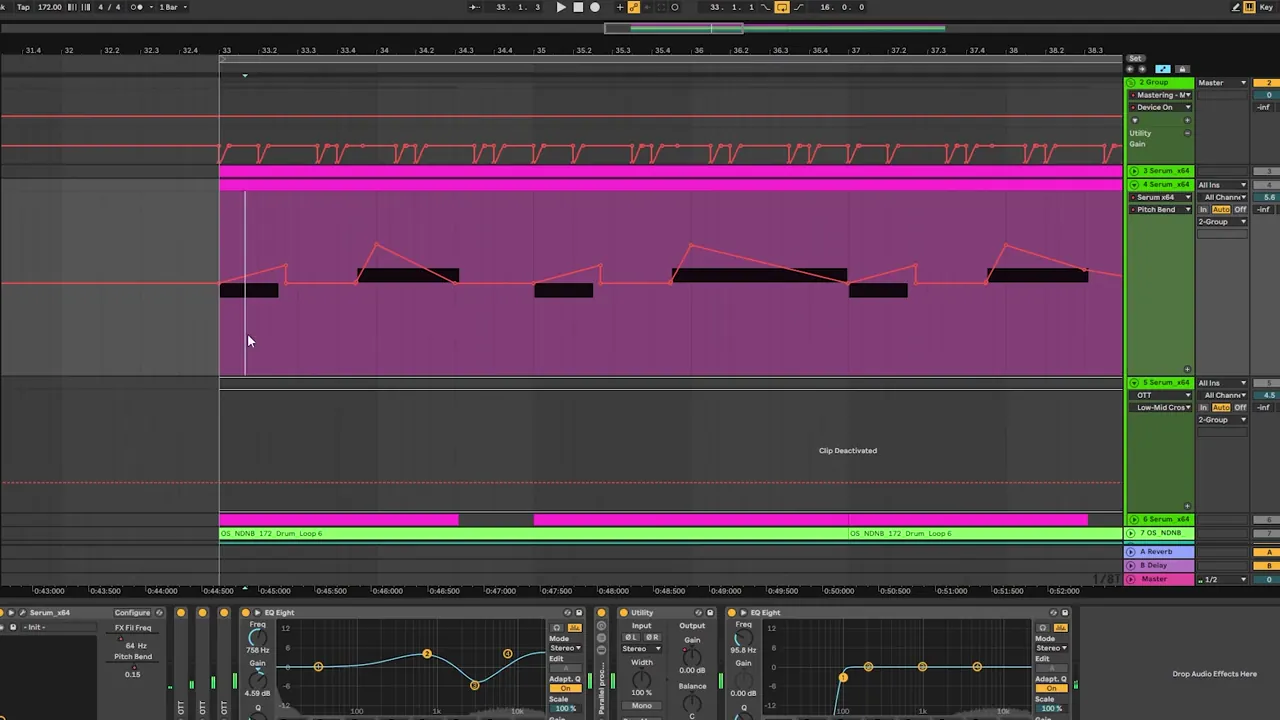
- Three OTTs with the same settings, one after another. In the screenshot each has Amount at 66%. Stacking them brings up a lot of detail and grit.
- Simple EQ to shape the result.
- Parallel processing: an audio effect rack that keeps the dry layer and adds a reverb layer, a stereo layer and a high layer. In the screenshot the dry chain sits at 0 dB with reverb at −6 dB and stereo at −8.4 dB underneath.
- Then the sidechain and a simple low cut.


For the sidechain, the ducking approach in our punchy DnB drums tutorial keeps the kick and snare on top of a busy bass like this.
7.Finish with pitch bends, then experiment
The last thing is to play with the pitch bend. Automate it so some notes slide up into the next one, as in the screenshot.
Then experiment to fine-tune the bass for your track:
- The amount of FM on oscillator A.
- The octave of oscillator B.
- The amount of distortion.
- The EQ peaks and notches.
Common mistakes
- Leaving oscillator B audible. It's the FM modulator. If its level is up, you hear a second tone fighting the bass.
- A long envelope decay on the pitch. Keep envelope 2 short (around 60 ms in the video) or the punch turns into a slow pitch dive.
- Random phase left on. The bass will sound different on every note. Turn RAND down.
- Too much noise. About 5% is enough. More noise fills the mids and fights the drums.
- Stacked OTT without gain checks. Three OTTs add a lot of level and grit. Level-match before you judge it.
- No low cut on the processed bass. The parallel layers can add rumble. A simple low cut keeps room for the sub and kick.
Go deeper
Techy roller presets and courses
Want more techy, rolling sounds to study, or a full artist workflow for this style? Start here.
 Preset bundleCreatures Serum preset bundleTechy / Rollers: Serum presets for techy, rolling DnB.
 Preset bundleBristol Tech Serum preset bundleTechy / Rollers: Serum presets for techy rollers.
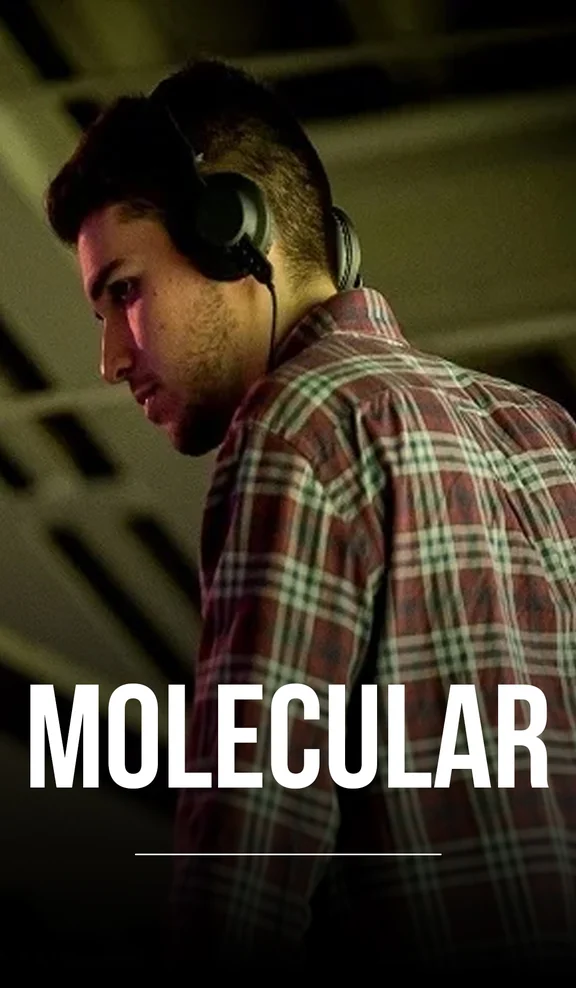 Production courseMolecular production courseTechy / Rollers: Molecular's approach to rolling, techy DnB.
Every artist course, preset bundle and sample pack is also in The Vault. Browse courses
Related tutorials
All tutorials → Vital · Bass designHow to Make a Roller Bass in Vital8 min read · Video + guide
 Ableton · NeuroNeuro Bass Patterns: How to Write DnB Basslines8 min read · Video + guide
 Vital · Bass designDark, Minimal DnB Bass Sound Design in Vital7 min read · Video + guide
 Free packsFree DnB Sample Packs, Presets & LessonsFree downloads
FAQ
How do you make a techy roller bass in Serum?
Start with two sine oscillators and use FM from oscillator B into A, plus the sub and a little noise. Add a short envelope on the master tune for punch, distortion, then a band-pass filter and notch EQ moved by an LFO and automation. Finish with OTT, parallel layers and pitch bends.
What FM settings are used for this bass?
Oscillator A uses FM (from B) at around 40%, with oscillator B as a sine shifted up in octave (+2 in the video) and its level turned all the way down, so it only modulates oscillator A.
How do I add punch to a Serum bass?
Route envelope 2 to the master tune in the Matrix with an amount of an octave, then set a very short decay (around 60 ms in the video) and zero sustain. Each note gets a fast pitch drop that sounds like a punchy transient.
Why does my Serum bass sound different every time I play it?
Random phase is turned on in the oscillator. Turn the RAND knob next to Phase all the way down and every note will start at the same point in the waveform.
Can I make this bass in Vital instead of Serum?
The same ideas (sine FM, noise, distortion, filter movement and pitch modulation) work in Vital, which has a free version. Our roller bass in Vital tutorial builds a similar FM roller step by step.
Next steps
You now have a moving techy roller bass and a chain you can reuse. When you want to learn the whole process in order, from sound design to finished tracks, here's where to go next:
Course guide
How to learn drum and bass production step by step, and which course fits your level.
Read the guide1:1 Mentorship
Personal guidance on your music from a mentor, built around your goals.
See the mentorship