
Dark, Minimal DnB Bass Sound Design in Vital
For a deep, dark minimal DnB bass in Vital, start with basic waveforms so the energy stays in the lows and low mids. Draw a high harmonic into a sine, add a unison saw through a filter swept by an LFO, mix in an atmospheric noise sample, then let distortion turn the sine, harmonic and noise into a rumbling texture. Tame it with EQ and a notch filter. Here are the steps from our video.
Prefer to watch? The full 8-minute video recreates this bass from an initialised patch.
What you'll need
- Vital. Everything here is stock Vital, including the wavetable editor and the noise samples. Vital has a free version.
- A DAW and a sustained note. The riff in the video is a single held note with some pitch going up, so one long MIDI note is enough to design the sound.
- Patience to experiment. The last step is all about tweaking. The same patch gives very different basses with small changes.
1.Start simple and draw a harmonic
Start from an initialised patch. In this dark, minimal style we begin with basic waveforms: they have fewer harmonics, so the sound stays focused on the low and low-mid register.
If you want some interesting harmonics in a basic wave, you can add them by hand. Click the small edit button (the pencil on the oscillator) to open the wavetable editor, and draw harmonics in the harmonic bars. In the video it's just one small, high harmonic on top of the sine.
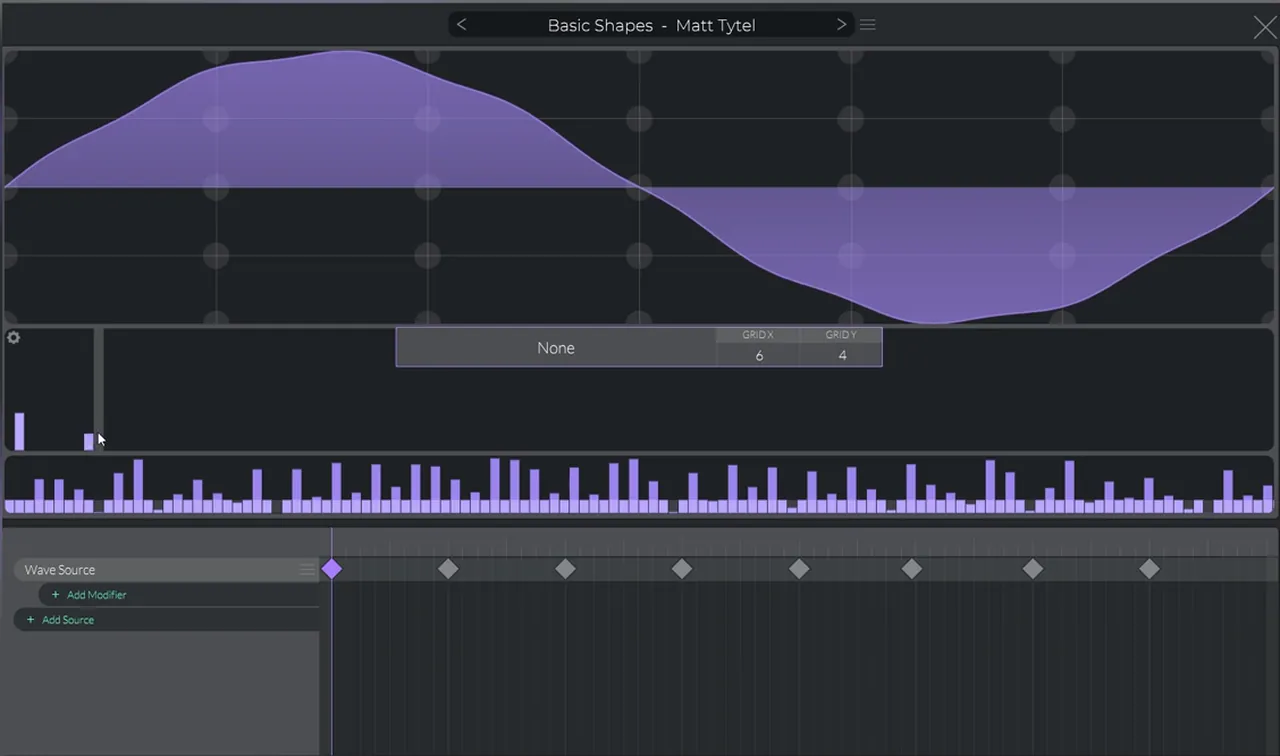
There's a lot of room to experiment here, and we'll come back to it at the end.
2.Add a unison saw through filter 2
Turn on oscillator 2. It's a saw wave, full of harmonics, so we'll filter it with filter 2, which already has oscillator 2 routed into it.
- First, add more voices to the saw (unison; 13 voices in the screenshot) for a wider, thicker layer.
- Bring the cutoff all the way down.
- Bring the resonance all the way down too, so you don't get a laser effect when the cutoff moves.
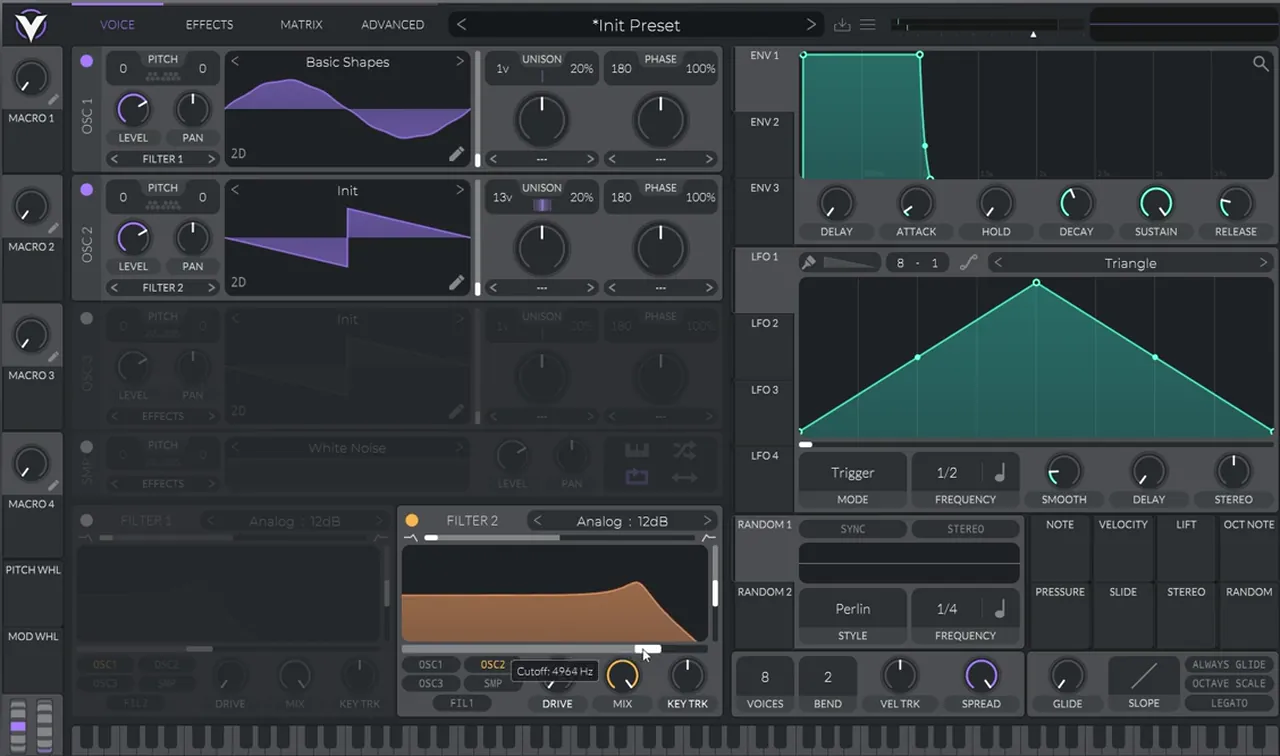
Now map LFO 2 to the filter cutoff, draw a simple ramp (rising from left to right) and bring the rate down to 2 bars (2/1). Play a note and the saw slowly opens up over two bars.
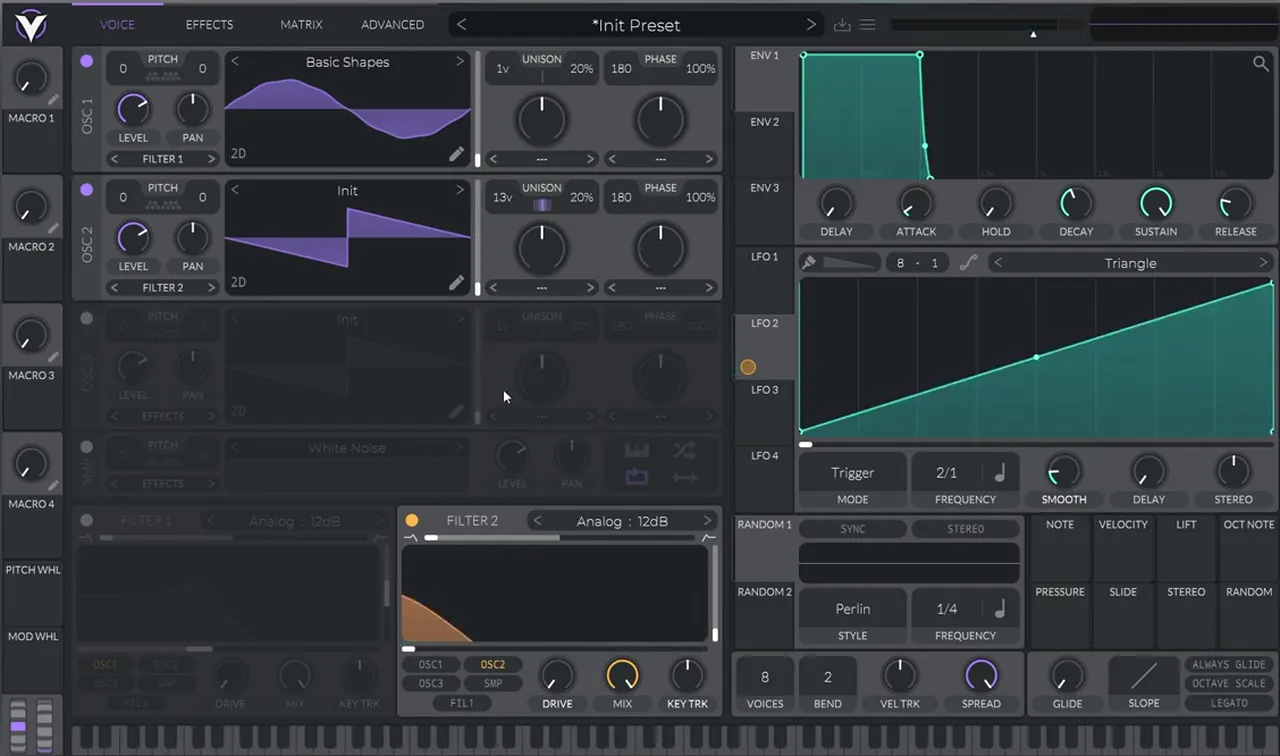
3.Mix in an atmospheric noise sample
Add some noise, but not much: bring its level down and change the sample. The video picks an atmospheric sample from Vital's noise list (shown as BART).
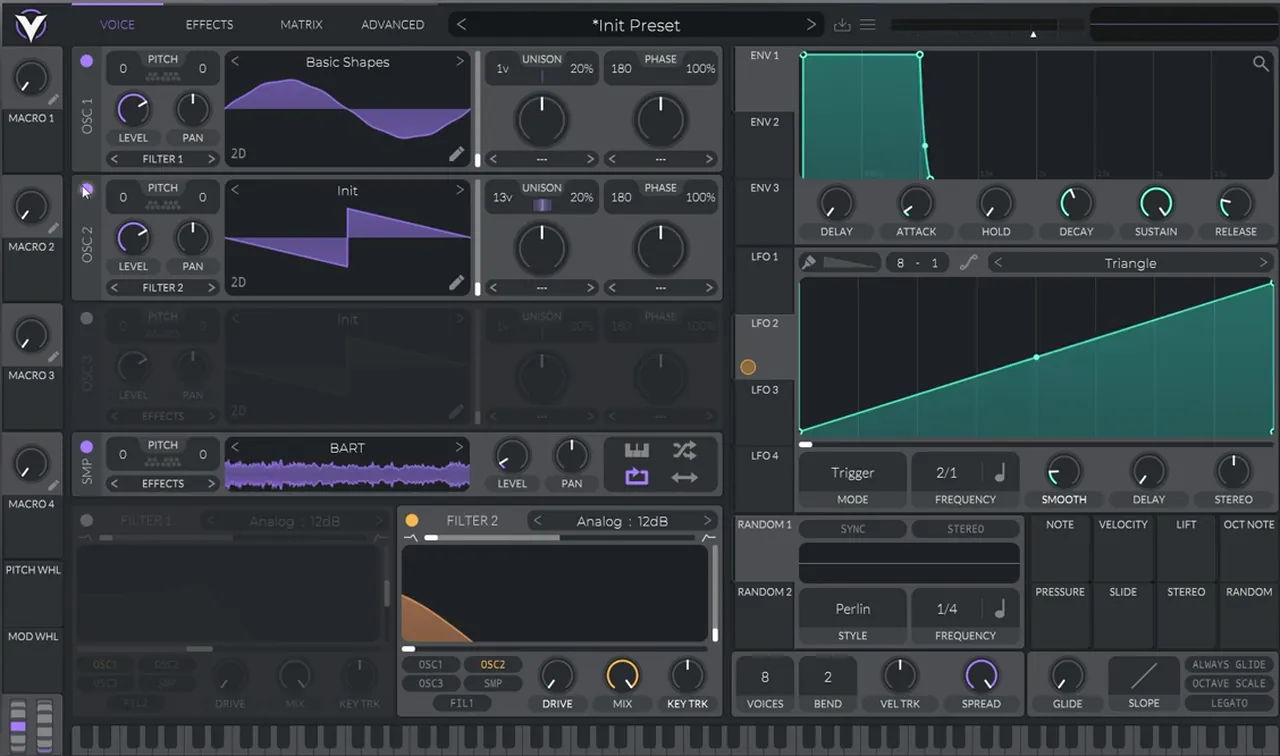
4.Use distortion to create the texture
If all the sound is meant to come from the saw, why add that odd sine and the noise? The answer is in the Effects tab, in the Distortion.
When you distort a low sine that has a high harmonic plus some noise, you get a really interesting texture. Turn on Distortion (Soft Clip; the drive reads 14.40 dB in the screenshot) and listen to the sine and noise on their own.
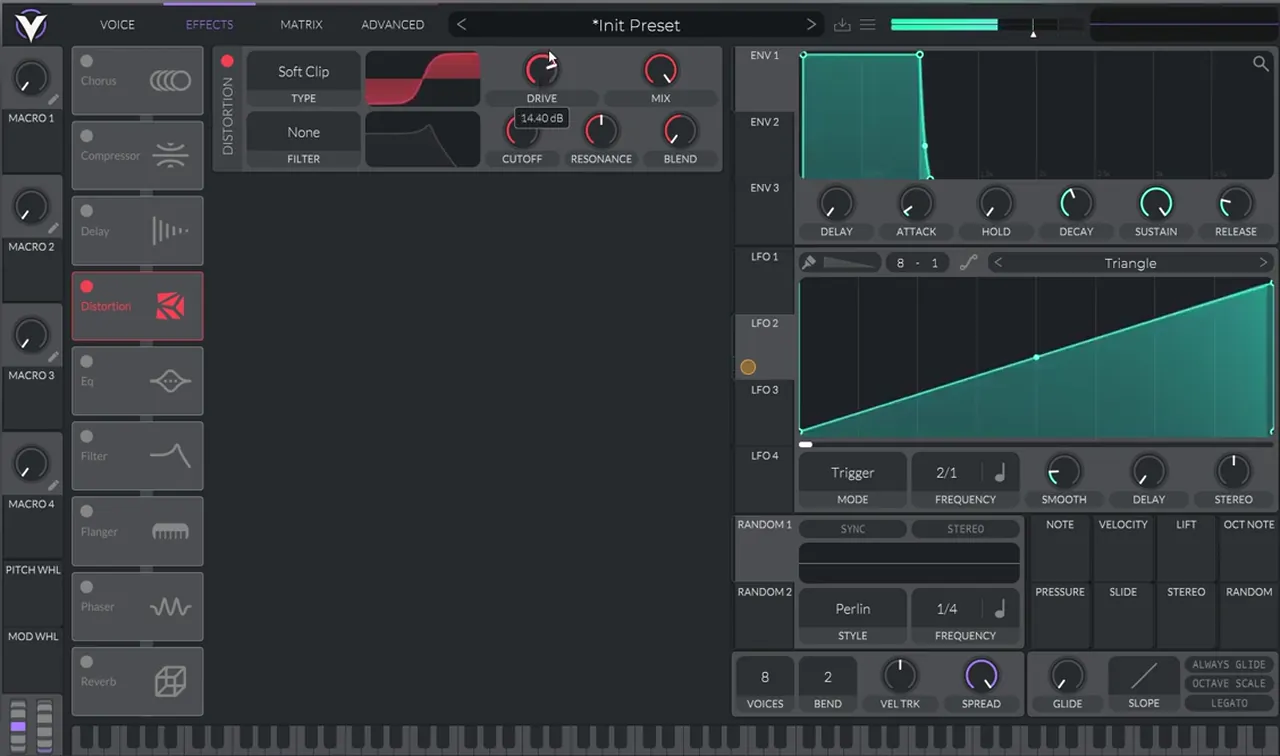
Play with the mix of these layers and you get a deep rumble. Try different noise samples too, as each one changes the texture. Then bring the saw back in: it now feels like two sounds playing at once, a sub and a big distorted layer from the saw.
Tip: the same "distort a sine, a high harmonic and noise together" idea, pushed much harder, is how our foghorn bass in Vital gets its tone.
5.Chorus, EQ and a notch filter for control
Keep adding effects:
- Chorus adds a bit more movement.
- EQ: all that distortion creates very high frequencies. Use the high shelf and bring it down to attenuate them (about −12.7 dB at around 1 kHz in the screenshot).
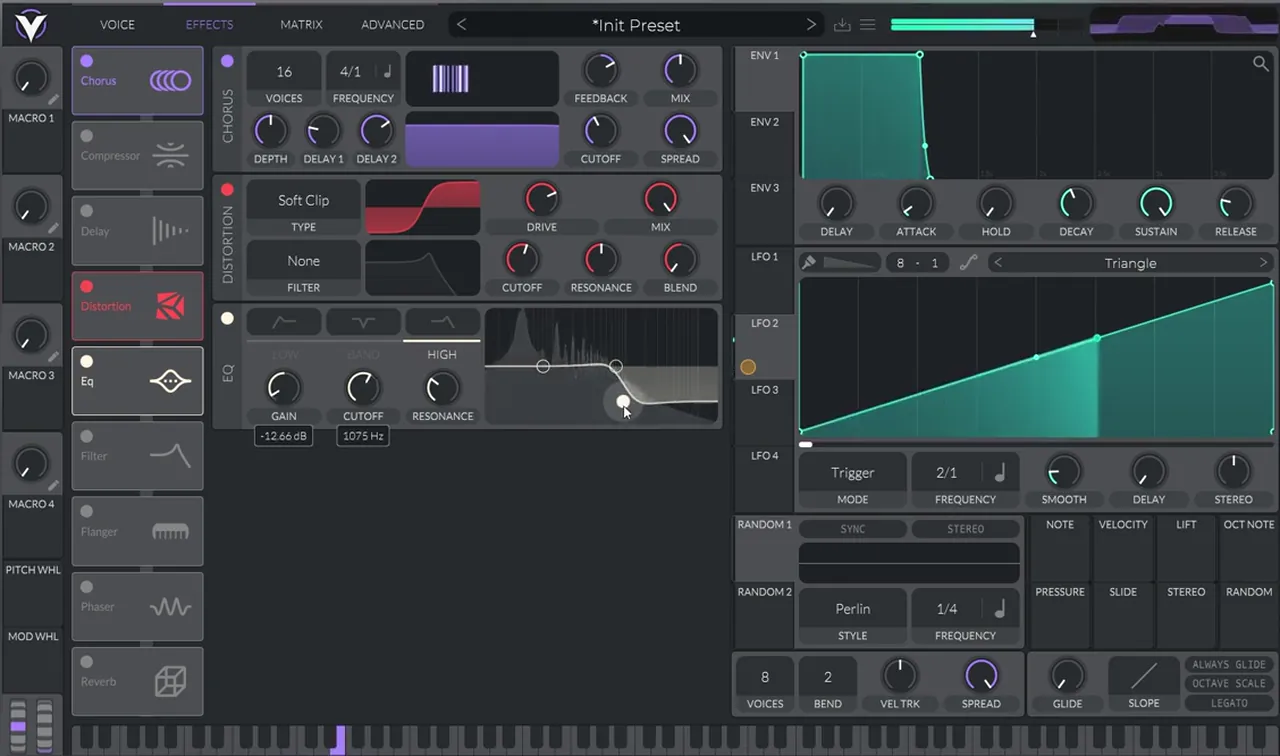
You'll now hear strong resonant peaks in the mids. Add a Filter, change it to a notch and use the blend fader above the filter (the mode reads Analog: Notch Blend). You get much more control over the low mids, plus a cool movement down there from the phase shift the filter adds.
6.Add reverb and the pitch riff
Add some reverb to finish the chain: Chorus, Distortion, EQ, Filter (notch blend) and Reverb.

The riff itself is simple: a sustained note with some pitch going up. With this much movement in the patch, a long note is all a minimal drop needs.
7.Experiment to make it your own
Don't stop at recreating the sound. The same patch can give you many different basses:
- Change the harmonic in the sine. Go back into the wavetable editor and draw different harmonics; some give a really powerful sound.
- Change the mix of the layers, for example bring the saw down and the noise up.
- Try different ways of modulating the filter.
- Play with the distortion and the filter.
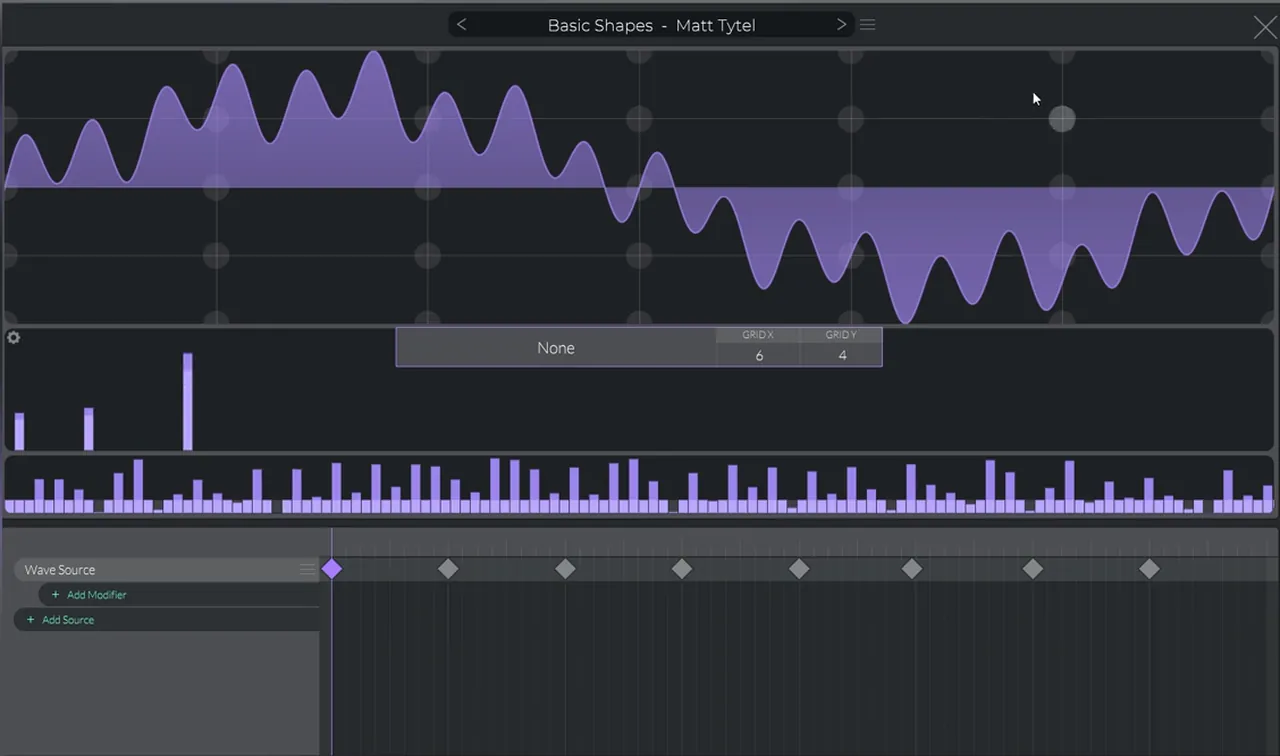
Experimenting with every knob and every stage is how you teach yourself sound design and develop your own sound. For another patch to practise on, try our roller bass in Vital.
Common mistakes
- Starting with complex wavetables. For deep, minimal basses, simple waveforms keep the energy in the low and low-mid register. Add harmonics on purpose, one at a time.
- Resonance left up on the saw filter. When the LFO sweeps the cutoff you get a laser-like whistle. Turn resonance all the way down.
- Too much noise. The noise is seasoning for the distortion, not a layer on its own. Keep its level low.
- Ignoring the harsh highs. Heavy distortion creates fizz up top. A high shelf cut keeps the bass dark.
- Leaving the mid resonances. Distortion causes strong peaks in the mids. A notch-blend filter tames them and adds movement.
Go deeper
Presets to learn from
The mini drop at the start of the video uses sounds from the ALIX Vital bundle. Open presets like these and study how they are built.
 Preset bundleALIX Vital preset bundleDeep / Minimal: Vital presets for dark, minimal DnB.
 Preset bundleIcicle Vital preset bundleDeep / Techy: Vital presets for deep, techy drum & bass.
 Preset bundleFrenzy Serum preset bundleJump Up / Rollers: Serum presets for jump-up DnB.
Every artist course, preset bundle and sample pack is also in The Vault. Browse courses
Related tutorials
All tutorials → Vital · Bass designHow to Make a Roller Bass in Vital8 min read · Video + guide
 Vital · Bass designHow to Make a Foghorn Bass in Vital6 min read · Video + guide
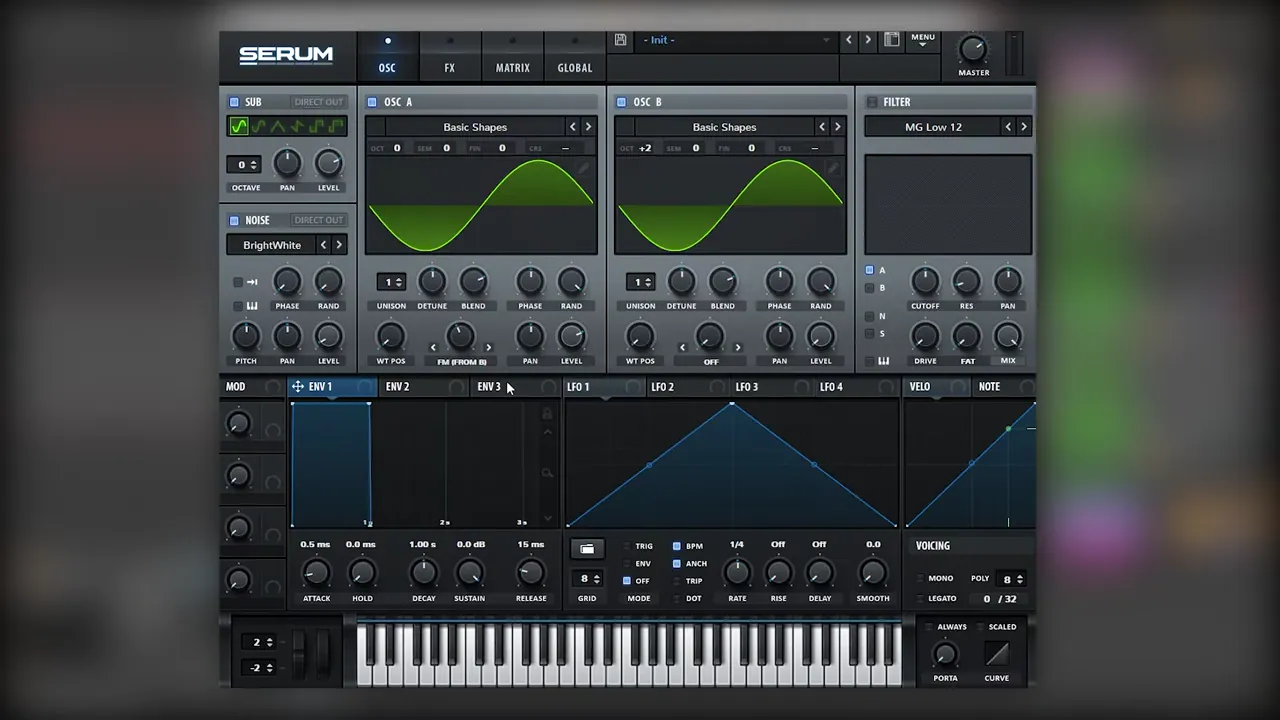 Serum · Bass designHow to Make a Techy Roller Bass in Serum7 min read · Video + guide
 GuideDrum & Bass Production Course: How to Learn DnB the Right Way11 min read
FAQ
How do you make a dark, minimal DnB bass in Vital?
Start with basic waveforms, draw a high harmonic into a sine, add a unison saw through a filter swept by an LFO, and mix in a quiet atmospheric noise sample. Distort it, add chorus, cut the harsh highs with a high shelf, control the mids with a notch-blend filter and add reverb.
Why use a sine wave with a drawn harmonic?
A low sine with one high harmonic is simple on its own, but when it goes through distortion together with some noise it creates a rich, rumbling texture while the low end stays solid.
How do I add harmonics to a wave in Vital?
Click the small edit button on the oscillator to open the wavetable editor, then draw harmonics in the harmonic bars. In the video a single small, high harmonic is added on top of the sine.
What does a notch filter do on a bass?
A notch filter cuts a narrow band. On this bass it tames the strong resonant peaks the distortion creates in the mids, and Vital's notch blend mode also adds movement in the low mids from the phase shift.
Can I use this patch for jump up?
The patch in the video is a dark, minimal sustained bass. The video also shows how much it changes when you alter the harmonics, the layer mix, the filter modulation and the distortion, so it is a good base to experiment from in other styles.
Next steps
You now have a deep, moving bass and plenty of ways to reshape it. When you want to learn the whole process in order, from sound design to finished tracks, here's where to go next:
Course guide
How to learn drum and bass production step by step, and which course fits your level.
Read the guide1:1 Mentorship
Personal guidance on your music from a mentor, built around your goals.
See the mentorship