
How to Make Liquid Drum and Bass in FL Studio (Beginner Guide)
To make liquid drum and bass in FL Studio, set the tempo to 174 BPM, program a two-step beat (kick on beat 1, snares on 2 and 4), add a piano loop and an organ melody, then build a two-layer bass: a filtered BooBass mid bass and a pure sine sub from 3x Osc. Finish with pads and a riser, and arrange the drop in four 16-bar phrases.
The full 40-minute walkthrough. Each step below matches a section of the video.
What you'll need
- FL Studio. Everything uses stock plugins: the Sampler, BooBass, 3x Osc, Fruity Filter, Fruity WaveShaper, Fruity Parametric EQ 2 and Fruity Limiter.
- A liquid starter pack with drums (tops, kick, snare, percussion), piano, organ, guitar, bell and a riser. The video uses our free Liquid DnB Starter Kit, which also includes the FL Studio project file. More on our free DNB sample packs page.
- Headphones or a subwoofer. Laptop speakers and phone speakers won't reproduce the sub bass.
- No paid synths. When you want to design your own sounds, Vital is a free synth worth learning next.
Learn four windows and their hotkeys first: the Playlist (F5), where you arrange the track; the Channel Rack (F6), where instruments and samples live; the Piano Roll (F7), where you write MIDI notes; and the Mixer (F9), where you route, balance and add effects. The Hint Panel at the top tells you what anything under your mouse does.
1.Set the tempo to 174 BPM
Drum and bass lives around 170 to 176 BPM. Liquid sits nicely at 174, which is what we use here. Left-click the tempo box in the toolbar, hold and drag up from 130 until it reads 174.

2.Program the drums
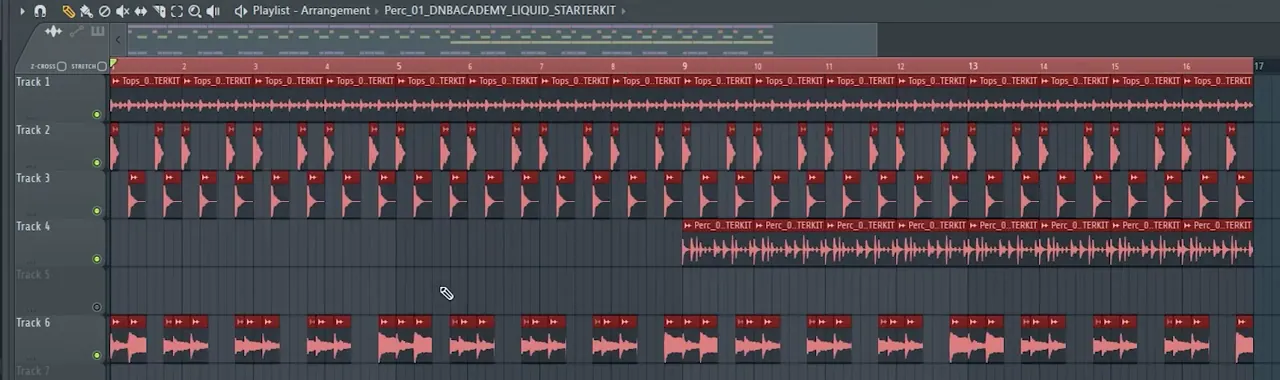
- Tops: drag the tops loop into the Playlist, select the paint brush and click across to make an 8-bar loop.
- Route it: double-click the sample, click the word Track (it sends the sound to the first empty mixer track), then press F2 and name it "Hats". Do this for every sound.
- Kick: place it on the first beat of every bar, then add a second kick later in the bar (on the "and" of beat 3 in the screenshot). That's the standard DnB beat.
- Snare: place it on every second and fourth beat.

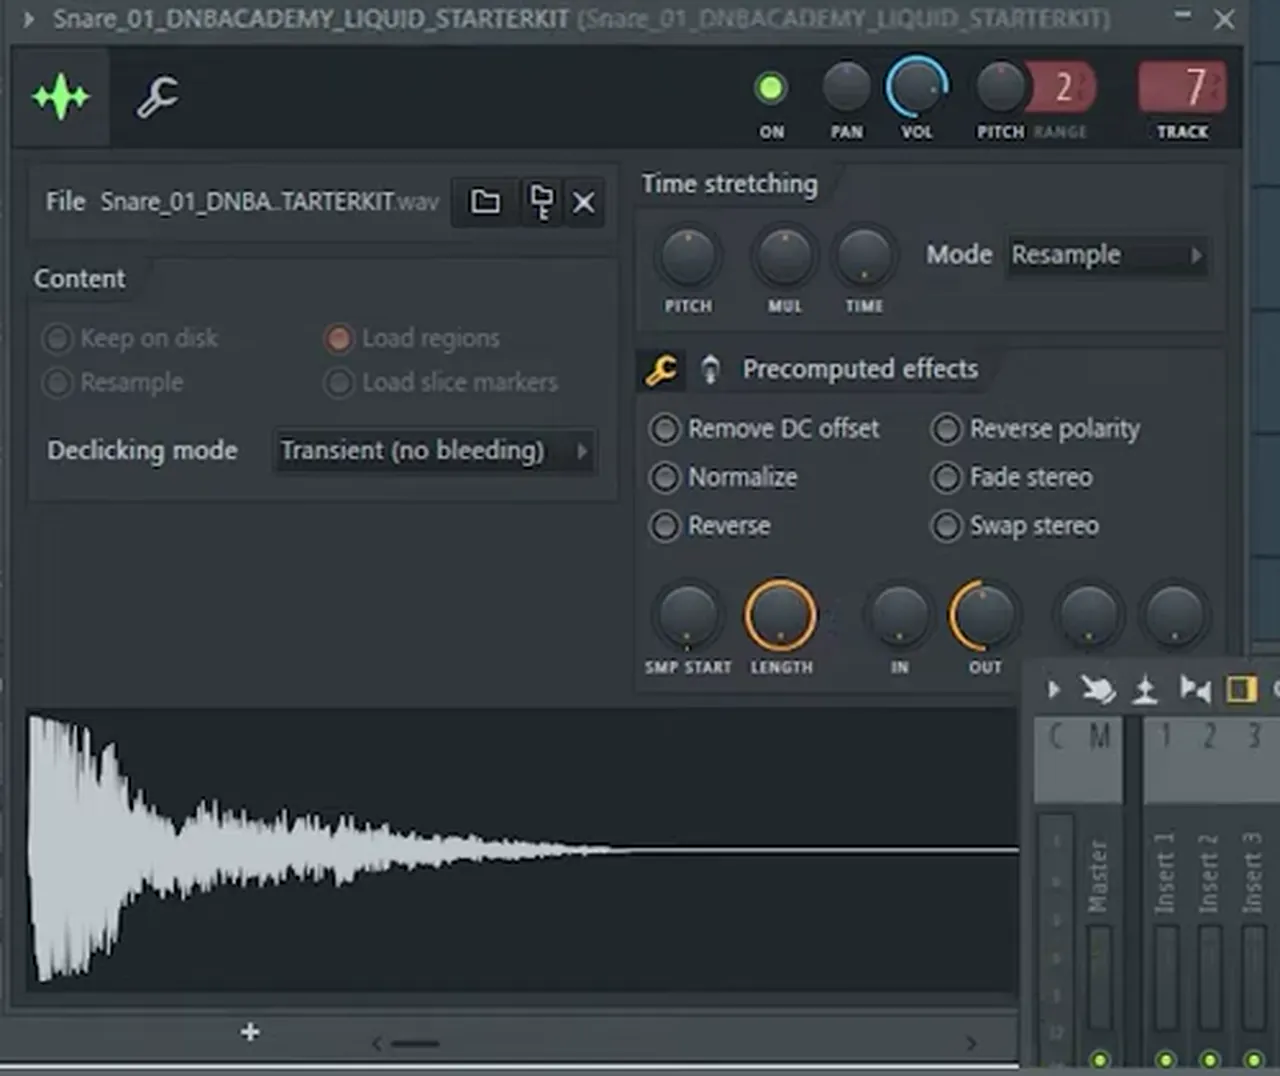
If the snare clicks at the end, double-click it to open the Sampler. Under Precomputed effects, turn up the OUT knob (quick fade out). If there's a gap at the start, nudge SMP START (sample start offset).
3.Add the piano and fix its timing
Drag the piano loop in and solo its track with a right-click. To tidy it, zoom in, make sure the focus is on audio clips and stretch mode is off, then hold Alt to unlock the grid and drag the clip so it hits on time.
To fill the empty bit at the end, cut the clip with the slice tool. Because both halves share one sample, click the waveform menu in the clip's top-left corner and choose Make unique. Turn stretch on, hold Alt and drag the end out.
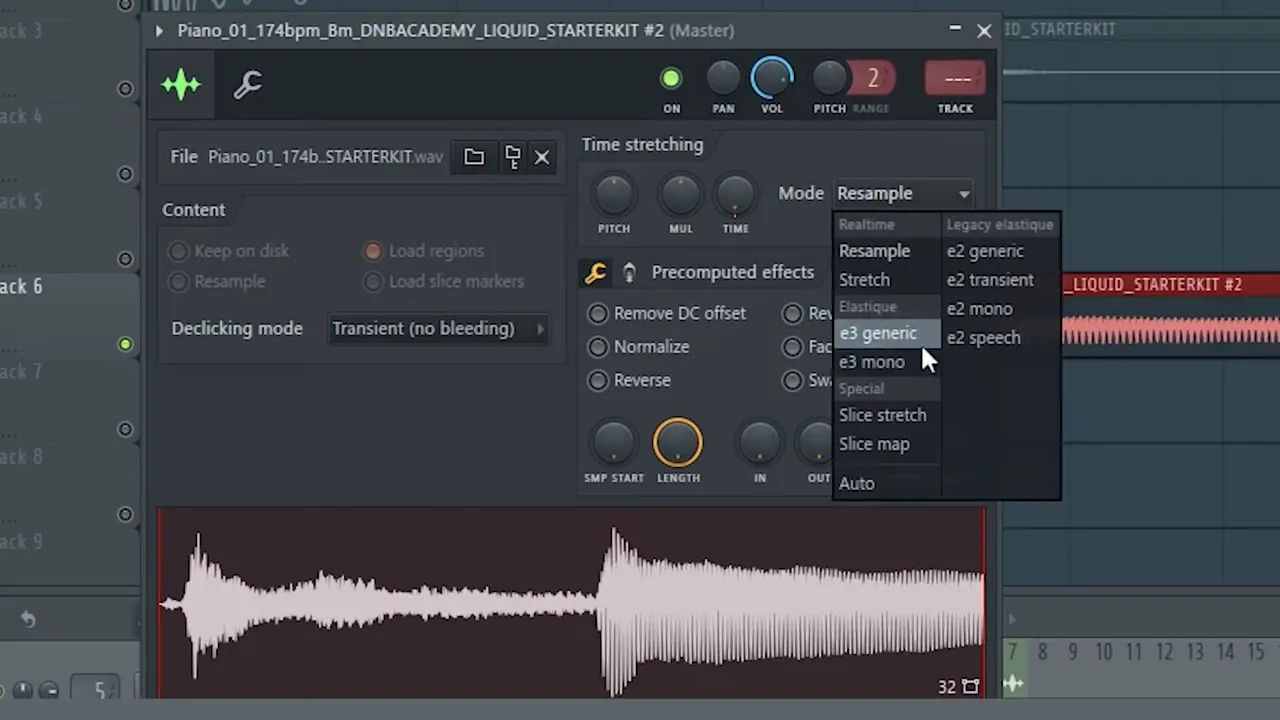
Stretching changes the pitch by default. Double-click the sample and, under Time stretching, change Mode from Resample to e3 generic. The pitch now stays put.
The second piano sample needs the same mixer channel. Click the box above Track in its Sampler and drag until it shows the piano's channel (8 in the video).
4.Build a 16-bar phrase with percussion
DnB is built in phrases of 16 bars. Hold Ctrl and drag to select the whole loop, then hold Shift and drag to duplicate it. Now layer the percussion so it comes in on the second half of the phrase. It acts as a progression and keeps the loop moving.
5.Write an organ melody in the Piano Roll
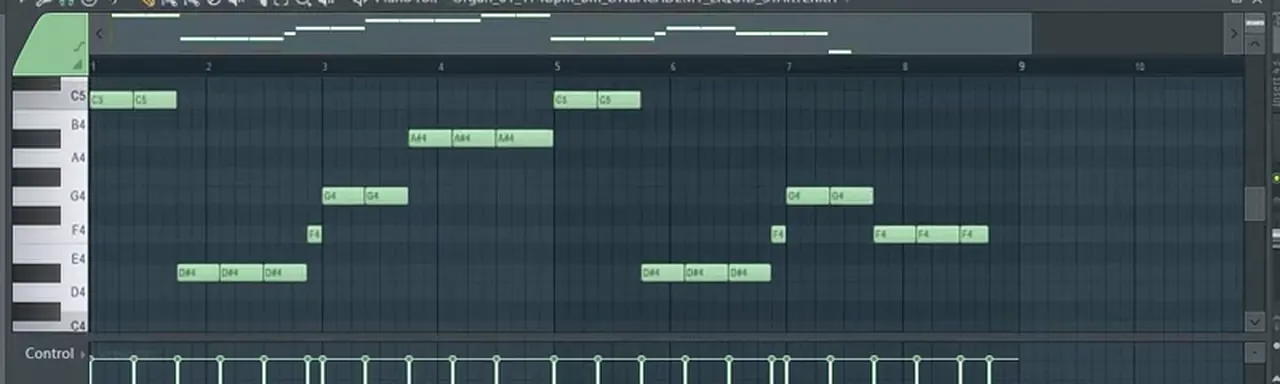
This time we use MIDI rather than audio. Route the organ sample to the mixer, then select Pattern 1 and paint it into the Playlist. In the Channel Rack set the display filter to All so every sound shows. Right-click the organ and open the Piano Roll.
Now freestyle: try notes, keep what feels good, duplicate the phrase (Ctrl+drag to select, Shift+drag to copy) and change the ending so it doesn't repeat exactly.
6.Gain stage the loop
At this point the drums usually feel too loud and the melody gets lost. Open the Mixer, let the loop play and bring channel volumes down until the balance feels right. It's also a good check for routing: in the video the percussion hadn't been sent to the mixer yet.
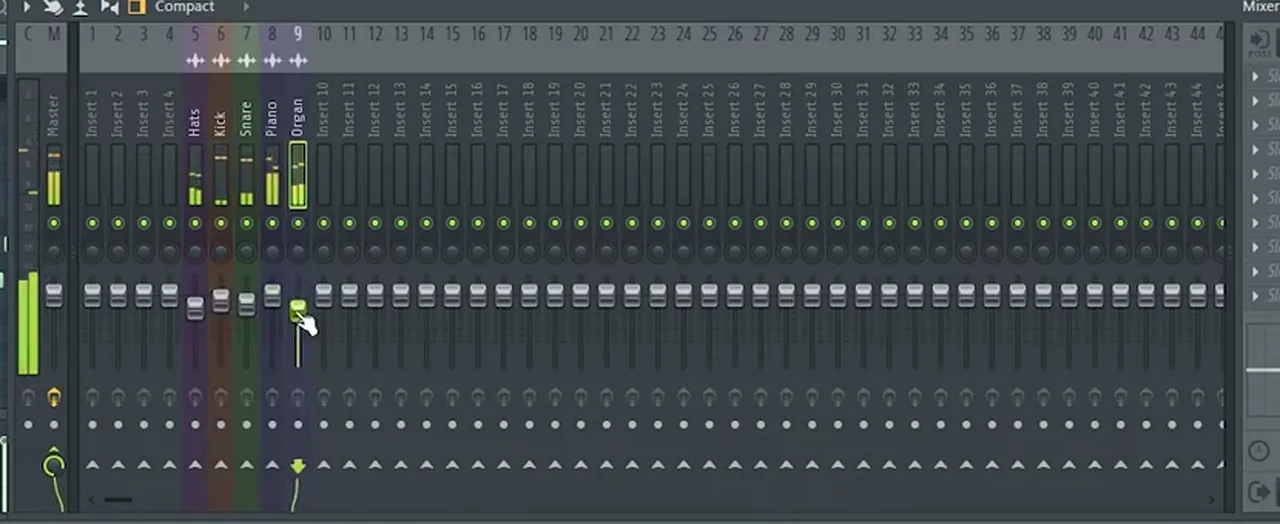
7.Make the mid bass with BooBass
A good bass usually has two layers: a mid bass you hear and a sub bass you feel. Load the stock BooBass, open its detailed settings, send it to the mixer and call it "Mid Bass". On its own it sounds thin.
Add Fruity Filter in Low Pass mode: remove the resonance, remove the high pass and bring the cutoff down. The upper harmonics go and the bass sounds deeper.
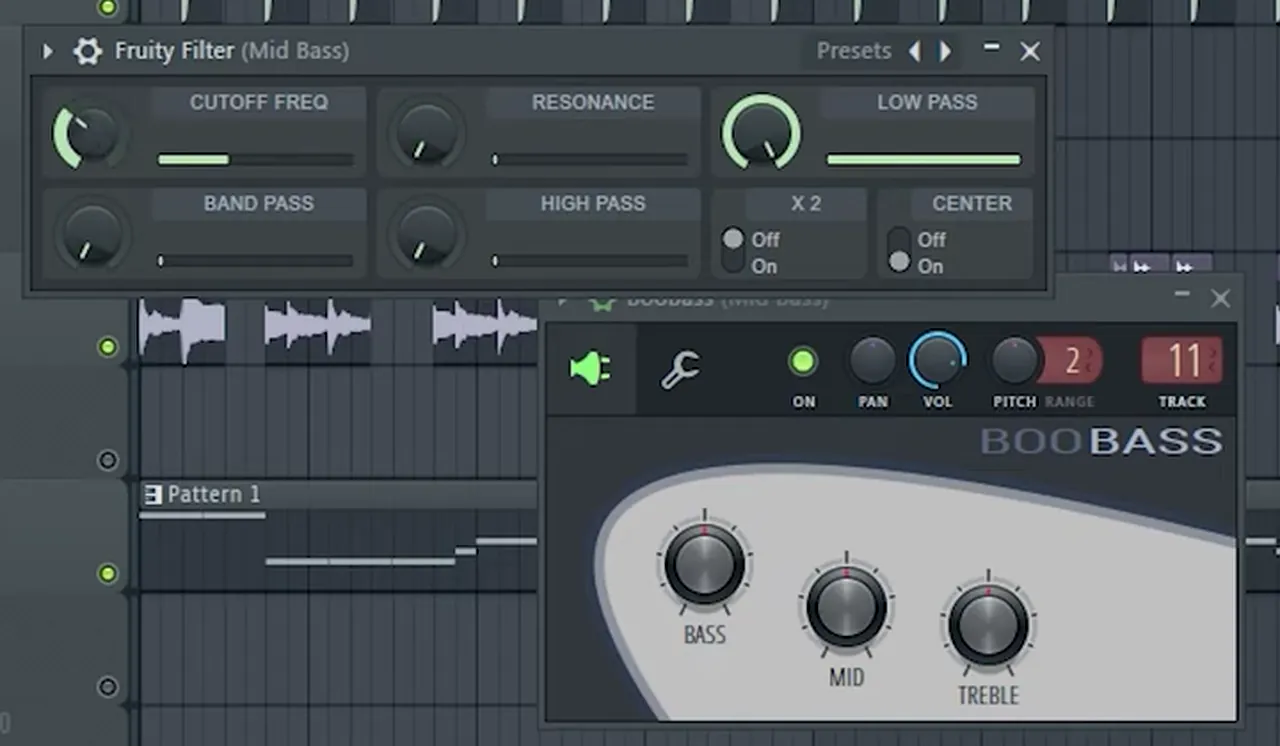
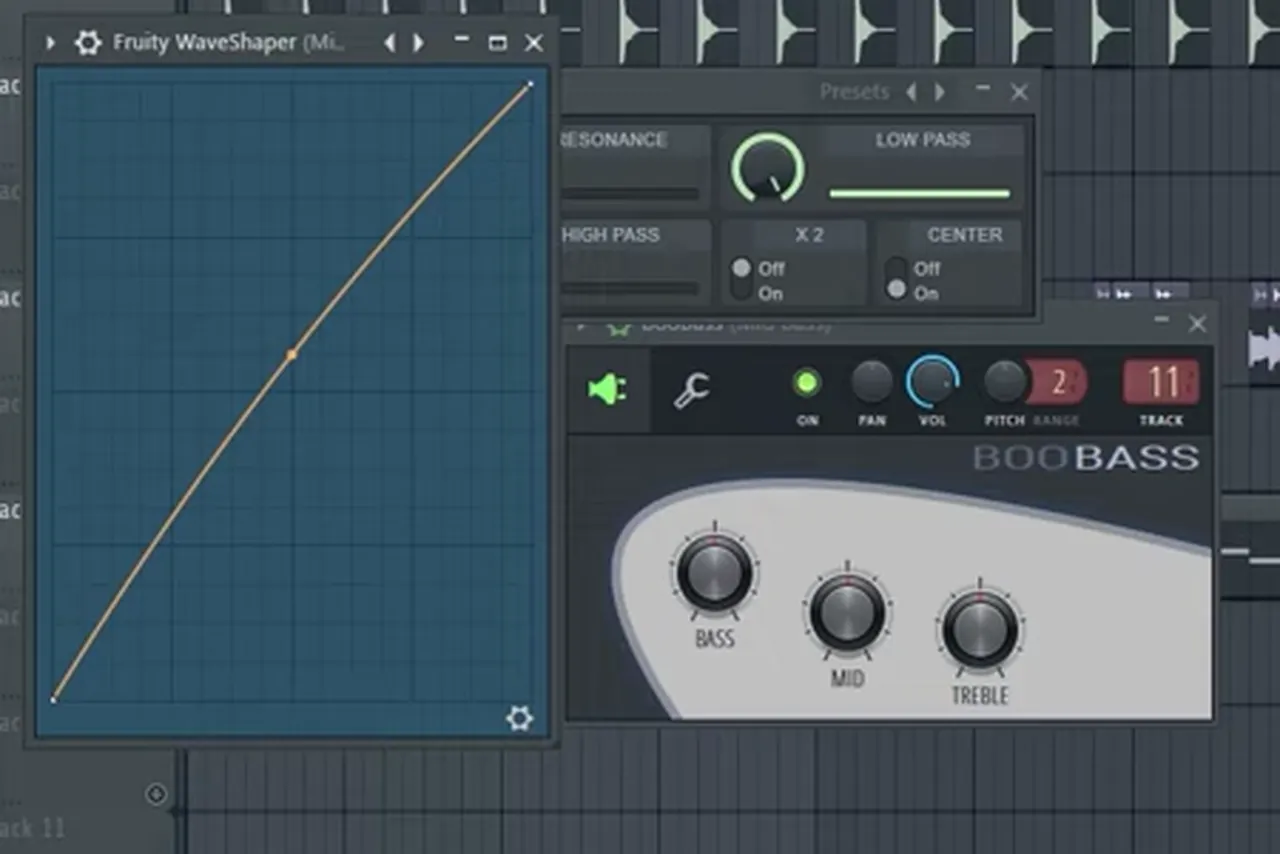
Then add Fruity WaveShaper before the filter and drag its curve point up. This harmonic distortion makes the bass more powerful.
Switch to Pattern 2 (so the bass doesn't end up in the melody's pattern), open BooBass in the Piano Roll and write the bassline. The sample names say Bm, so start on B as the root note and find the rest by ear.
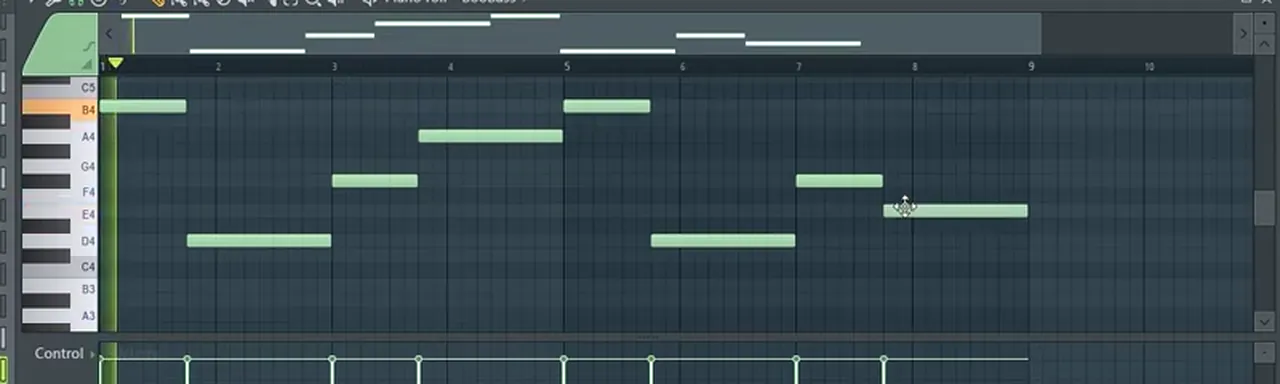
8.Add a clean sub bass with 3x Osc
Copy the mid bass notes (Ctrl+C). Add 3x Osc from the Channel Rack, set all three oscillators to a sine wave and turn the Coarse knobs all the way down.
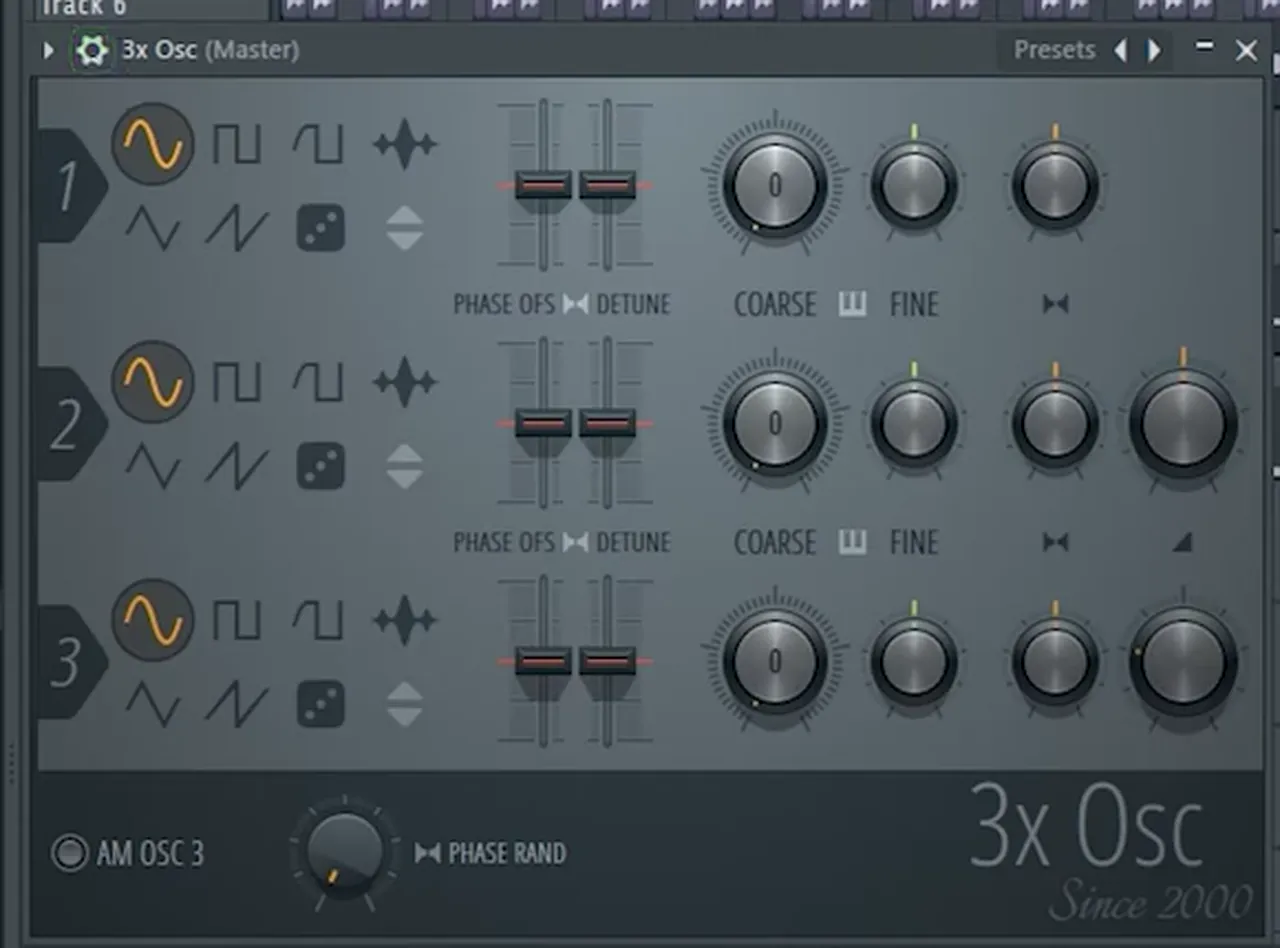
Place a new pattern, open 3x Osc in the Piano Roll and paste (Ctrl+V). If it's too high, Ctrl+↓ drops it an octave into the sub range. Route it to a mixer track called "Sub Bass" and add:
- Fruity WaveShaper, pushed all the way up to boost the harmonics, and with them the fundamental.
- Fruity Parametric EQ 2: click the preset arrow twice to the right for a low cut and high cut, then drag the top point down to around 125 Hz. That strips the extra harmonics and leaves a stronger fundamental.
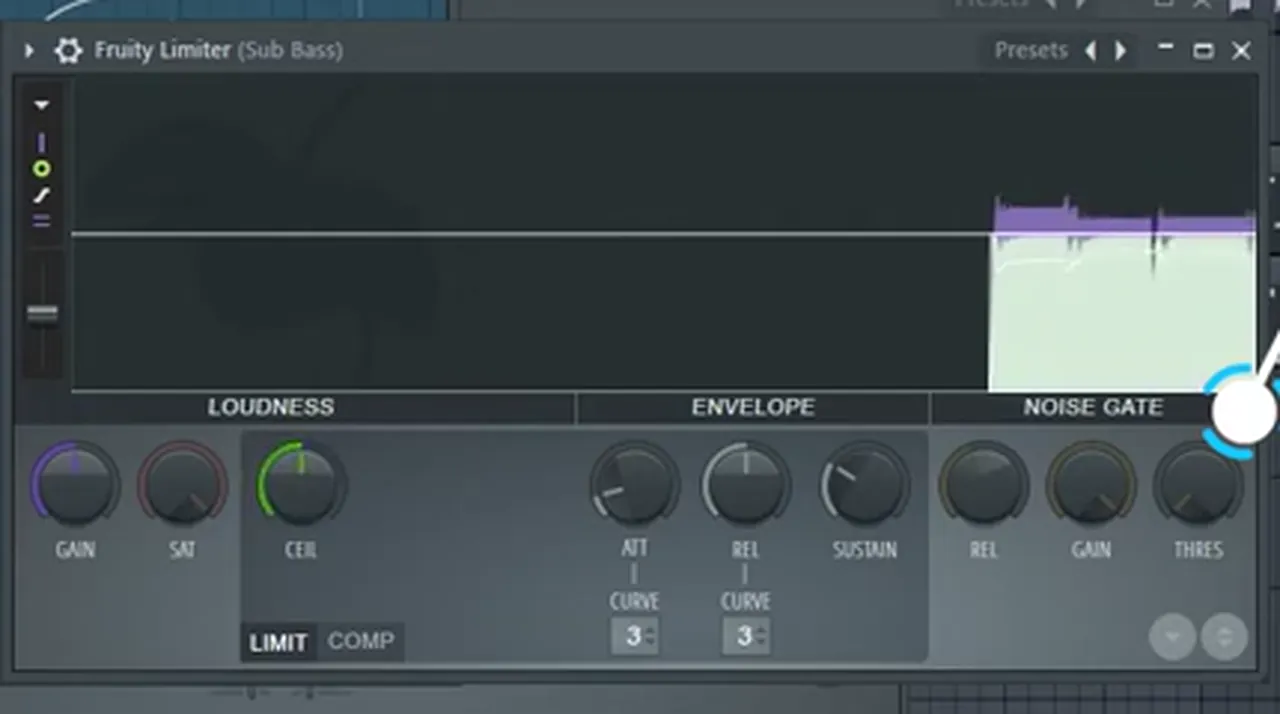
- Fruity Limiter on default, so the sub never goes over 0 dB.
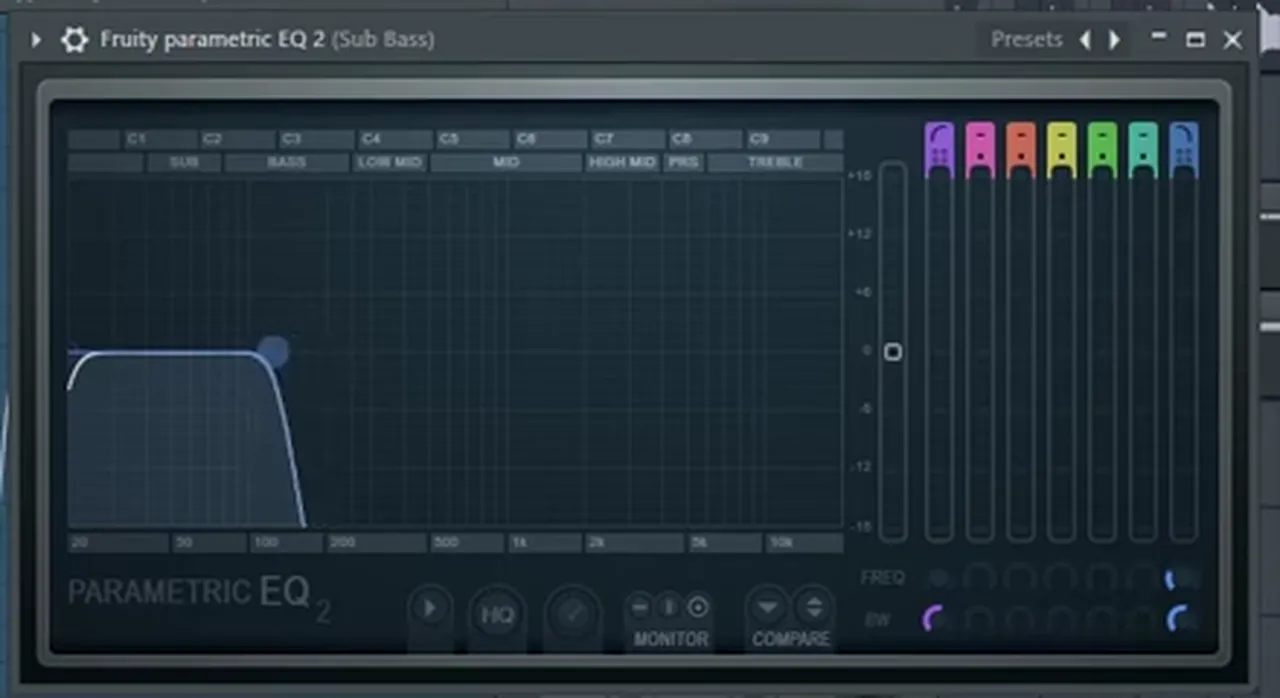
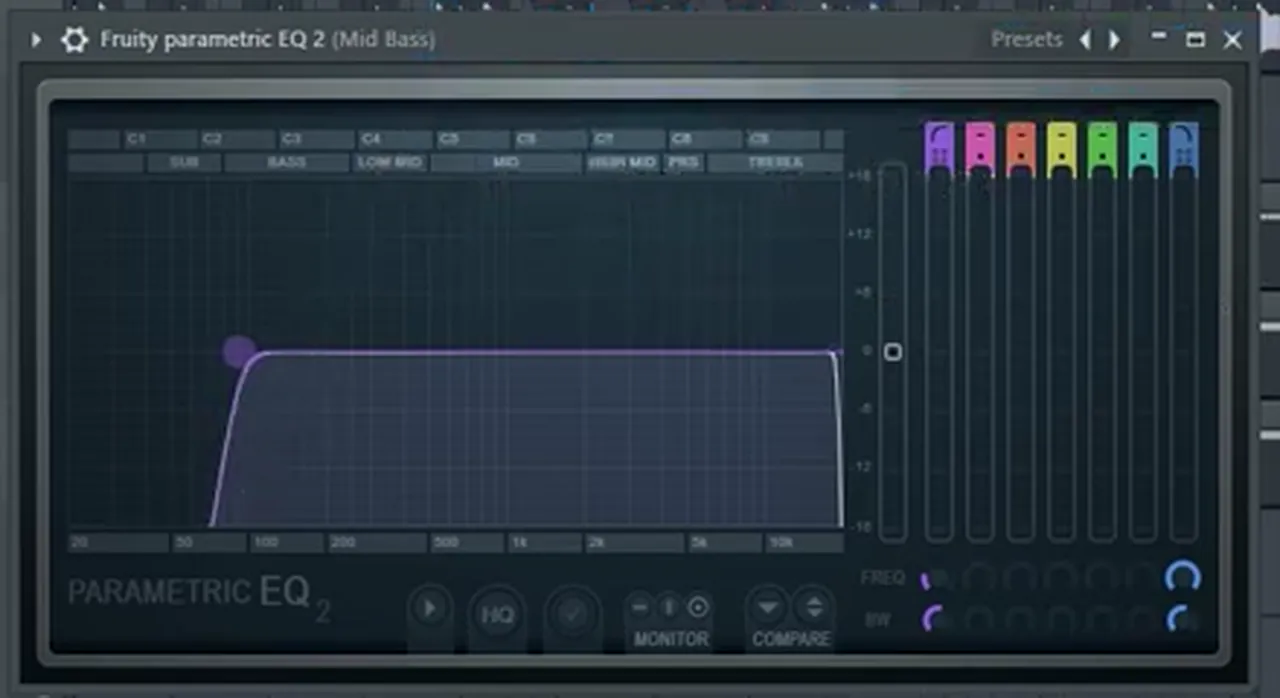
The mid bass shares some of those low frequencies, which makes the mix muddy. Put a Parametric EQ 2 on the mid bass, use the same preset and raise its low cut to around 90 Hz. The two layers overlap slightly and blend instead of clashing.
9.Add pads, a reversed bell and a riser
Reversing samples is a quick route to interesting textures. Drag in the guitar, tick Reverse under Precomputed effects in the Sampler, route it to the mixer as "Pad" and lower its volume.
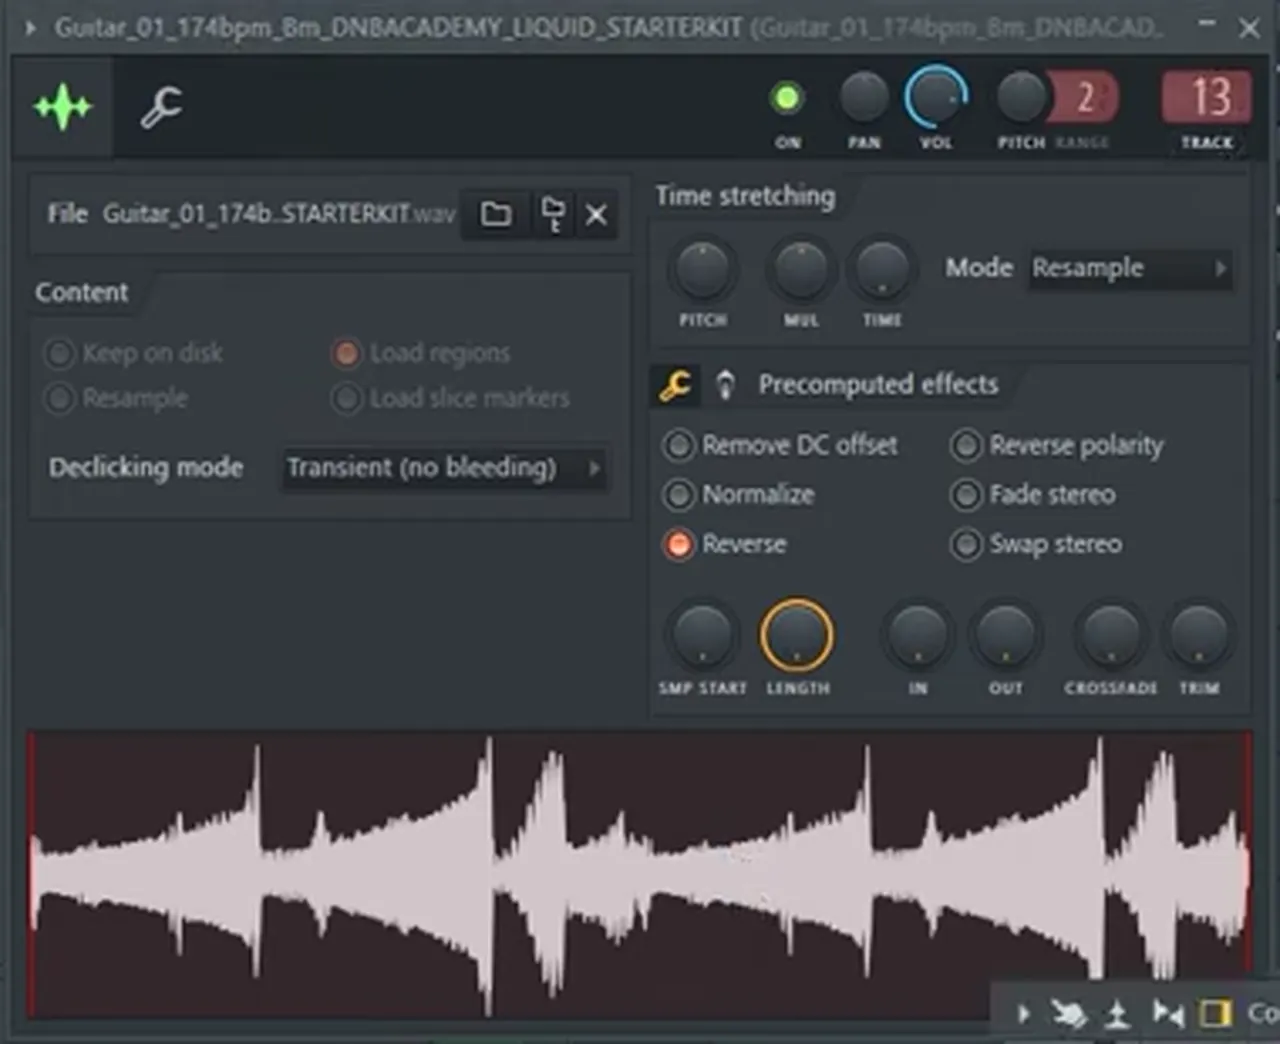
Do the same with the bell: reversed, it sounds better, and it comes in with the percussion as the phrase progresses. Finally, place the riser at the end of the phrase to lead into what comes next.
10.Arrange the drop in four phrases
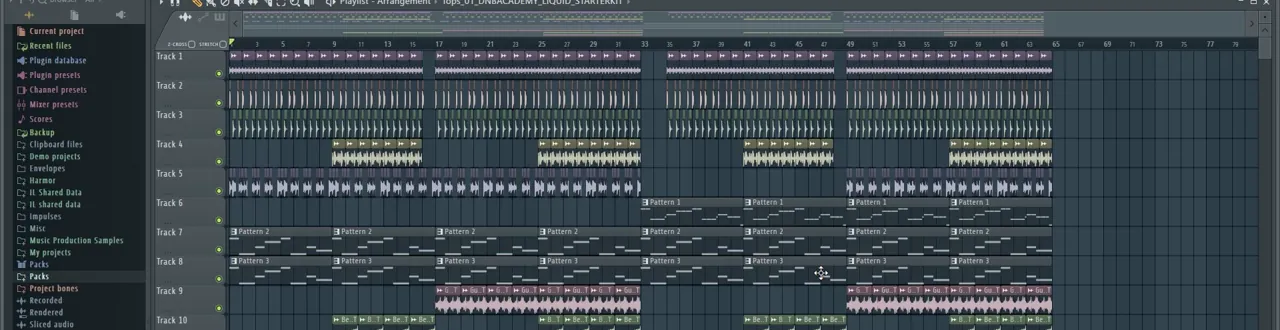
Right now everything plays at once, which sounds like a loop rather than a track. Select everything and Shift+drag it across until you have four phrases, the length of a standard DnB drop. Then use elimination to give each phrase its own character. In the video we:
- remove the pads from phrases 1 and 3
- remove the melody from phrases 1 and 2
- remove the risers from phrases 1 and 3
- remove the piano from phrase 3
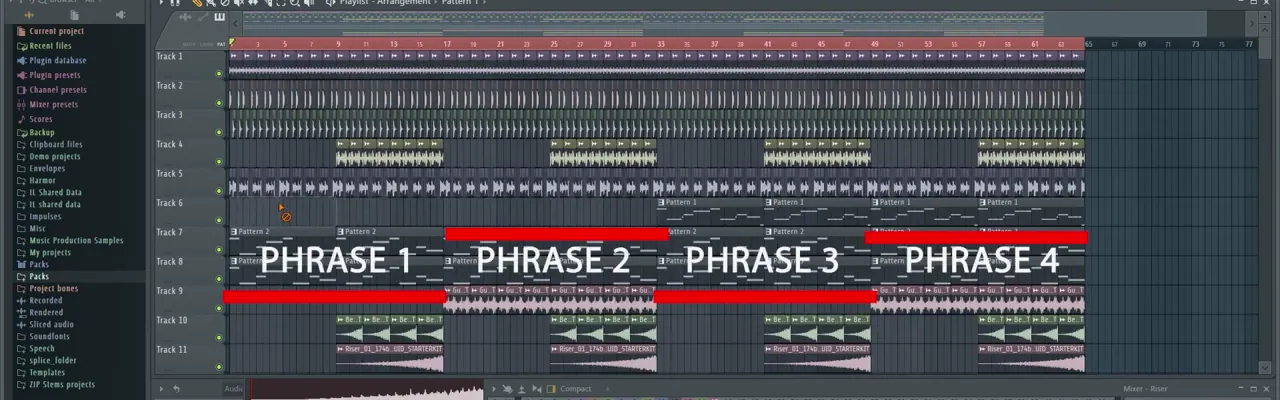
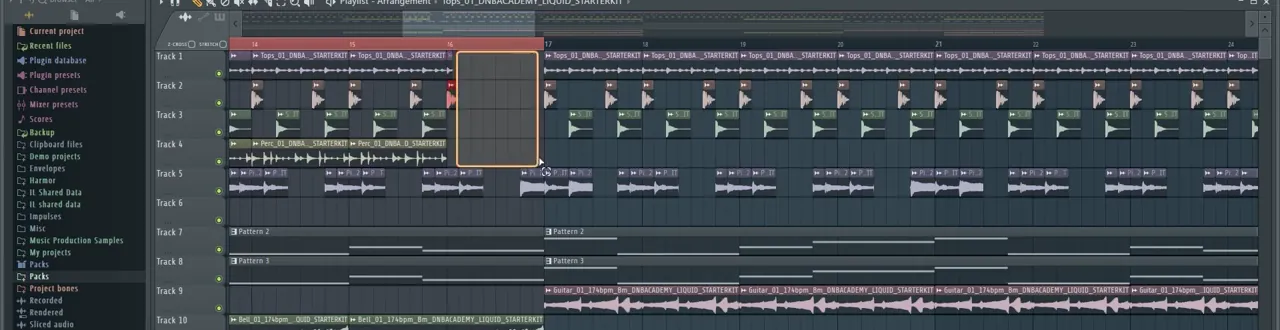
Then add drum transitions. Delete a few kicks and snares at the end of phrase 1, at the start of phrase 3 and at the end of phrase 3. Small gaps like these tell the listener a new section is coming.
Common mistakes
- Forgetting to route sounds to the mixer. Use the Track button and F2 on every sample, or you can't balance or process it.
- Stretching with Resample. The pitch changes. Switch to e3 generic.
- Writing every part in one pattern. New sound, new pattern (melody on 1, mid bass on 2, sub on 3), or arranging gets confusing.
- Judging the sub on laptop speakers. You won't hear it. Use headphones or a subwoofer.
- Mid bass and sub fighting. High-cut the sub (around 125 Hz) and low-cut the mid bass (around 90 Hz).
- Everything playing all the time. Remove elements per phrase so the drop develops.
FAQ
What BPM is liquid drum and bass?
Drum and bass is usually produced between 170 and 176 BPM. This tutorial uses 174 BPM for liquid, which is a common choice.
Can you make drum and bass in FL Studio with only stock plugins?
Yes. This whole track uses FL Studio stock tools: the Sampler, BooBass for the mid bass, 3x Osc for the sub, plus Fruity Filter, Fruity WaveShaper, Fruity Parametric EQ 2 and Fruity Limiter.
How do you make a sub bass in FL Studio?
Load 3x Osc, set all three oscillators to a sine wave and turn the Coarse knobs down, then play your bass notes low. In the video a WaveShaper boosts it, a Parametric EQ 2 high cut around 125 Hz cleans it, and a Fruity Limiter on default keeps it under 0 dB.
What is the basic drum and bass beat?
A kick on the first beat of every bar plus a second kick later in the bar, and a snare on beats 2 and 4, over a tops or hi-hat loop. At 174 BPM this gives the classic two-step DnB groove.
How long is a drum and bass drop?
A standard drop is four phrases of 16 bars each, so 64 bars. Varying which elements play in each phrase keeps it from sounding like one long loop.
Do I need music theory to make liquid DnB?
Not to start. In the video the melody and bassline are found by ear, starting from the key in the sample name (B minor, root note B). Theory helps later, but your ears are enough for a first track.
Next steps
That's a full liquid drop built with stock FL Studio tools. The process gets deeper from here: sound design, mixing and full arrangements. Here's where to go next:
Course guide
How to learn drum and bass production step by step, from first track to finished release.
Read the guideDNB Foundations
A structured course with weekly live feedback calls on your tracks. Beginners welcome.
See Foundations1:1 Mentorship
Personal guidance on your music from a mentor, built around your goals.
See the mentorship