
How to Make a Roller Bass in Vital
To make a roller bass in Vital, start from an initialised patch, turn on all three oscillators and the sampler, then run FM from oscillator 2 into oscillator 1. Use an LFO to pulse the level of oscillator 1 and a gritty noise sample, drive it through distortion, polish it with chorus, a high-pass filter, multiband compression, EQ and reverb, and finish with a falling pitch LFO. Every step below uses the settings shown in our video.
Prefer to watch? The full 5-minute video builds this patch from scratch.
What you'll need
- Vital. The whole patch is built in Vital, a wavetable synth with a free version. Everything here uses stock Vital features: no extra plugins.
- A DAW to play it from. Any DAW that loads VST/AU instruments works. You only need one held or repeated note to hear the patch move.
- A drum loop (optional). Rollers are about the groove between bass and drums, so it helps to audition the bass over a beat. Our punchy DnB drums tutorial shows how to get a loop sounding fat first.
1.Set up the oscillators and noise
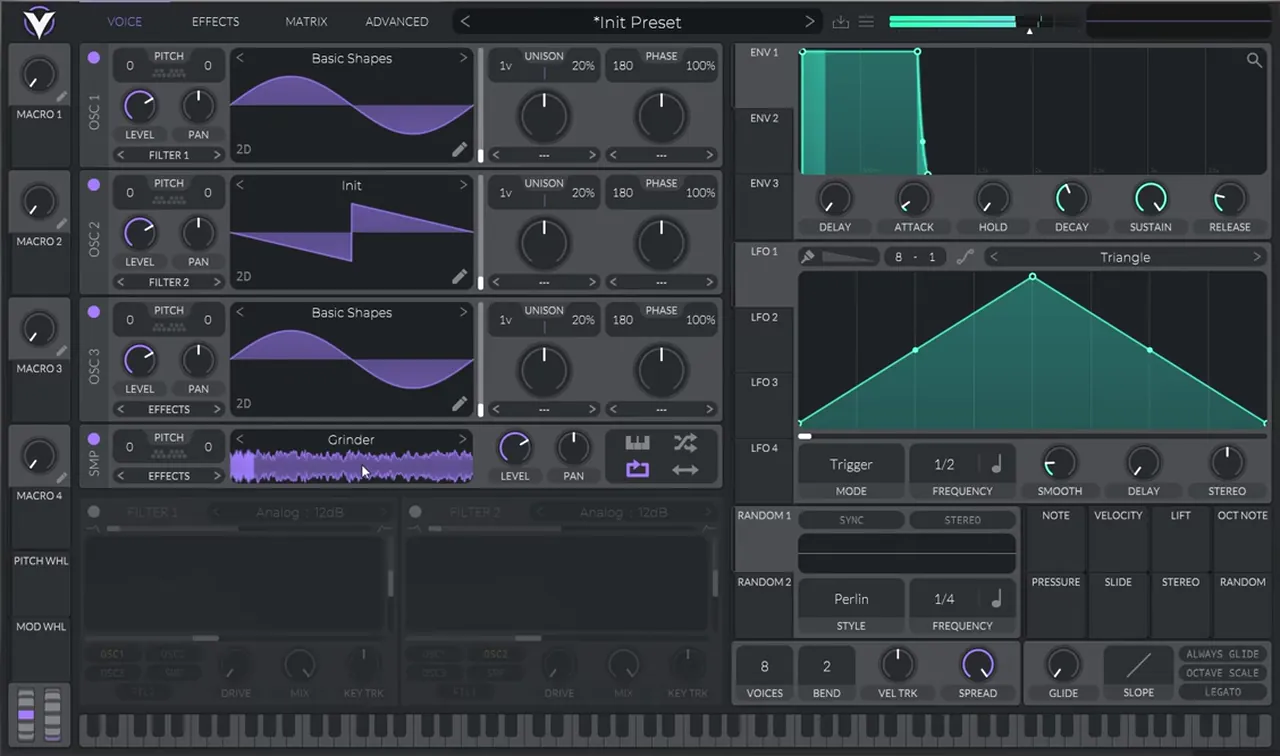
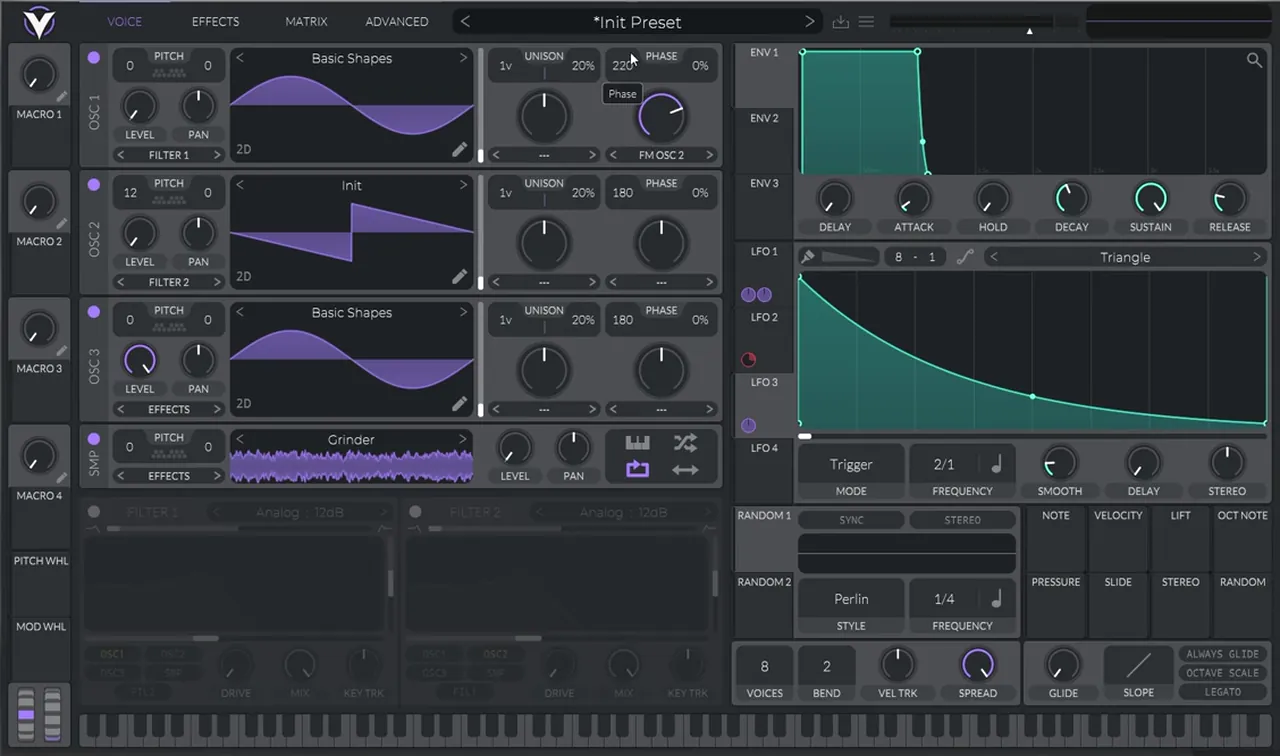
Start from an initialised patch (Init Preset) so nothing from an old sound gets in the way. Then switch on everything you need:
- Turn on all three oscillators and the sampler (SMP).
- Change oscillator 1 and oscillator 3 to a sine wave (Basic Shapes wavetable). Oscillator 2 stays on its default saw-like Init shape.
- In the sampler, swap the default white noise for the Grinder sample. This is where the rolling texture will come from.
Now pull the level of the noise all the way down, because we will bring it back in with modulation later. Do the same with oscillator 2: we don't want to hear it directly, only use it to modulate oscillator 1.
2.Add FM from oscillator 2
FM (frequency modulation) is what gives this bass its growl. A sine on its own is clean; when another oscillator modulates it, the sine gains harmonics that move as you change the amount.
On oscillator 1, open the mode menu under the phase/warp knob and pick FM OSC 2. Set the amount to around 74%. Then boost the octave of oscillator 2 (pitch 12, one octave up): a higher modulator gives brighter, more aggressive sidebands.
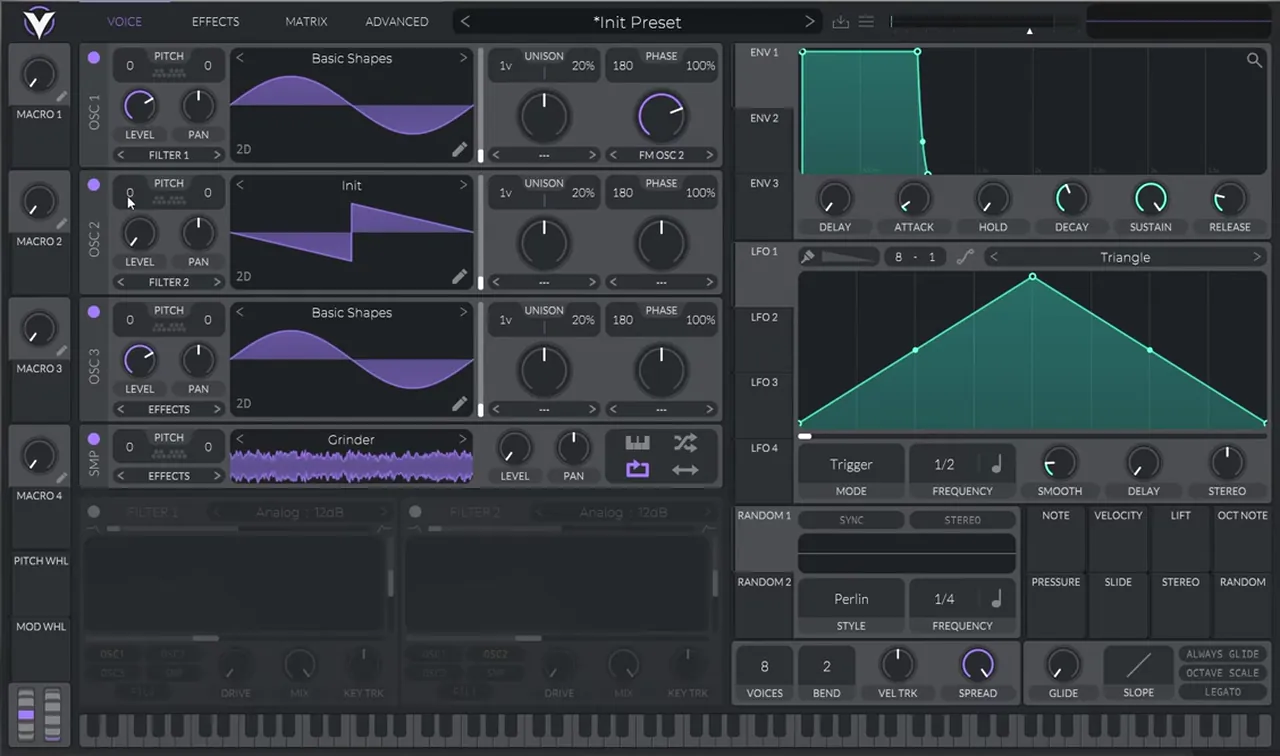
Next, bring the level of oscillator 1 all the way down as well and turn oscillator 3 up. Oscillator 3 is your steady sine body. Oscillator 1 (the FM layer) and the Grinder noise are both silent for now, because LFO 1 is going to turn them on and off in rhythm.
Tip: the same "high modulator into a sine" idea drives our techy roller bass in Serum, so if you own Serum it's a good comparison.
3.Make it roll with LFO 1
The "roll" is a rhythmic pulse. Drag LFO 1 onto the level of oscillator 1 and onto the level of the noise sample. Every time the LFO rises, the FM layer and the Grinder texture fade in on top of the sine.
Draw a shape that rises to a peak and then curves back down (as in the screenshot), keep the mode on Trigger so it restarts with every note, and increase the frequency. In the video it ends up on 1/8, which gives eighth-note movement that sits nicely against DnB drums.
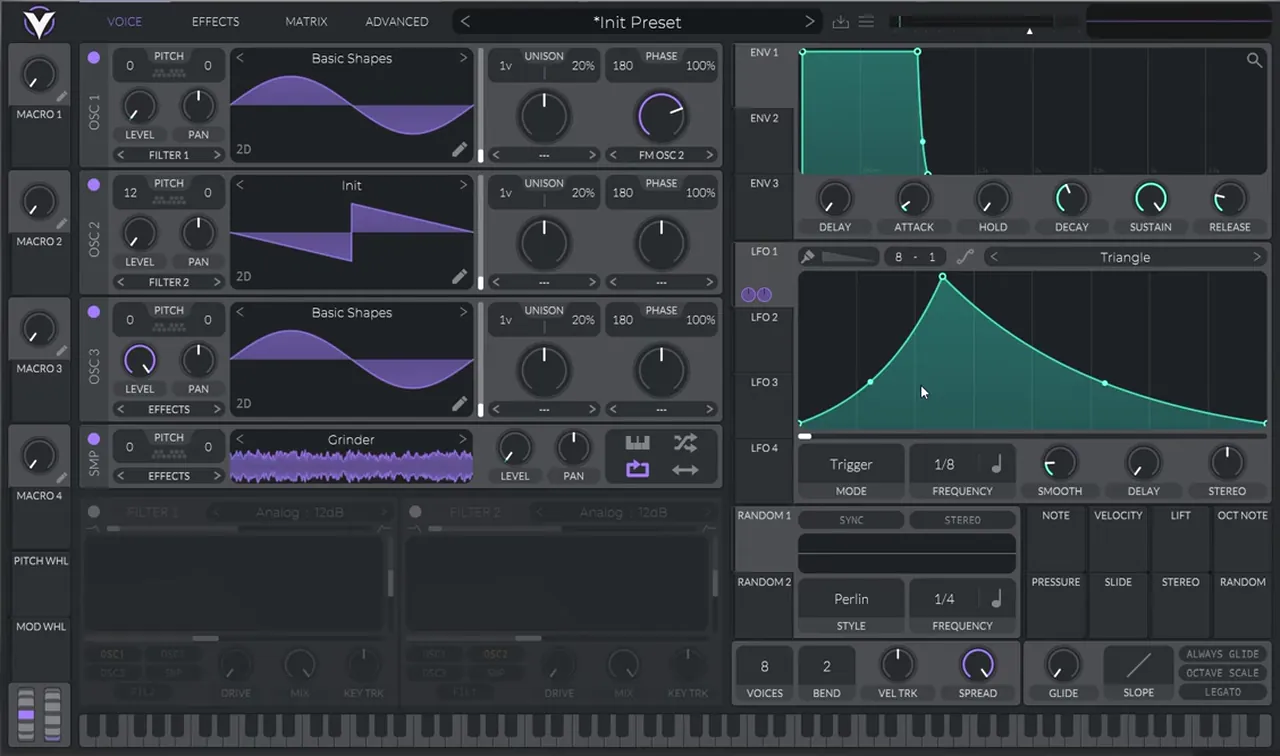
Play a note and you should already hear the bass pulsing. If it feels too busy, slow the LFO down; if it feels static, try a sharper peak in the shape.
4.Add distortion with an accent on the drive
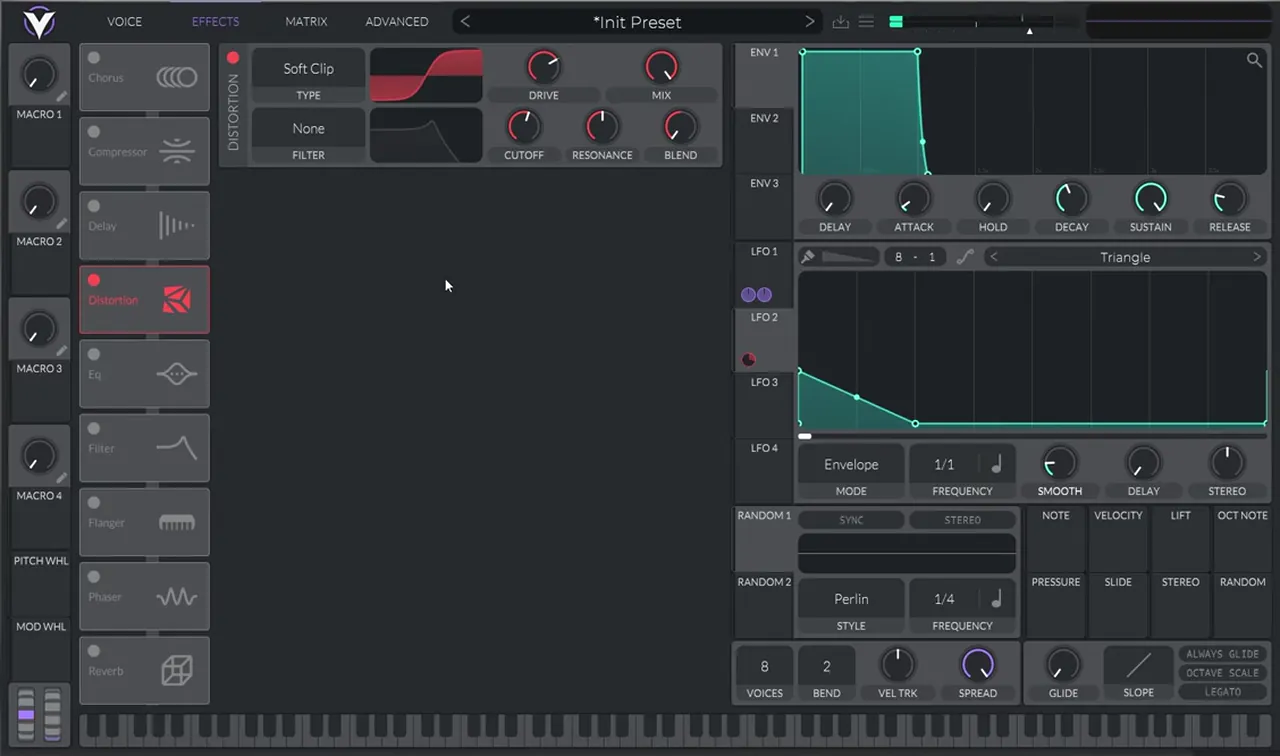
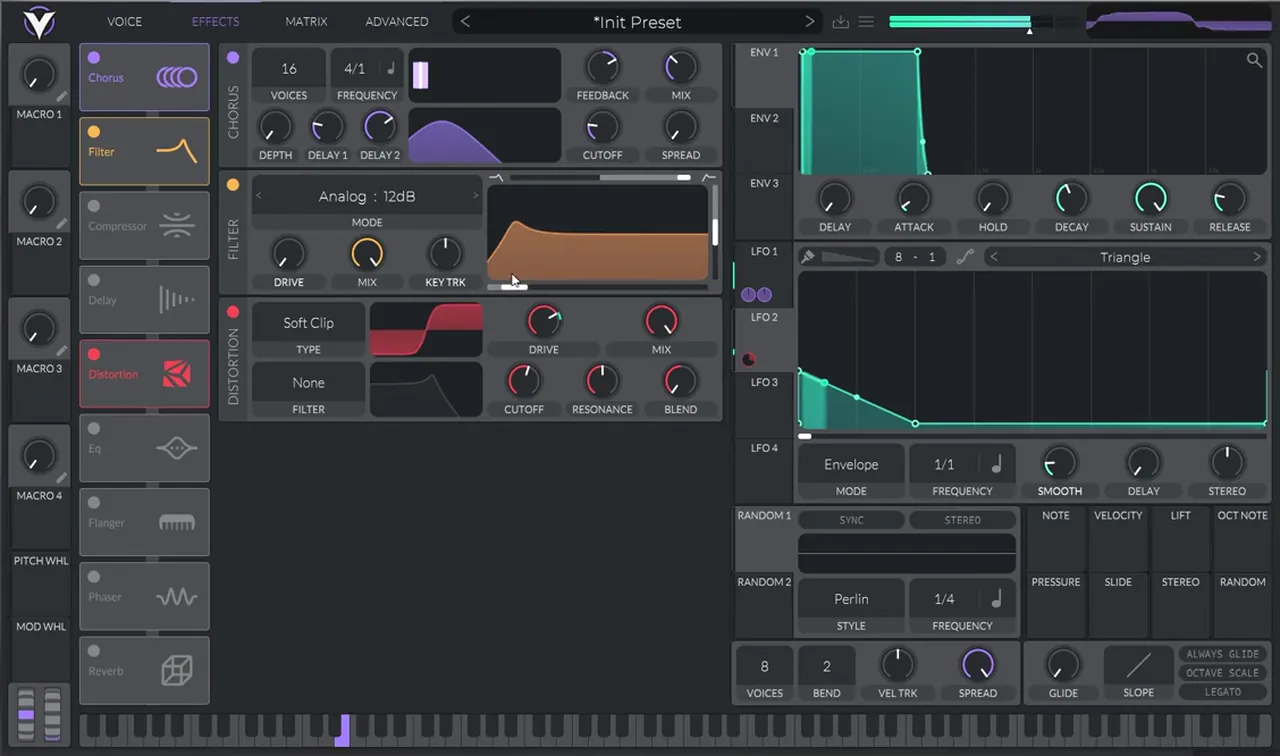
Go to the Effects tab and turn on the Distortion module (Soft Clip, as shown). You'll immediately hear more texture as the FM and noise harmonics get saturated.
For extra movement, drag LFO 2 onto the Drive knob and draw a falling shape: high at the start, dropping away. Set this LFO to Envelope mode and leave it on one bar (1/1). In Envelope mode the LFO plays once per note instead of looping, so you get a distorted accent at the start of each note that relaxes over the bar.
5.Chorus, filter, multiband, EQ and reverb
The rest of the chain is polish. Work down the effects list in this order:
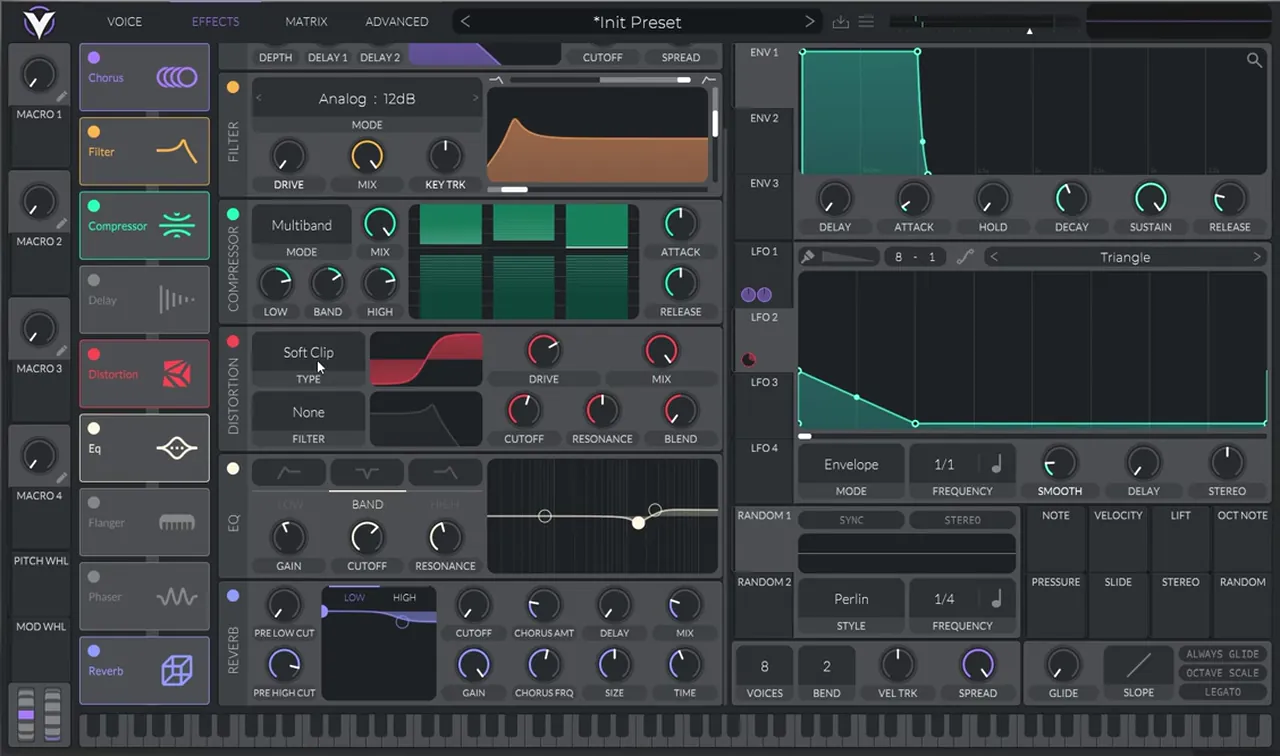
- Chorus: turn it on, then bring the spread and the mix all the way down, decrease the cutoff a little and bring the depth all the way down. With these settings it adds subtle width and movement without smearing the low end.
- Filter: add it and set it to a high pass, then bring the cutoff down so it only trims the very bottom.
- Compressor: turn on the multiband compressor. This evens out the bass and pulls up detail in the mids and highs.
- EQ: add some EQ and boost a bit of the highs so the texture cuts through.
- Reverb: add just a bit for space.
6.Add the pitch drop with LFO 3
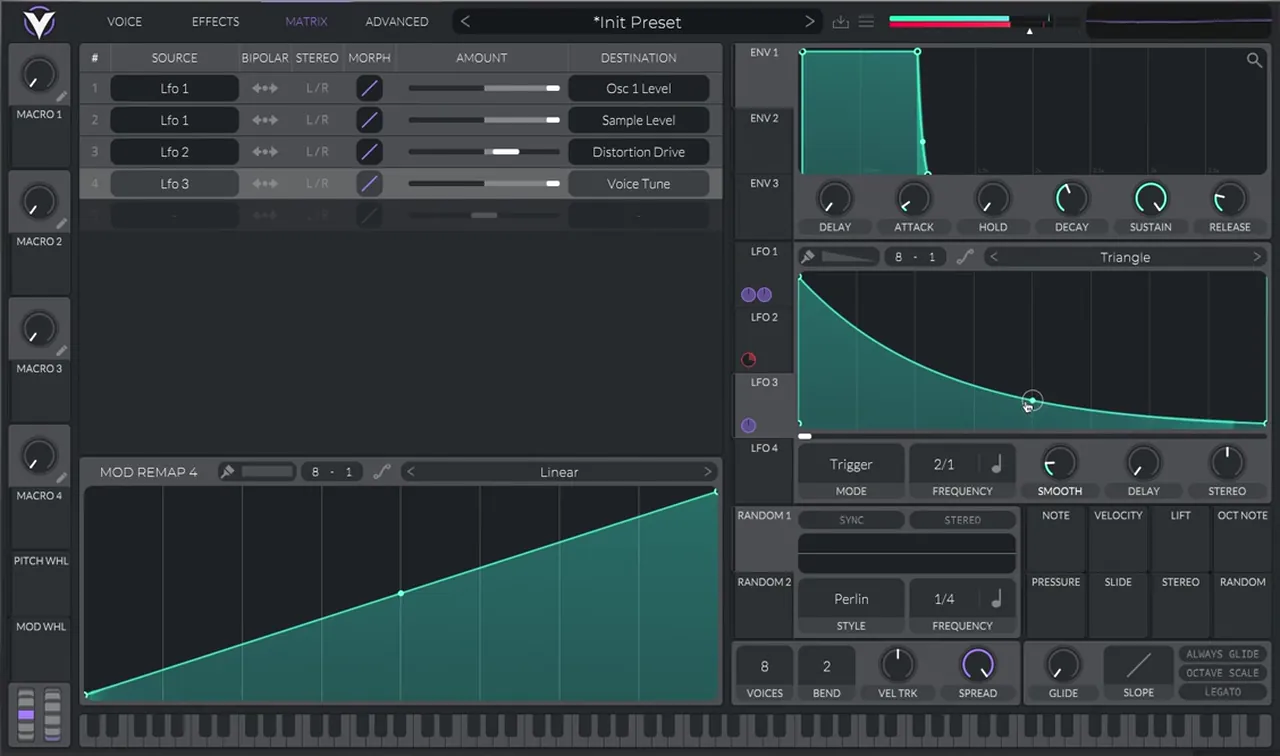
The last ingredient is the pitch movement that makes the bass "drop" into each note. Open the Matrix tab and use LFO 3 to modulate the global Voice Tune. Set the amount to two semitones.
Leave LFO 3 on Trigger mode, make it slower with the frequency knob (2/1 in the screenshot) and draw a falling shape. Each note now starts slightly sharp and slides down into pitch.
The Matrix view is also a handy overview of the whole patch: LFO 1 on Osc 1 Level and Sample Level, LFO 2 on Distortion Drive, LFO 3 on Voice Tune.
7.Fine-tune: fix the phase randomisation
Play the same note a few times and you'll notice it sounds slightly different every time. That's because Vital's oscillators start with phase randomisation at 100%. For a bass that has to hit the same way on every note, bring the randomisation down to 0% on every oscillator.
Now experiment until it sits right in your track:
- Phase: with randomisation off, the phase knob changes the starting point of each oscillator, and therefore the attack and tone.
- Noise modulation: change how much LFO 1 opens the Grinder sample for more or less grit.
- FM amount: more FM gives a harsher, techier bass; less gives a rounder one.
Want a different flavour from a similar starting point? Our foghorn bass in Vital uses FM, a sub and noise into heavy distortion for a very different result.
Common mistakes
- Leaving phase randomisation on. Every note will sound slightly different, which makes a rolling bass feel uneven. Set it to 0% on every oscillator.
- Forgetting to mute oscillator 2. It's only there to modulate oscillator 1. If you can hear it directly, the bass gets messy and loses its low end.
- Too much chorus. High spread, depth or mix on a bass can smear the low end. In the video they all go right down.
- Overdoing the pitch drop. Two semitones is plenty for a roller. Much more and it starts to sound like a different effect.
- Designing in solo only. Always check the bass against your drums, because a roller lives or dies on that groove.
Go deeper
Vital presets to learn from
Want to see how other deep and techy basses are built in Vital? Open these presets and study the modulation.
 Preset bundleIcicle Vital preset bundleDeep / Techy: Vital presets for deep, techy drum & bass.
 Preset bundleALIX Vital preset bundleDeep / Minimal: Vital presets for dark, minimal DnB.
Every artist course, preset bundle and sample pack is also in The Vault. Browse courses
Related tutorials
All tutorials →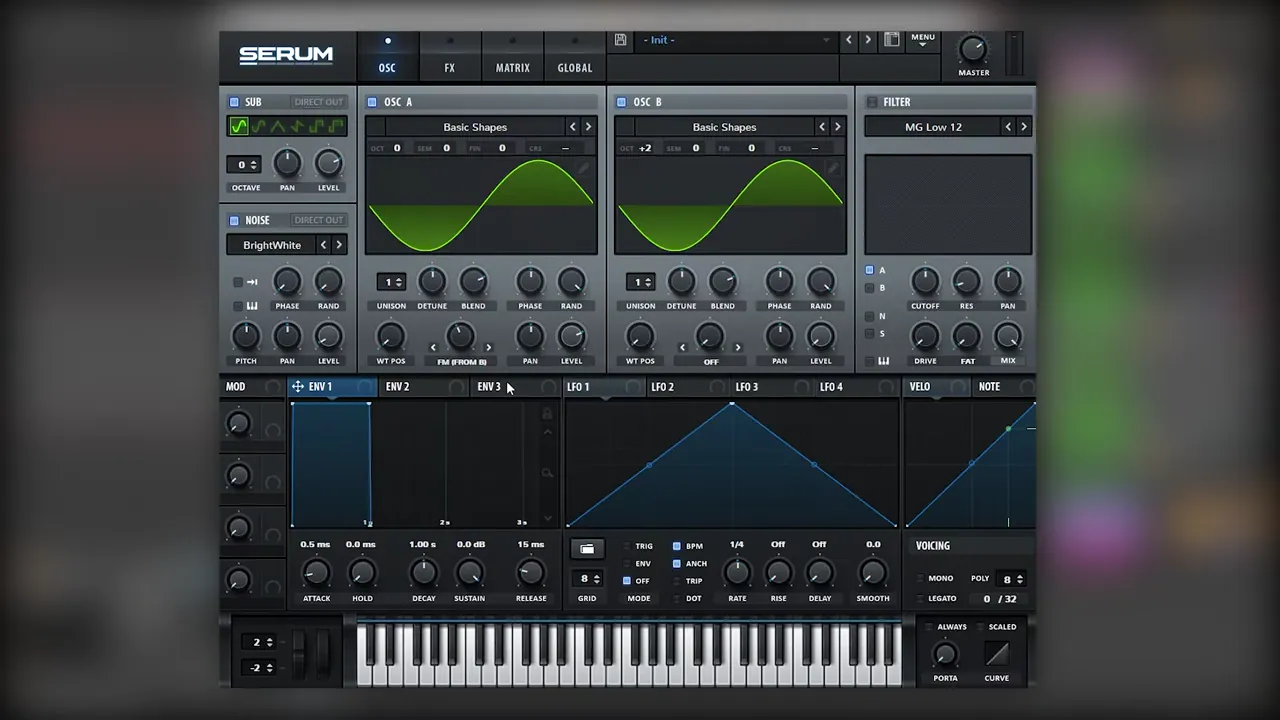 Serum · Bass designHow to Make a Techy Roller Bass in Serum7 min read · Video + guide
 Vital · Bass designHow to Make a Foghorn Bass in Vital6 min read · Video + guide
 Vital · Bass designDark, Minimal DnB Bass Sound Design in Vital7 min read · Video + guide
 Free packsFree DnB Sample Packs, Presets & LessonsFree downloads
FAQ
What is a roller bass in drum and bass?
A roller bass is a rolling, repetitive bassline that keeps the groove moving under the drums, rather than a big one-off hit. In this patch the roll comes from an LFO pulsing an FM layer and a noise sample on top of a steady sine, with a falling pitch on each note.
Can I make a roller bass in Vital for free?
Yes. Vital has a free version, and every step in this tutorial uses stock Vital oscillators, the Grinder sample, LFOs and built-in effects. You do not need any paid plugins.
How do I use FM in Vital?
Set the mode of oscillator 1 to FM OSC 2, then turn the amount up. In the video it sits around 74%, with oscillator 2 one octave up and its own level turned all the way down, so you only hear its effect on oscillator 1.
Why does my Vital bass sound different on every note?
Vital oscillators start with phase randomisation at 100%, so each note begins at a random point in the waveform. Turn the randomisation down to 0% on every oscillator and each note will sound the same.
How do I add a pitch drop to a bass in Vital?
In the Matrix tab, route an LFO to Voice Tune. In the video LFO 3 modulates Voice Tune by two semitones, in Trigger mode with a slow, falling shape, so every note slides down into pitch.
Next steps
You now have a moving roller bass and a patch you can tweak into many variations. When you want to learn the whole process in order, from sound design to finished tracks, here's where to go next:
Course guide
How to learn drum and bass production step by step, and which course fits your level.
Read the guide1:1 Mentorship
Personal guidance on your music from a mentor, built around your goals.
See the mentorship