
How to Make DNB Drums Punchy: 3 Techniques That Work
To make DNB drums punchy, add body with parallel compression, shave the peaks with a soft clipper so you can push them louder, and layer your snare from the best parts of several samples. Then make room for them in the mix with sidechain-style ducking. Below is each step with the exact settings shown in our video.
Prefer to watch? The full 10-minute video walks through every step below.
What you'll need
- A DAW. The video uses Ableton Live and its stock Audio Effect Rack, Compressor and Utility. The same ideas work in FL Studio, Logic or any other DAW.
- GClip, a free soft-clipper plugin (any soft clipper does the same job).
- Drum samples: a break or drum loop and a few snares. The sounds in the video come from our free Discord Community Pack; you'll find more on our free DNB sample packs page.
- No paid synths needed. If you want to design your own sounds later, Vital is a free synth that covers a lot of ground.
1.Add body with parallel compression
Parallel compression blends a heavily squashed copy of your drums with the untouched original. The crushed copy brings up the sustain and body; the dry copy keeps the transients. It's ideal for a break that sounds thin or lacks energy.
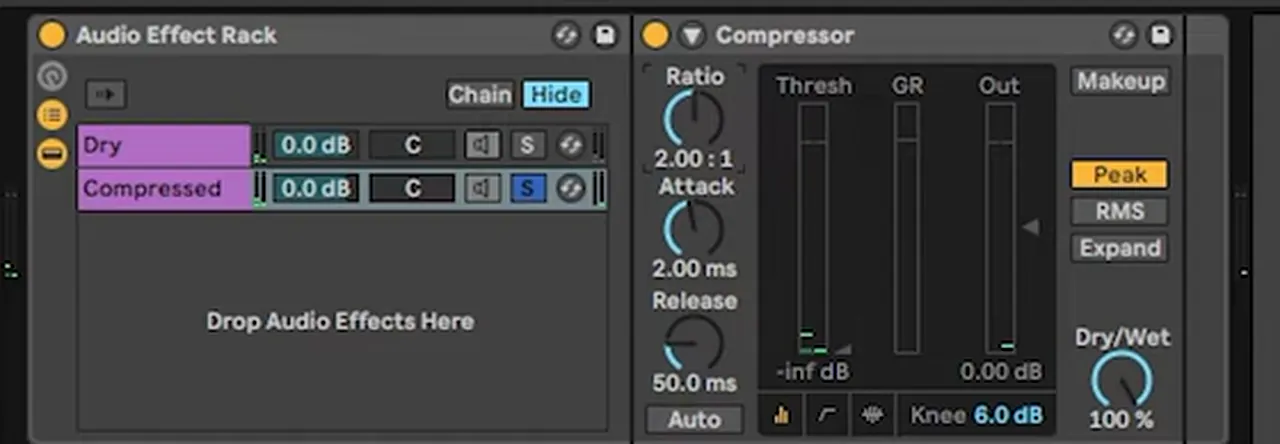
Set up the two chains
- Drop a Compressor on the break's channel and group it into an Audio Effect Rack.
- Open the chain list, rename the chain Dry, duplicate it with Ctrl+D and call the copy Compressed.
- Delete the Compressor from the Dry chain. Now only one chain gets compressed.
Crush the compressed chain
Switch Makeup off first, otherwise Ableton automatically compensates the gain you lose and it's hard to judge what's happening. Then pull the threshold right down, push the ratio up (inf:1 in the video) and bring the output gain back up to compensate. You'll hear the break get crushed and the tails get longer.
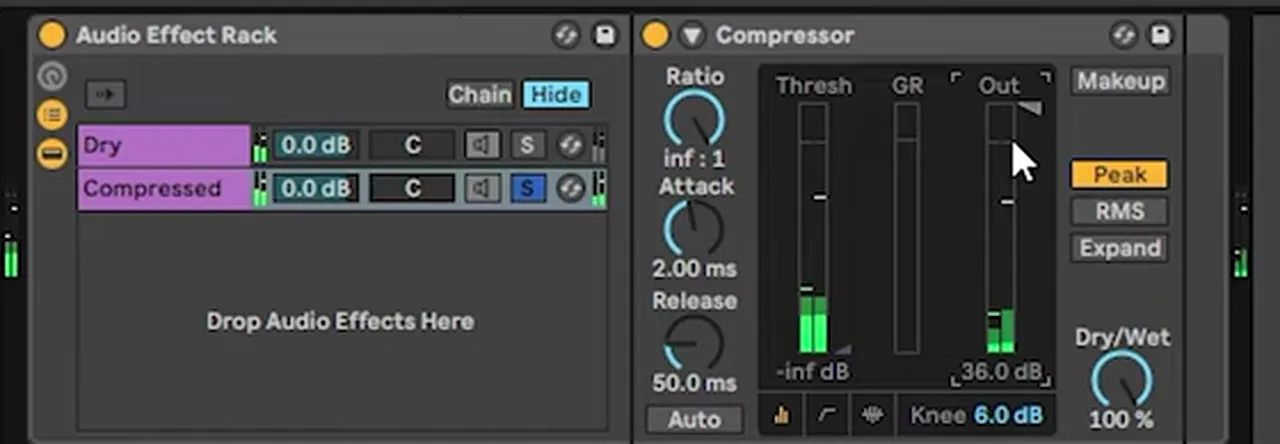
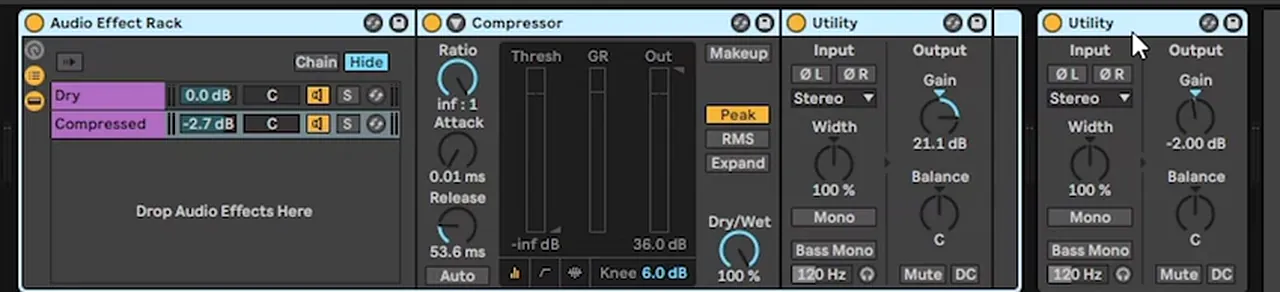
Next, make the attack really short so the clicks get compressed too, then play with the release. Release controls how much tail you get; because we want body in the tops, we keep it fairly short. Add a Utility on the chain to make up the gain lost to compression.
Finally, turn the Compressed chain all the way down and slowly bring it up underneath the Dry chain until the break gains weight without sounding squashed.
Watch your levels
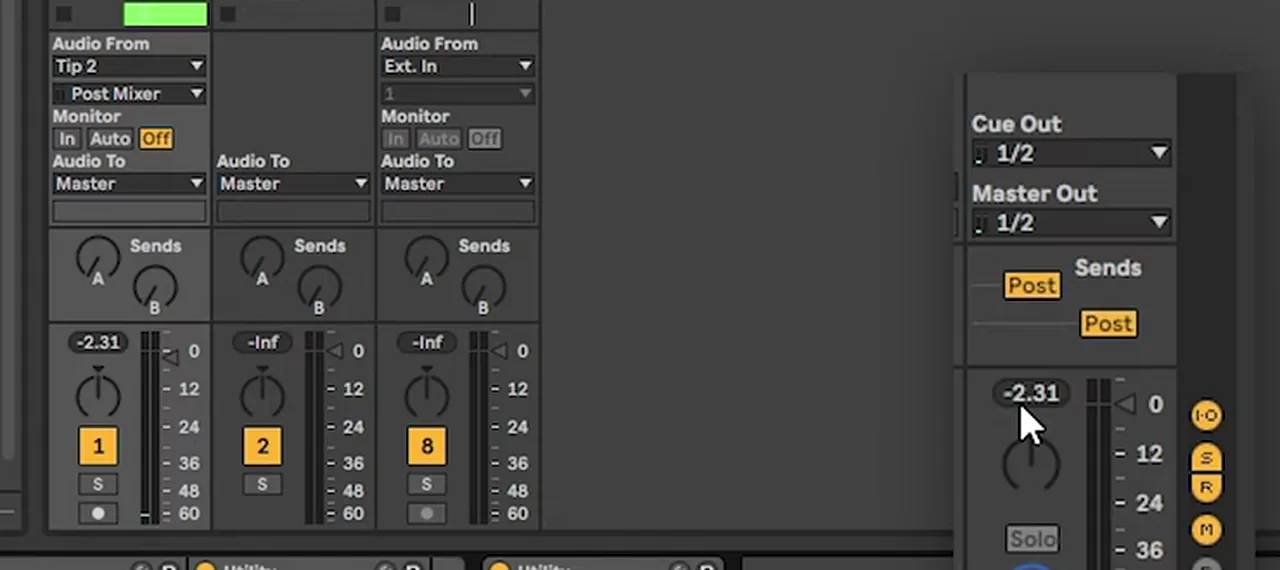
Parallel compression adds level, so check your meters. In the video the channel peaks at −1.88 dB without it and +0.5 dB with it. A Utility after the rack, turned down a couple of decibels, brings the peak back to −2.3 dB. Compare A/B at matched levels: the drums sound more aggressive while peaking lower.
2.Shave the peaks with soft clipping
DNB drums have big, short peaks. Those peaks eat headroom and hit your master limiter hard, which is where distortion creeps in. A soft clipper rounds them off so you can drive the drums louder without the peaks getting in the way.
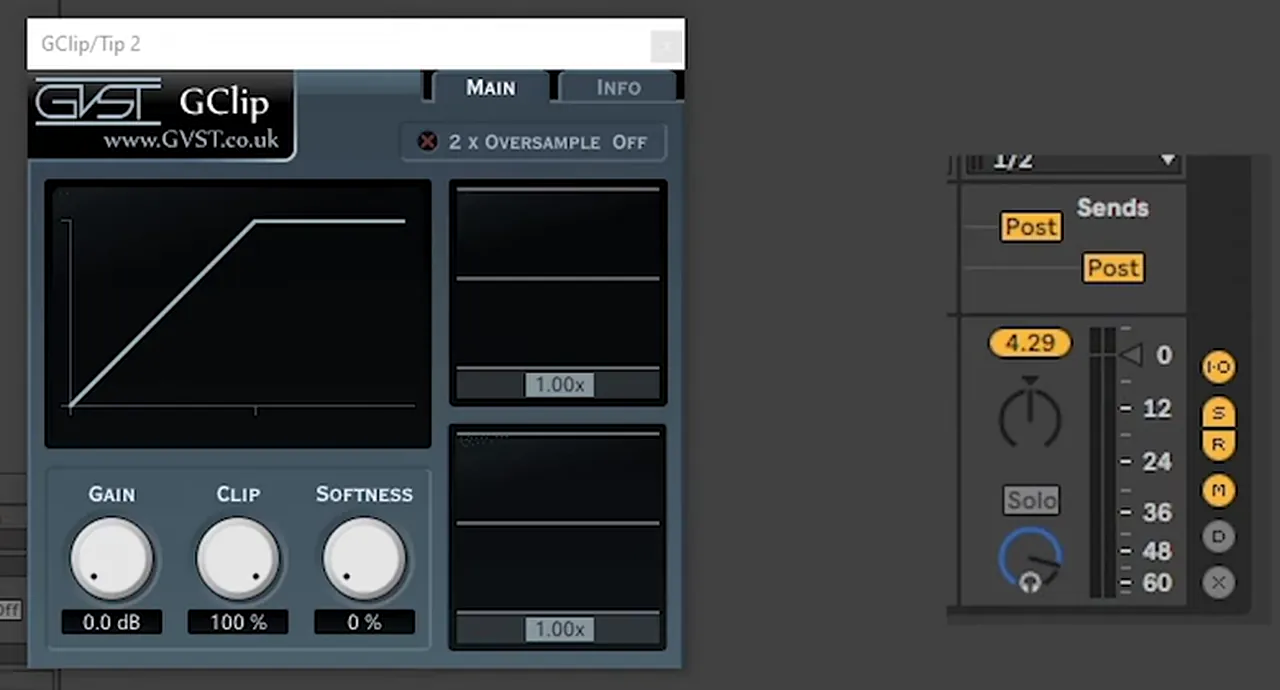
Load GClip on the drum channel. Before it does anything the drums peak at roughly +4 dB:
Now bring the Clip knob down. In the video it lands on 45%: the perceived loudness barely changes, but the peak falls to −6.94 dB. That's more than 6 dB of headroom gained.
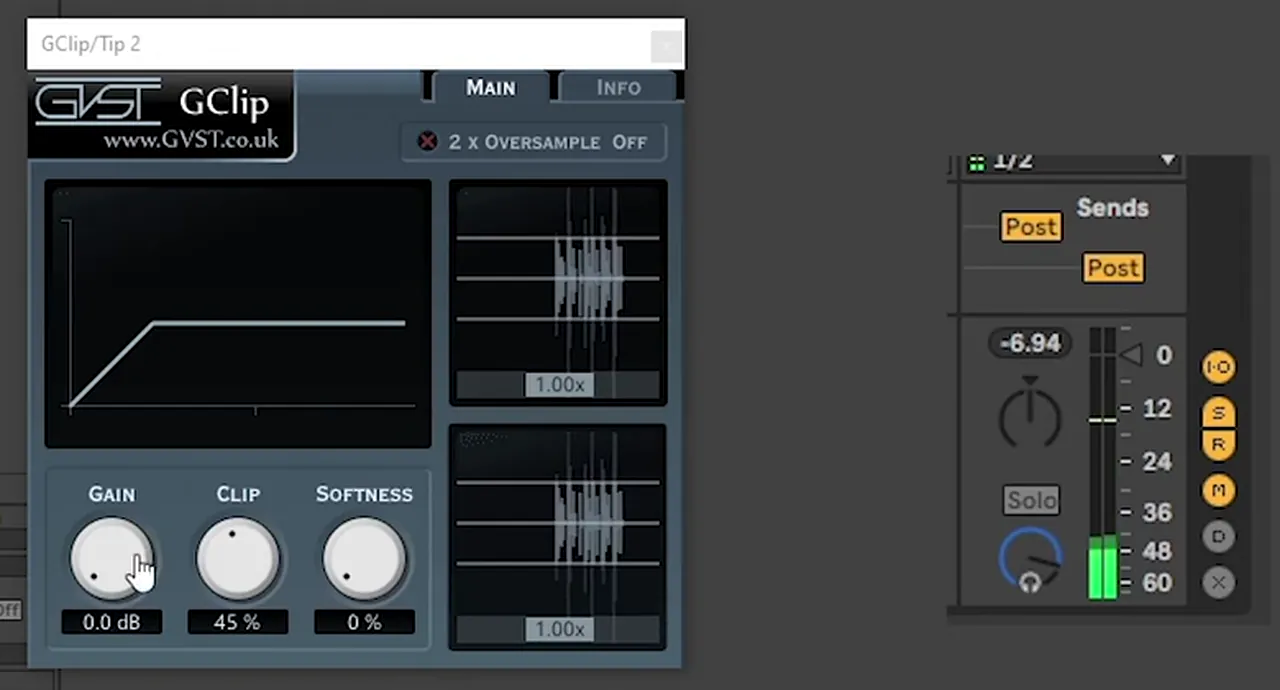
Use that headroom. Turn the Gain up (4.6 dB in the video) and the drums sound fatter and more aggressive while still peaking lower than where you started. On the master chain they won't trigger the limiter as hard, so you get loud drums without as much distortion.
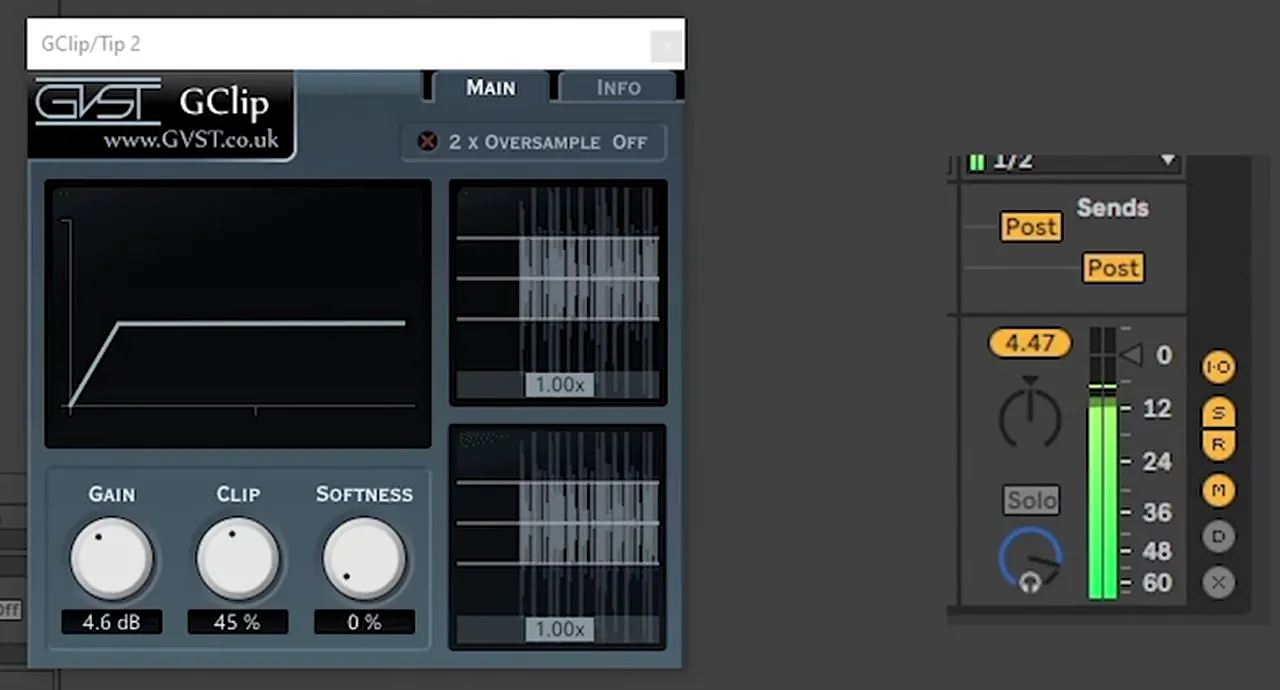
Tip: always A/B at the same volume. Louder almost always sounds better, so level-match before you decide whether the clipper is helping.
3.Layer your snare
The third technique is sound design rather than mixing. If you like a snare but it isn't quite there, don't hunt for a perfect replacement: build one from the best parts of several.
- Browse your pack's snares and find one with a better click (the initial transient).
- Drag it into the arrangement on top of your snare, line the hits up and crossfade so only its click comes through.
- Find another snare with a nice noise tail and combine it in the same way.
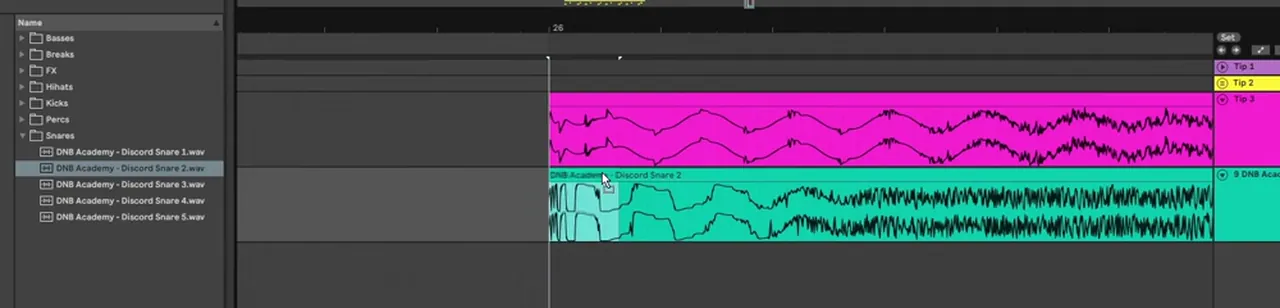
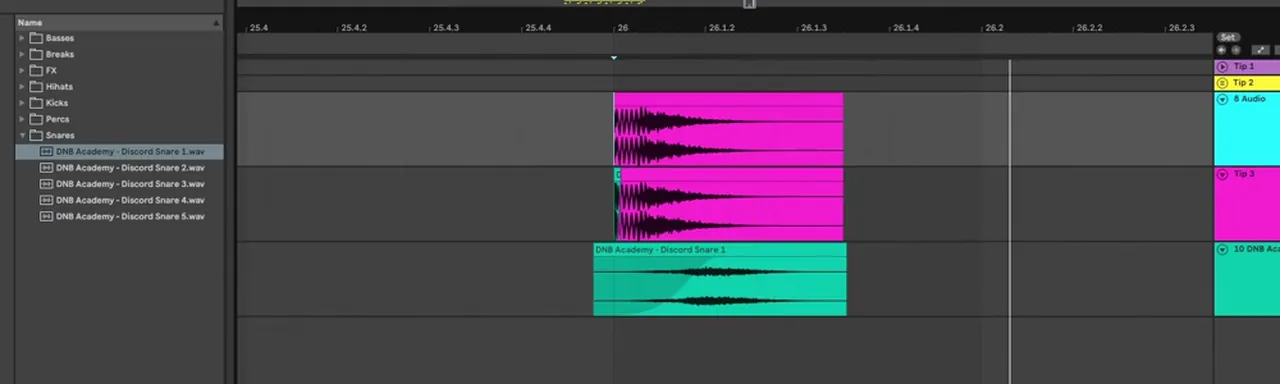
You can repeat this with as many parts of the snare as you like. A/B the original against the layered version and the difference is instant: more snap up front and more body and air behind it.
4.Bonus: duck everything else (sidechain)
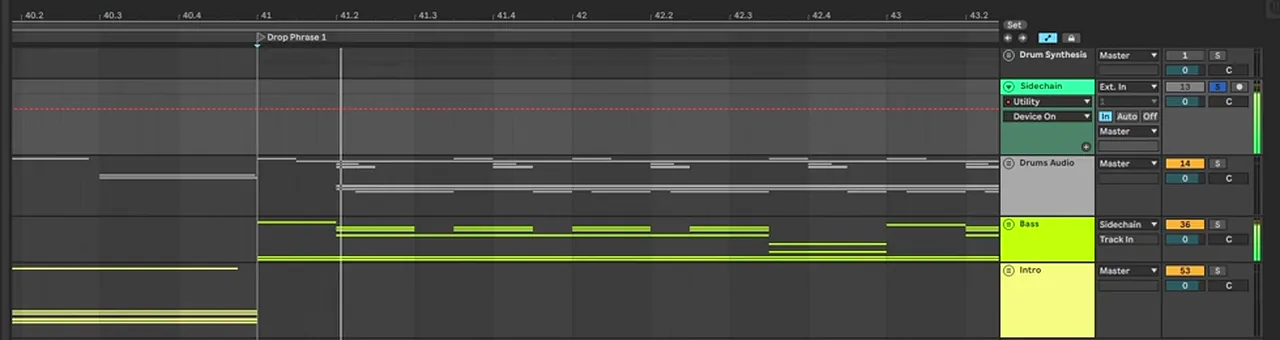
You can have the best-sounding drums in the world, but if lots of elements sit on top of them they'll get buried. In the video the kicks disappear under the bass.
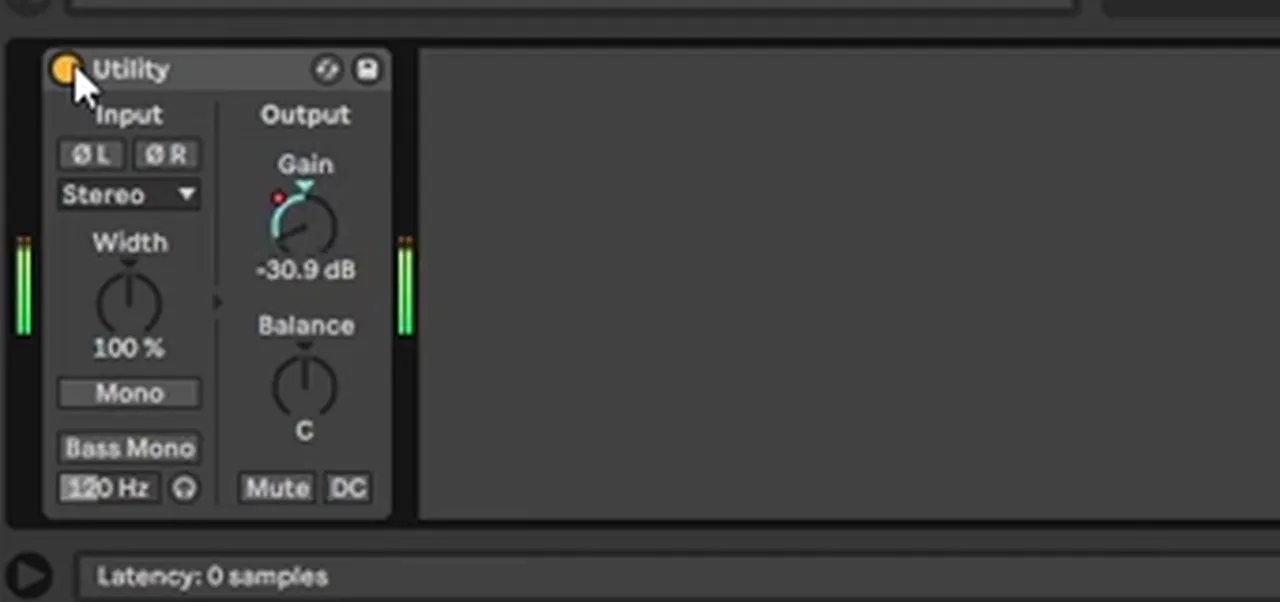
The fix is sidechain or ducking: bring the level of everything else down whenever the kick or snare hits. Here the Bass track's output goes into a track called Sidechain that holds a Utility, and that Utility's gain is automated to dip on every kick and snare. You'll hear a slight pumping when it's soloed; in the full mix the kick and snare suddenly hit through.
Common mistakes
- Leaving Makeup on in the parallel compressor. Auto gain hides what the compressor is doing and makes the blend hard to judge.
- Too much compressed signal. Start with the chain fully down and bring it up until you feel the body, not until you hear pumping.
- Skipping gain staging. Parallel compression adds level. Trim afterwards (a Utility at about −2 dB in the video) so you're not fooled by louder-is-better.
- Clipping without listening. Clip a little less if the snare starts to lose its crack.
- Layers that fight. Snare layers that aren't lined up or crossfaded cause flamming and phase issues. Zoom in and align the transients.
- Mixing the drums in solo only. The bonus tip exists because great drums still get buried. Check them in the full mix.
FAQ
How do I make my DNB drums punchier?
Add body with parallel compression, control peaks with a soft clipper so you can push the drums louder, and layer your snare from several samples. Then duck the bass and other elements when the kick and snare hit so the drums cut through the mix.
What is parallel compression on drums?
Parallel compression blends a heavily compressed copy of the drums with the dry signal. The crushed copy adds sustain and body while the dry copy keeps the transients, so the drums sound fuller without losing their punch.
What settings should I use for parallel compression?
In our video the compressed chain uses an infinite ratio, a low threshold, a 0.01 ms attack, a release around 53.6 ms and Makeup off, blended in at about -2.7 dB under the dry chain. Treat these as a starting point and adjust by ear.
Is soft clipping bad for drum and bass drums?
Used gently, no. Soft clipping rounds off short peaks, which gives you headroom to push drums louder without slamming the master limiter. In the video GClip at 45% clip lowers the peak from about +4 dB to -6.94 dB with similar perceived loudness.
How many layers should a DNB snare have?
There is no fixed number. The video builds a snare from three samples: the original for the body, a second one for its click and a third for its noise tail. Add layers only when each one brings something the others lack.
Do I need to sidechain bass to drums in drum and bass?
Usually, yes. If the bass and other elements play at full level over the kick and snare, the drums get buried. Ducking those elements on each hit, with a sidechain compressor or automated volume like in the video, lets the drums punch through.
Next steps
These three moves will lift almost any drum loop. If you'd rather learn the whole process in order, from drums to finished tracks, here's where to go next:
Course guide
How to learn drum and bass production step by step, and which course fits your level.
Read the guide1:1 Mentorship
Personal guidance on your music from a mentor, built around your goals.
See the mentorship