How to Make Neuro Drum and Bass in Ableton Live (Beginner Guide)
To make neuro drum and bass in Ableton, set the tempo to 172 BPM, program a kick and snare in a Drum Rack, then sequence short, aggressive bass samples between the drums and duck everything around the kick and snare with automated Utility gain. Add filter and reverb movement, a bass layer and a sub, then a build-up into two drops.
The full 44-minute walkthrough. Chapters: Ableton basics 1:06, drums 3:38, bass 12:10, build-up 34:01, final result 41:50.
What you'll need
- Ableton Live Lite (or any Live edition). Everything is stock: Drum Rack, Utility, Auto Filter, Reverb and Channel EQ. Live Lite allows eight tracks, and this project fits inside that.
- A neuro starter pack with kicks, snares, top loops, bass shots, a sub and FX. The video uses our free Neuro DnB Starter Kit, which includes the project file. Find more on our free DNB sample packs page.
- No synth required. The pack's bass sounds let you skip sound design for now. When you're ready to design your own neuro basses, Vital is a free synth that's well worth learning.
Quick orientation: we work only in the Arrangement View (the timeline). The Browser on the left holds instruments, effects and your samples (use Add Folder to add the pack). The mixer section on the right has volume and routing for each track. The bottom panel shows the sample view or Piano Roll for whatever clip you double-click. The grey Info View box (the hint panel) explains anything under your mouse.
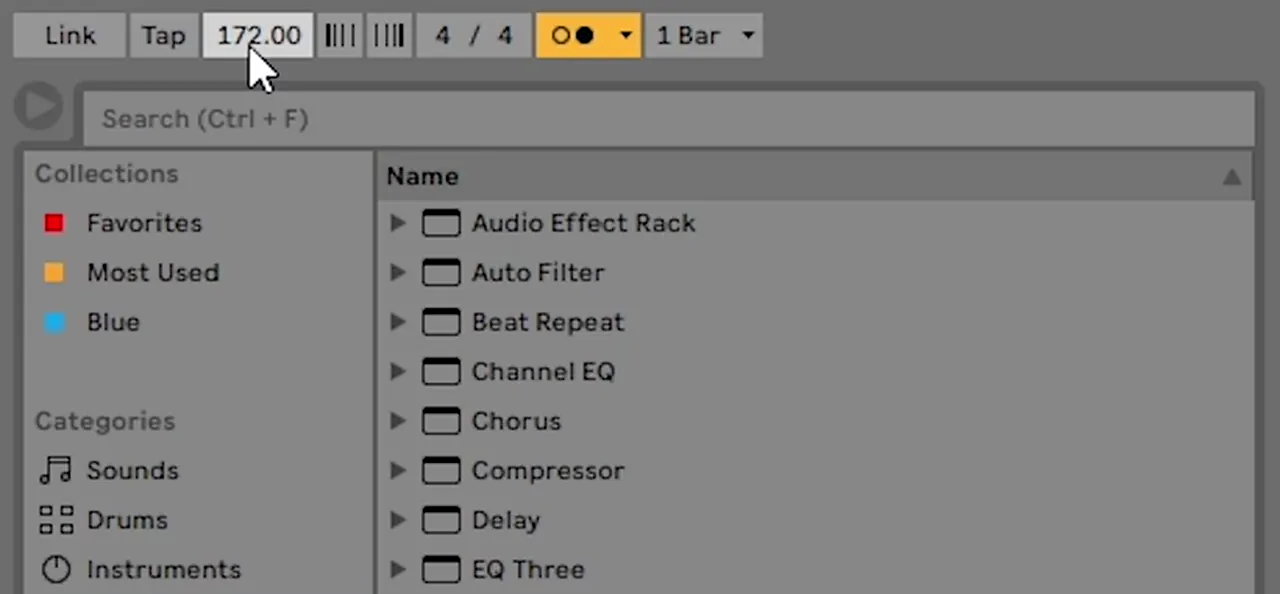
1.Set the tempo to 172 BPM
Tempo sets how fast the track is. Switch the metronome on, press play and drag the tempo up or down to hear the difference. For neuro we use 172 BPM. Then switch the metronome off.
2.Program the main drums in a Drum Rack
- Click the first MIDI track, press Ctrl+R and rename it Main Drums.
- From Instruments, drag in a Drum Rack. It lets you drop samples onto pads and play them from the Piano Roll.
- Open the pack's drums folder, pick a short kick and Alt+drag it onto the first pad. Drop a snare onto the second pad.
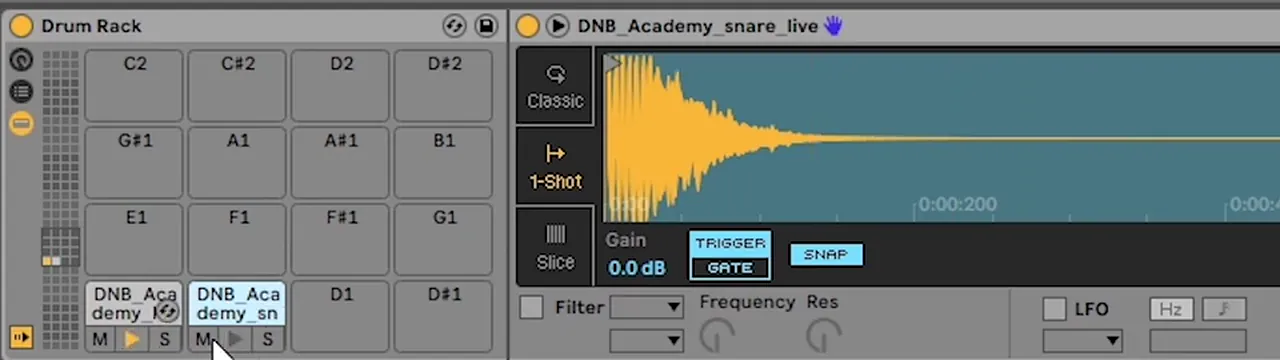
Select four bars on the track, right-click and Insert MIDI Clip. Put the snare on beats 2 and 4. The kick goes on beat 1 and then, instead of landing on beat 3, slightly later. Program one bar, then right-click and duplicate it to save time. An extra kick here and there adds groove. Select the clip and press Ctrl+L to loop it.

3.Add a top loop and duck it around the kick and snare
From the cymbals folder, Alt+drag a top loop in. It's longer than the drums, so duplicate the MIDI clip and extend the loop range to 8 bars. Drag the clip gain (the "0") down to about −5.
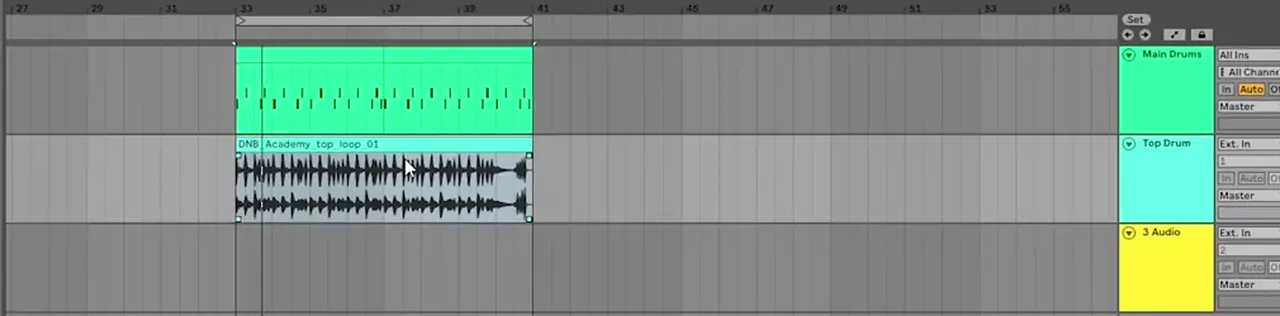
The top loop now plays over the main kick and snare and it sounds messy. The fix is a form of sidechain: turning the loop down whenever the kick or snare hits. Drag a Utility onto the track, right-click its Gain knob and choose Show Automation. Put a breakpoint at the start and end of the kick, then right-click the line and Insert Shape to draw the dip.
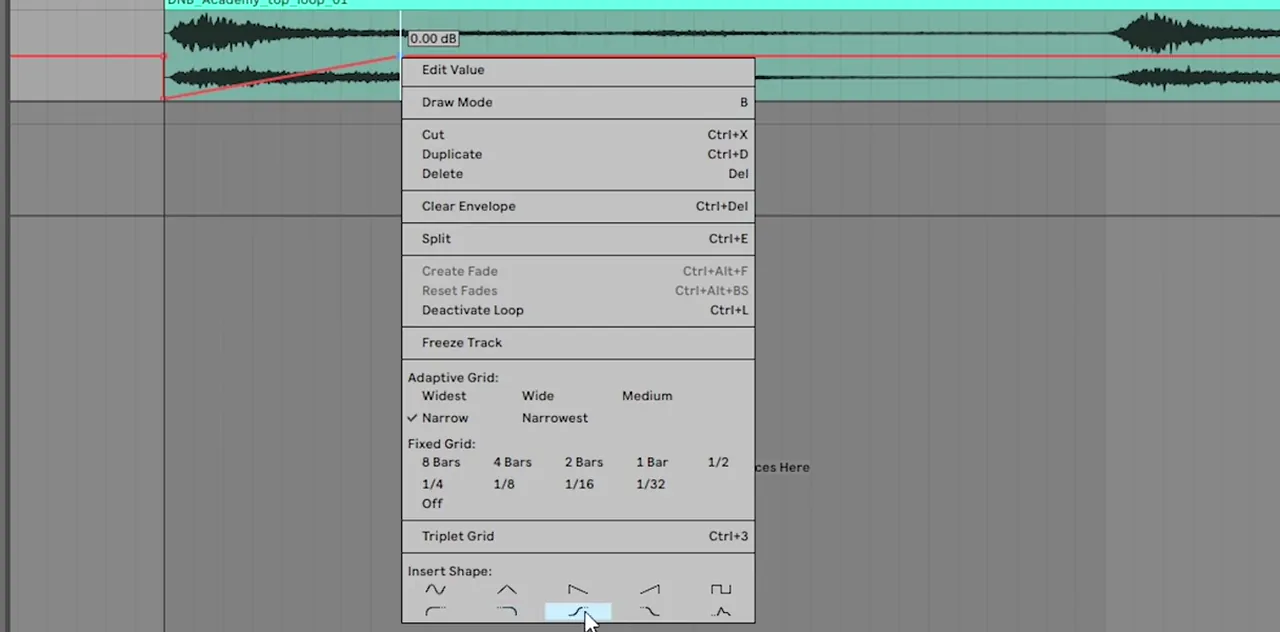
Do the same for the snare, but shorter, since the first hit of a snare is shorter. Copy the shapes with Ctrl+C and Ctrl+V onto every kick and snare, then select a section and duplicate it with Ctrl+D. Compare a ducked section with an un-ducked one: the difference is obvious. Press A to toggle the automation view.

4.Sequence the neuro bass
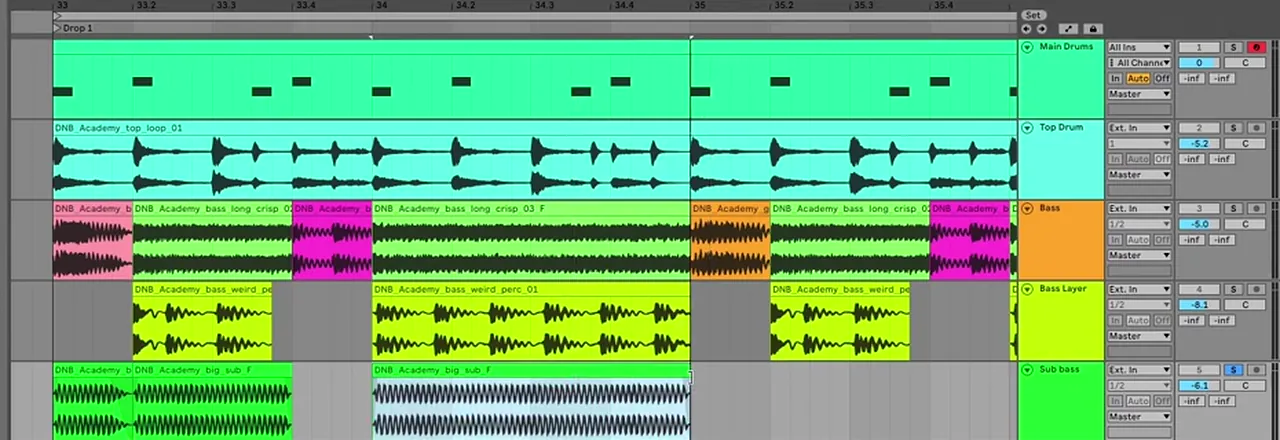
Press Ctrl+T for a new audio track and name it Bass. Audition the pack's bass folder and drag in a sound you like, then lower its volume. Right-click the top loop's Utility, copy it and paste it on the Bass track, so the bass ducks with the kick and snare too.
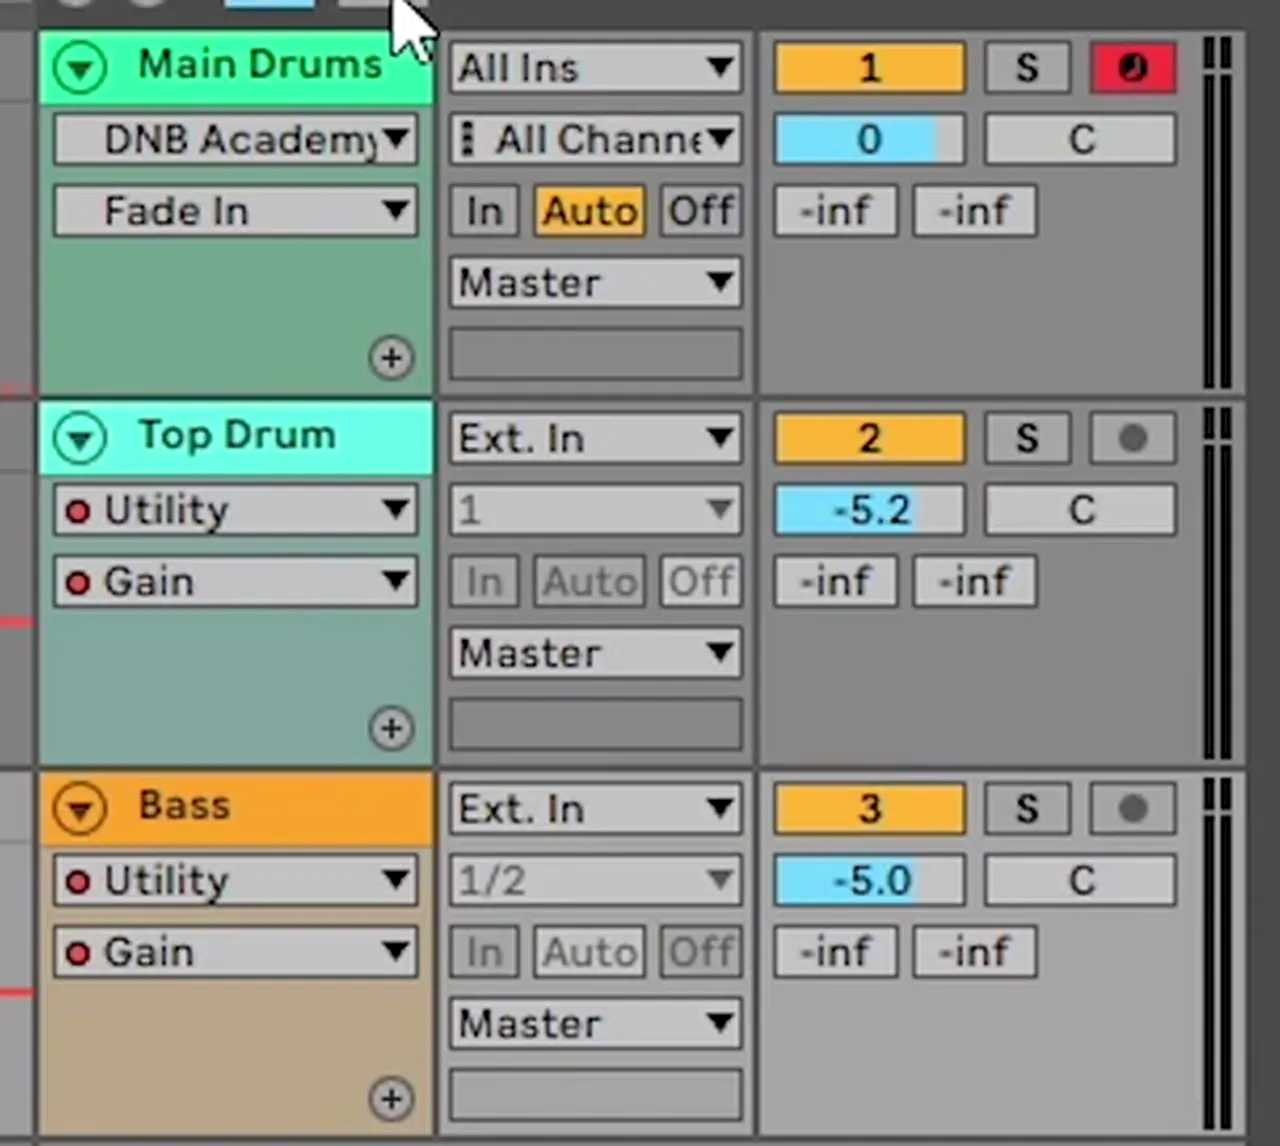
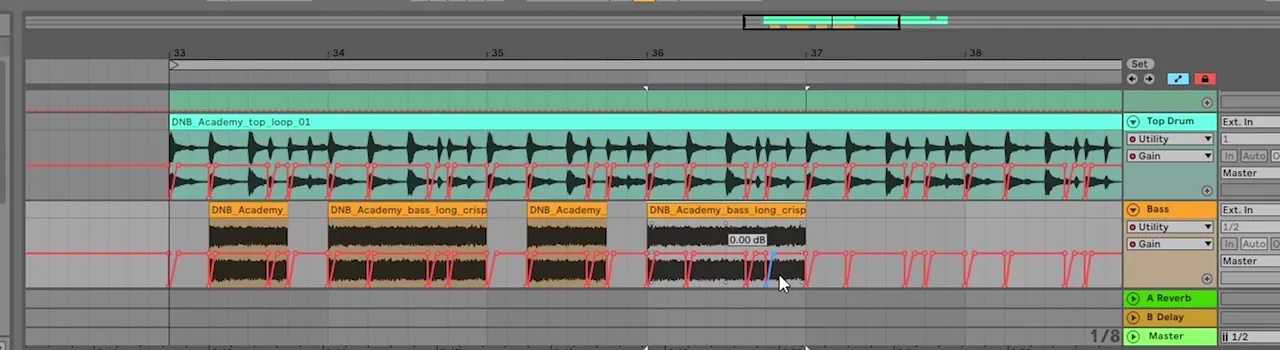
To move clips without dragging the automation along, click the small lock icon. Then build the sequence:
- start a bass on the snare and trim it shorter by dragging its edge
- swap in variations from the pack rather than repeating one shot
- add short fade-ins and fade-outs with the clip's corner handles
- colour-code bass types (right-click a clip) so you can read the pattern
- if a sample's timing feels off, switch Warp off and line it up with the grid
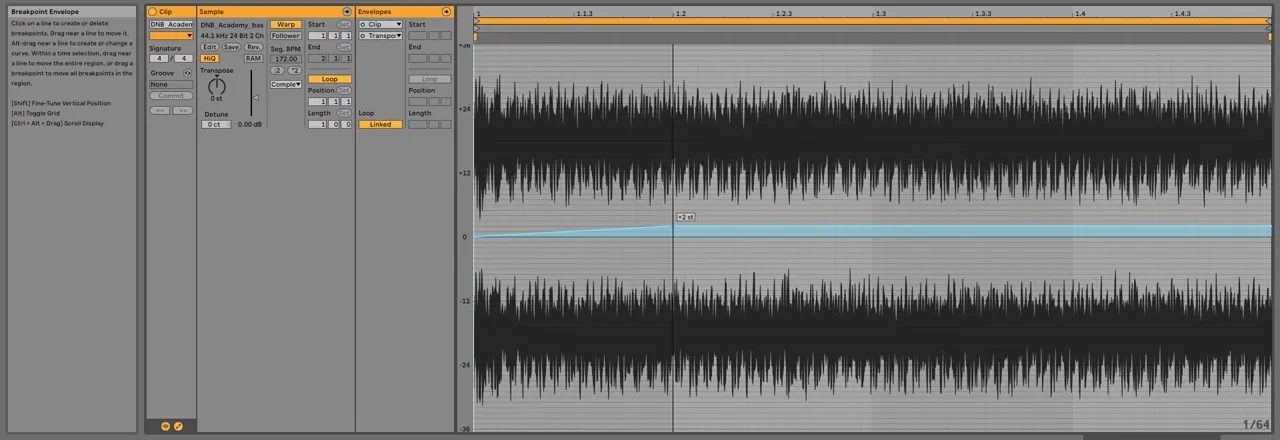
For movement, double-click a clip, open Envelopes, choose Clip → Transposition and draw the pitch so it sustains and then drops. Keep it subtle: "not that drastic" sounds better.
5.Add filter and reverb movement, then mark the drop
For movement at the end of the sequence, add an Auto Filter. Keep the Utility last in the chain so the ducking isn't affected by the filter. Play with the cutoff, then right-click, Show Automation and draw the sweep yourself.
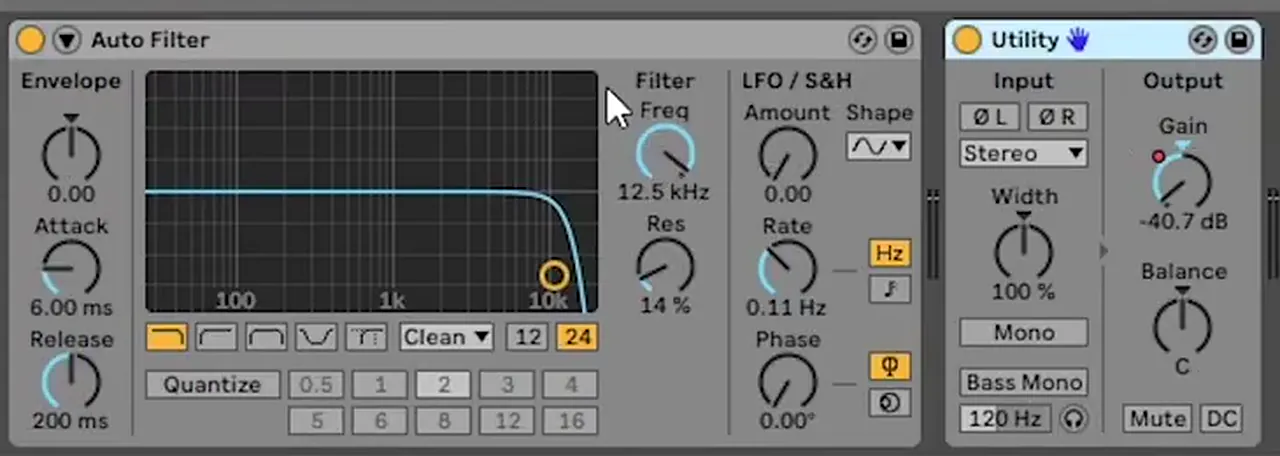
Add a Reverb after the filter and automate dry/wet from 0 to 100. In the video we switch off the reverb's cut filter, raise the decay, then bring it back a little shorter.

Right-click the time ruler and Add Locator called "Drop 1". To copy the drop with its automation, unlock the automation lock first, then select and duplicate it, and add a second locator, "Drop 2".
6.Turn drop 2 into a variation
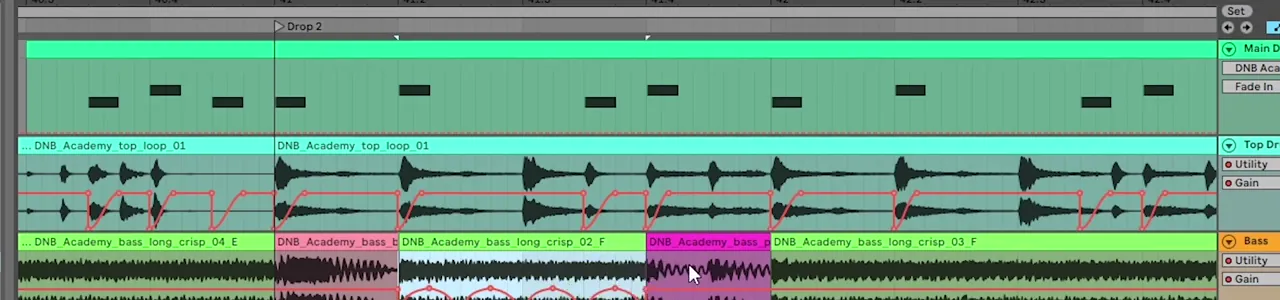
In neuro, the second drop usually changes something. Here the long bass moves up and down in volume. Add another Utility after the Reverb, show its gain automation, select an area and Insert Shape → triangle. Move the peak to the middle, make the triangle half as long using the grid and duplicate it. Hold Alt and drag each line to round the shape, then copy it onto the matching basses.
7.Fill the drop: bass layer and sub bass
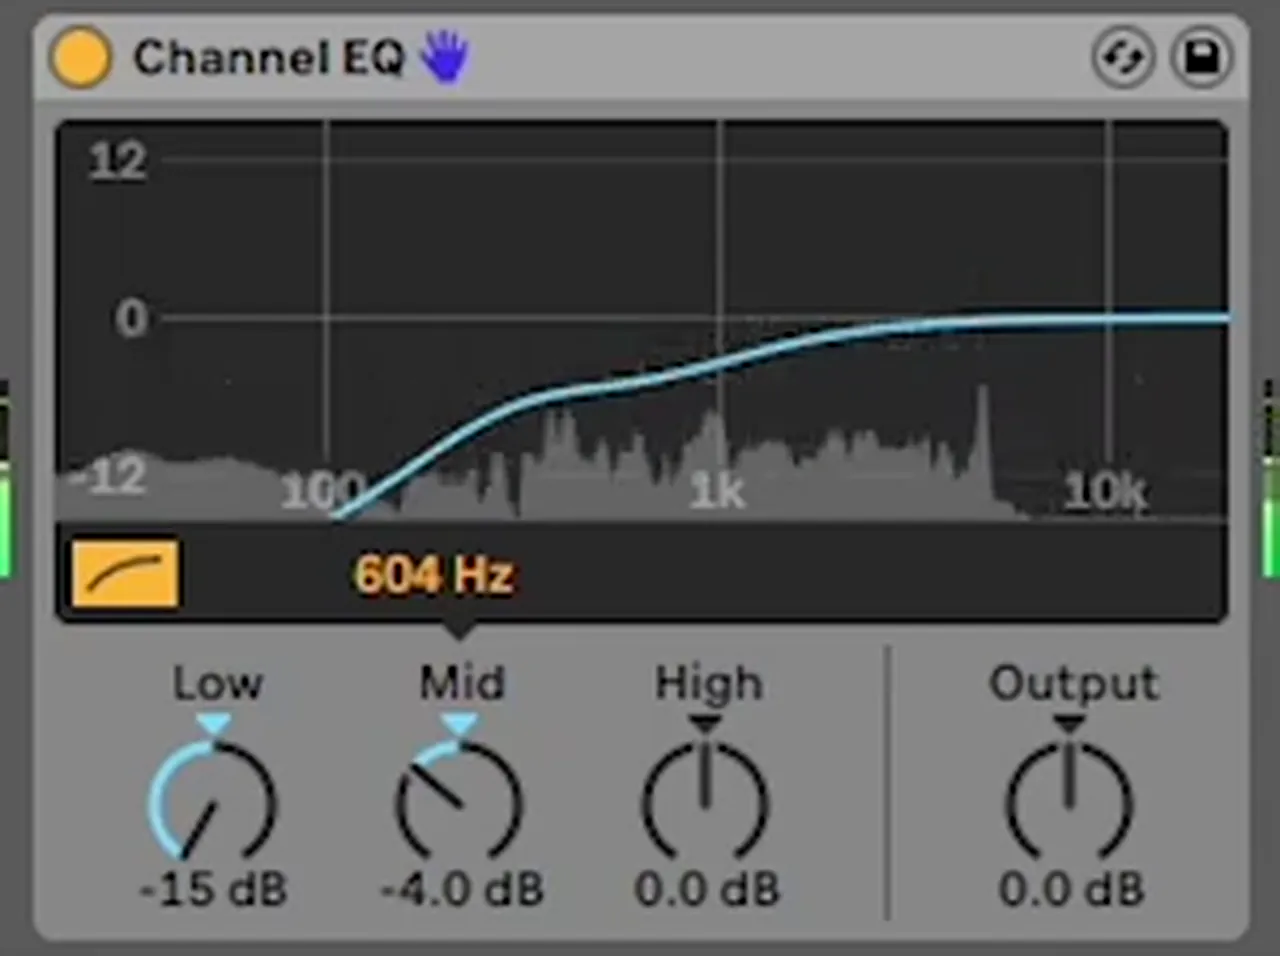
The drop still feels empty. Add an audio track called Bass Layer and find a percussive sound to sit on top of the bass. Slice it, right-click and turn warping off so the timing isn't changed. It clashes at first, so add an EQ and cut the lows and some of the mids. Then paste the kick and snare ducking automation and duplicate it across the basses.
Next the sub bass, which fills the low end you feel in your chest. Add a track called "Sub Bass", drag in the pack's sub sample and turn warping off for the raw sample. Paste the ducking Utility so the drums have space, then bring the volume down and check it with the drums.
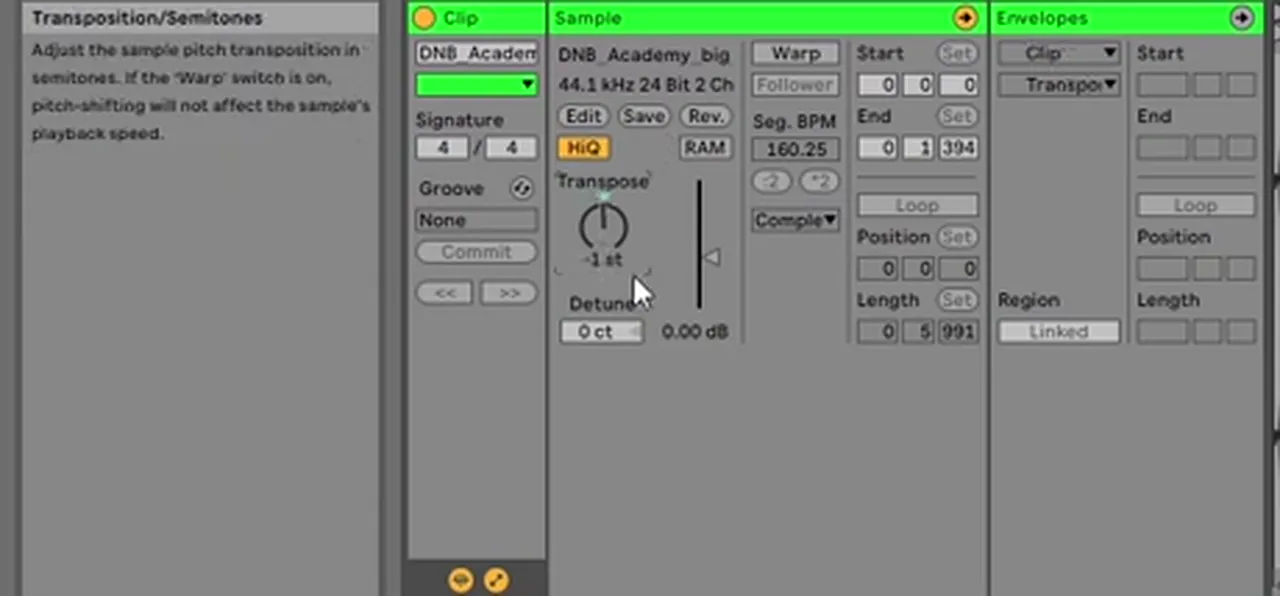
The sub has to follow the bass on top. Use Ctrl+E to split it, delete what you don't need and use fades to match each bass. Leave a gap where you want a breathing space. Where a bass sits on a different note, transpose the sub (−1 semitone in the video). Copy the bass's pitch envelope onto the sub too, so they move together.
8.Make the build-up
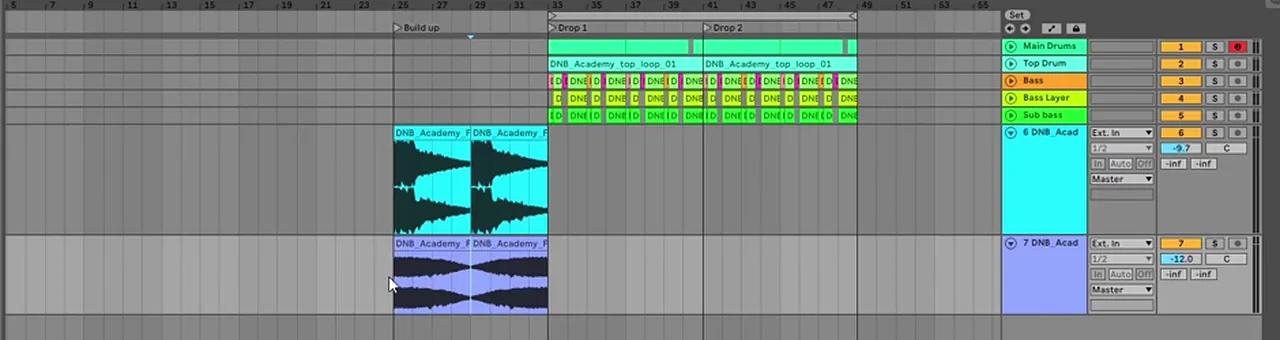
Alt+click one of the track arrows to fold everything and see the big picture. Add a locator called Build up before the drops, the same length as a drop.
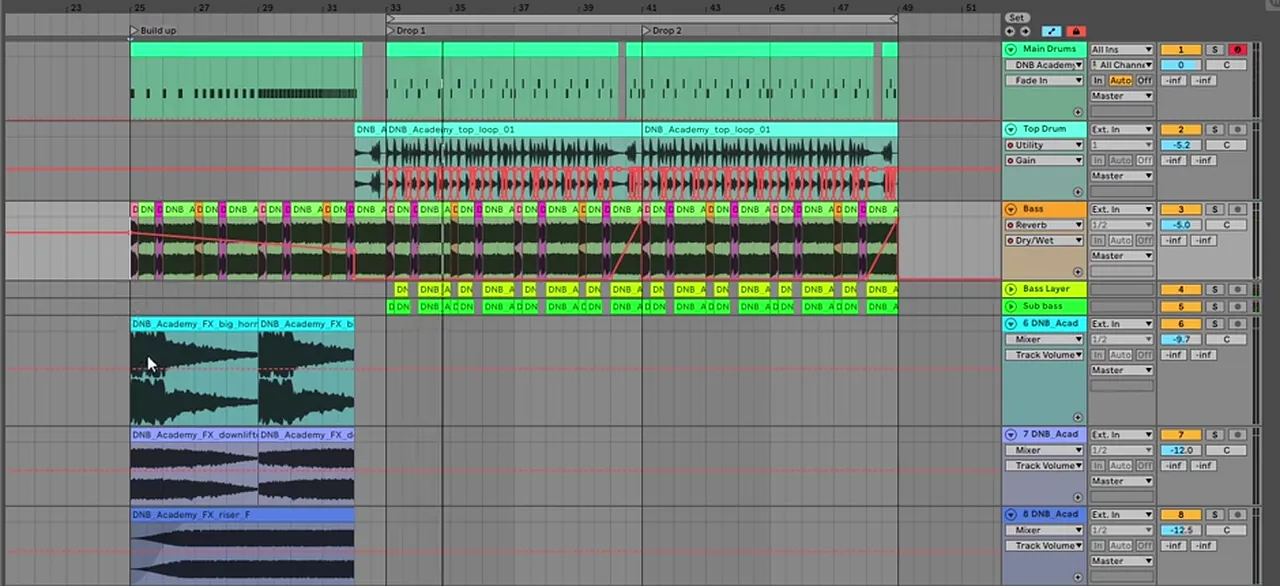
Add audio tracks for FX: drag in sounds you like, turn warping off, shorten and duplicate them, and lower their volume. To flip a falling sound into a rising one, select it and press R to reverse it. Live Lite stops at eight tracks, so choose carefully. Leave a short gap before the drop for a pre-drop.
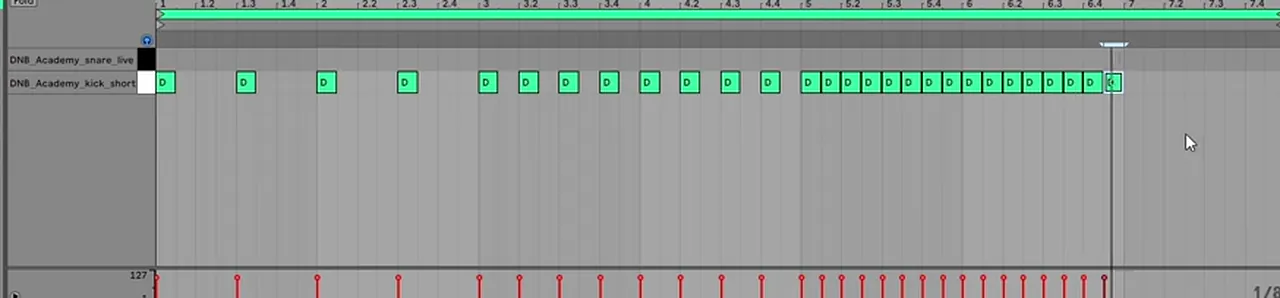
For drums, create a MIDI clip and start with a simple kick rhythm, then double the speed and double it again as you approach the drop.
Finally, copy some basses into the build and automate the filter to introduce them slowly. Start the reverb high and bring it down. Add a rising noise with warping off, trim it with Ctrl+E and fade it in with automation. Turn the sample down in its sample view rather than the mixer, so you don't break the automation.
Common mistakes
- Utility in the wrong place. Keep the ducking Utility last in the chain, after filters and reverb.
- Moving clips with automation locked to them. Use the lock so you can rearrange basses without wrecking the ducking.
- Leaving warping on for one-shots. Warping can smear bass shots and FX. Turn it off for the raw sample.
- Repeating one bass shot. Neuro lives on variation: swap samples, add pitch envelopes, change drop 2.
- A sub that ignores the bass. Cut, fade and transpose the sub so it follows the notes on top.
- Fighting the eight-track limit in Live Lite. Plan your tracks: drums, top loop, bass, bass layer, sub and a few FX.
FAQ
What BPM is neuro drum and bass?
Drum and bass usually sits between about 170 and 176 BPM. This tutorial uses 172 BPM, a tempo that works well for neuro.
Can you make neuro drum and bass in Ableton Live Lite?
Yes. This whole track is made in Ableton Live Lite with stock devices (Drum Rack, Utility, Auto Filter, Reverb and Channel EQ) and a sample pack. The main limit is eight tracks, which is enough for drums, bass layers, a sub and some FX.
Do I need a synth like Serum or Vital to make neuro?
Not to start. This tutorial uses ready-made bass samples, so you can learn sequencing, ducking and arrangement first. When you want to design your own basses, Vital is a free synth you can grow into.
How do you sidechain in Ableton Live Lite without a compressor?
Add a Utility to the track, show automation for its Gain and draw a dip around every kick and snare using Insert Shape. Copy the shapes along the track and keep the Utility last in the device chain.
How do you make a neuro bass sound more interesting?
Use several bass shots instead of one, trim and fade them, automate pitch with the clip Transposition envelope, add filter and reverb automation, and layer a percussive sound on top with a sub underneath.
How do you make a drum and bass build-up?
Start the kick simple and keep doubling its speed, add rising or reversed FX, bring basses in with a filter sweep and reverb automation, and leave a short gap before the drop for a pre-drop.
Next steps
That's a neuro build-up and two drops from samples and stock devices. The next layer is designing your own basses, mixing and full arrangements. Here's where to go next:
Course guide
How to learn drum and bass production step by step, and which course fits your level.
Read the guideDNB Foundations
A structured course with weekly live feedback calls on your tracks. Beginners welcome.
See Foundations1:1 Mentorship
Personal guidance on your music from a mentor, built around your goals.
See the mentorship