
Ableton Live · Liquid DnB · Full track
How to Make Liquid DnB in Ableton: A Full Track from Scratch with Telomic
To make liquid DnB in Ableton, start from one musical idea, such as a soulful vocal sample, lock the key, then build a reese and sub bassline, rolling layered drums, atmospheres and a filler bass before you lay out the arrangement and add leads, chords and FX. Telomic does exactly that in our 98-minute session, building a deep liquid tune from an empty project. Here are his steps, with screenshots, settings and audio of the track as it grows.
Using FL Studio? Our liquid drum and bass in FL Studio guide is the beginner walkthrough for that DAW. This page follows a full Ableton session, from the first sample to the rough finished tune.
Quick answer
How do you make liquid DnB in Ableton?
Pick one idea (a vocal, a pad or a drum loop), find its key, and write a reese bassline in that scale. Add a kick, a snare and high-passed top loops, group and glue the drums, sidechain the bass with Utility automation and put a clean sub underneath. Then layer atmospheres, add a resampled filler bass, block out the sections and finish with leads, chords and FX.
- Start from one idea.A vocal sample with a simple chain, then a pad in the same key.
- Write a reese bassline.Two detuned saws in Serum, filter key-tracked.
- Lay down the drums.Kick, snare and clap, then shuffles and top loops.
- Glue the drum group.Transient shaper, short room reverb, light clipping.
- Sidechain and sub.Utility gain automation and a sine sub under the reese.
- Add atmospheres.Granulated vocal, filtered pads and reverb sends.
- Make a filler bass.Resample a notched reese and play it from Simpler.
- Block out the arrangement.Named, empty MIDI clips for every section.
- Leads and chords.A Pigments pluck and an Operator chord stab for the B section.
- FX and the playthrough.Impacts, tonal reverses, then notes for the mixdown.
Telomic’s liquid DnB track from scratch in Ableton, recorded for our 174 Production Marathon. Every step below links to the moment in the video.
What you’ll need
- Ableton Live. It is what Telomic primarily uses, and the session leans on Ableton tools: Utility, Saturator, Auto Filter, Simpler, Operator, Glue Compressor, instrument racks and groups within groups.
- A synth for the basses. He uses Serum for the reese, sub and filler bass, and Arturia Pigments for the lead. Any synth with two saw waves and a filter does the job, including Vital, which is free.
- A few samples. A soulful vocal sample, a pad or atmosphere, a kick, a snare and clap, and some top loops, shuffles and breaks.
- Some effects. He reaches for Little AlterBoy, Kilohearts Chorus and Transient Shaper, FabFilter Pro-Q 3, Pro-R and Pro-L 2, H-Delay, ValhallaRoom, KClip 3, Trash, OTT and Crystalline, plus Granulator II, a free Max for Live device. Stock Ableton EQs, delays, reverbs and saturators can stand in for most of them.
1.Start from one idea and lock the key
Don’t start a liquid tune with a blank grid. Start with one short idea, such as a vocal sample, a drum loop, an atmospheric sample or a piano progression, and build the framework of the track around it. Find its key straight away, because every bass note and chord will follow it.
Telomic picks a soulful vocal sample, pitched down a couple of semitones (watch at 1:30). Its chain is simple: Little AlterBoy with the formant turned down slightly, which gives a deeper, pitched-down tone without changing the pitch; Kilohearts Chorus, which he loves because it’s so simple; RVox squeezing the vocal quite hard; Pro-Q 3 for a low cut plus a dynamic EQ band that takes out the vocal’s low-mid fundamental, so it doesn’t clash with the kick, snare, pads and basses; and H-Delay, with the delay automated down at the end so it doesn’t muddy the next phrase. Our DnB vocal processing guide goes deeper on Telomic’s vocal chains.

To check the key, he has a quick trick: put Auto-Tune on the vocal, set it really tight in the key you suspect, and if it doesn’t sound weird you’re probably right. Here it confirms G minor (watch at 3:29). Next comes a pad. The first one he tries is a rhythmic sample in G sharp, so he warps it at 130 rather than 65 so it doesn’t stretch too far, and pitches it down to G. A few minutes later he scraps it for a pad from a pack he knows is well key-labelled: a good reason to keep a few trusted libraries.
2.Write a reese bassline in the scale
A classic liquid reese is two saw waves, detuned slightly against each other, with a low-pass filter that tracks the keyboard. Write the bassline with the notes of your scale that sound best, and don’t worry about perfect mixing yet: get the creative parts down first and fix the technical side later.
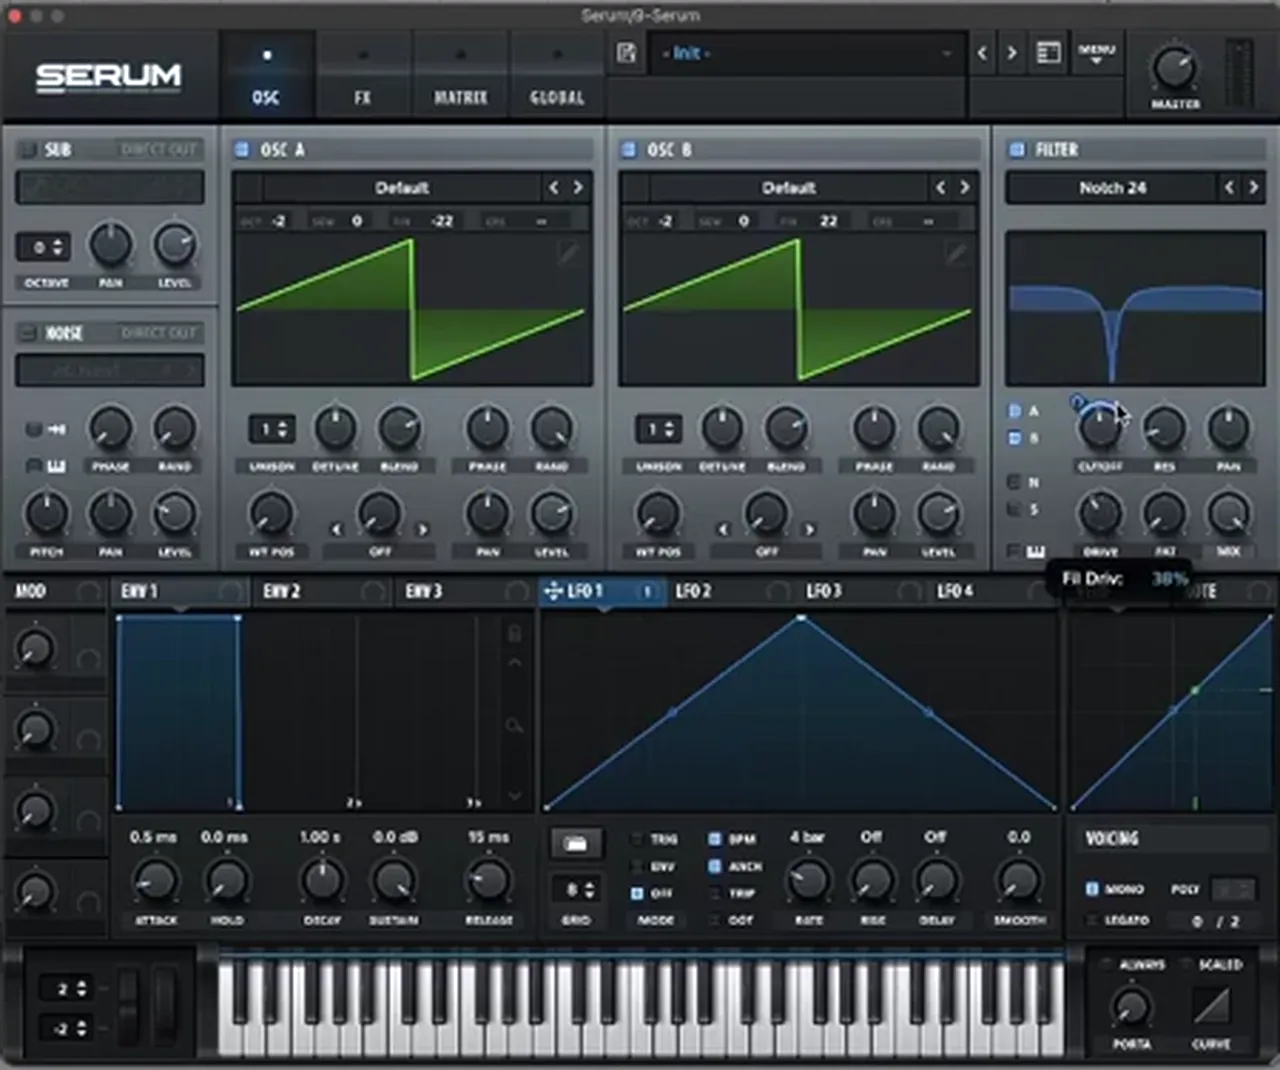
In Serum, Telomic loads the default saw in both oscillators, leaves unison off because it adds width he doesn’t need in a bass, and detunes them in opposite directions: +24 on one and -24 on the other (watch at 6:04). He drops the patch an octave or two, turns the filter down and key-tracks it. With key tracking, higher notes open the filter and lower notes close it, so an octave leap still sounds full instead of the filter cutting away all the harmonics.
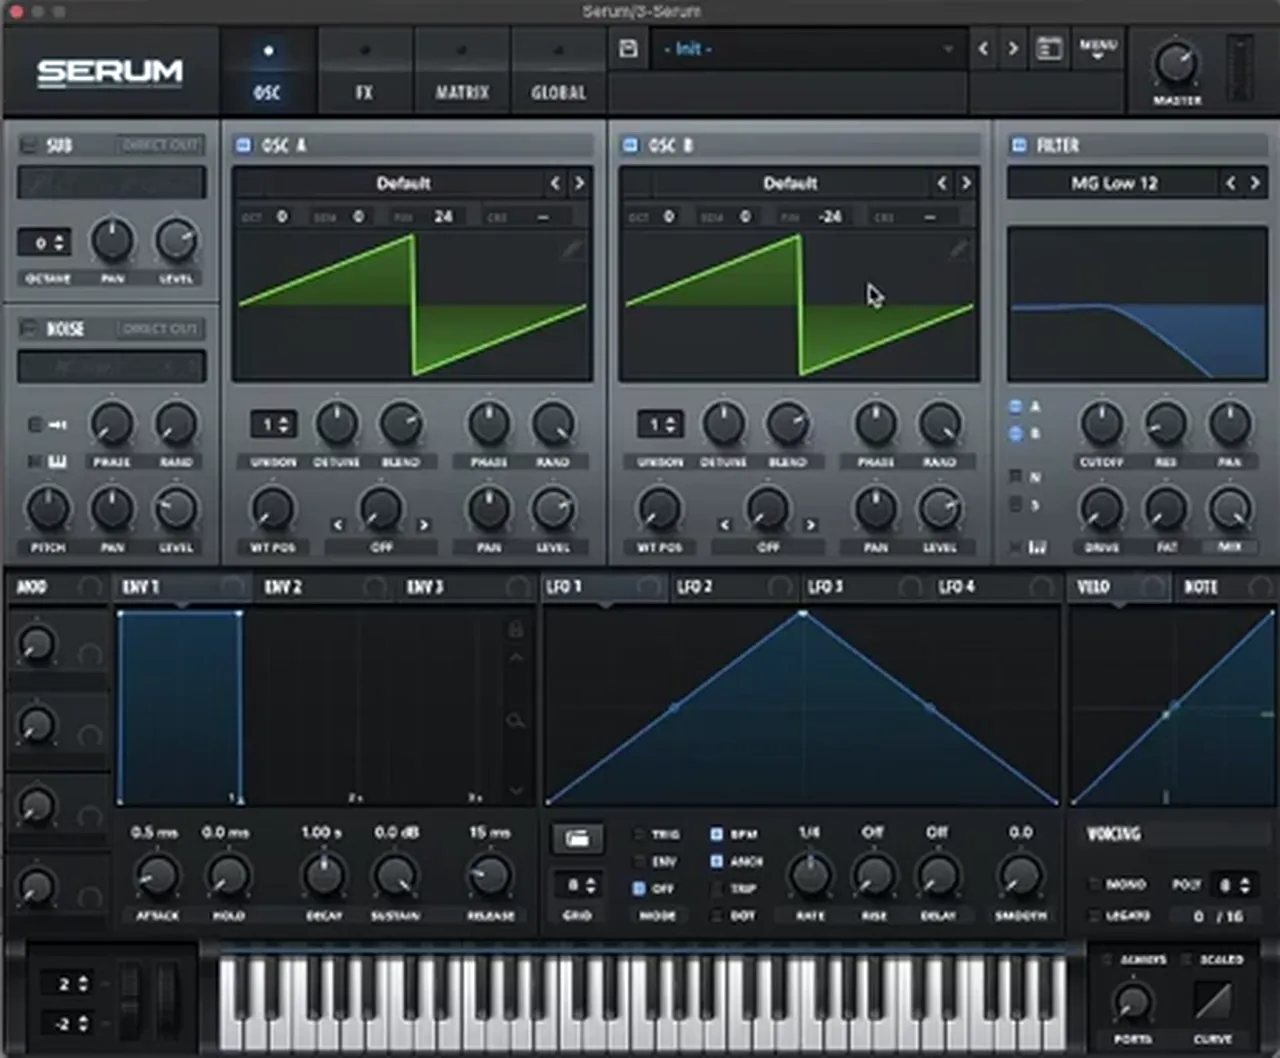
The bassline itself comes from the G natural minor scale: G, A, B flat, C, D, D sharp (E flat) and F (watch at 9:17). From experience he leans on the 1st, 6th, 4th and 3rd notes, uses the 5th and 7th freely, steers a little clear of the 2nd, and notes that going from the 7th back to the 1st can sound a bit too major and cheesy. If you don’t think in scale degrees, put a note in, see if it works, and try another. He then adds Ableton’s Saturator with the “A Bit Warmer” preset. For more liquid bass ideas in Serum, see our liquid DnB bass like Random Movement.
Listen: the first loop, with the pad, the reese and the basic kick, snare and clap beat10 sec
3.Lay down the drums: kick, snare, then top loops
Keep the main kick and snare simple and well chosen, then make the beat roll with layers on top: a shuffle cut out of a break, a hat on every quarter beat to anchor it, a shaker loop and high-passed breaks. A few straight hats on their own tend to sound boring.
Telomic picks a long kick with a nice top end that cuts through but still sounds organic rather than synthetic, a clappy snare with a transient that isn’t too aggressive, and a clap with its stereo width and tail reduced: “fairly classic modern liquid” (watch at 12:29). He programs a basic beat, groups it, then digs through his top loops (watch at 14:29). Since the kick and snare are already strong, he doesn’t need fat full breaks layered over them. Instead he cuts just the shuffly hats out of one break, adds a second break for its shuffle and open hat, puts a hat on every quarter beat and adds a shaker loop. One of his favourite top loops is a cut-up version of the Think break’s shaker.
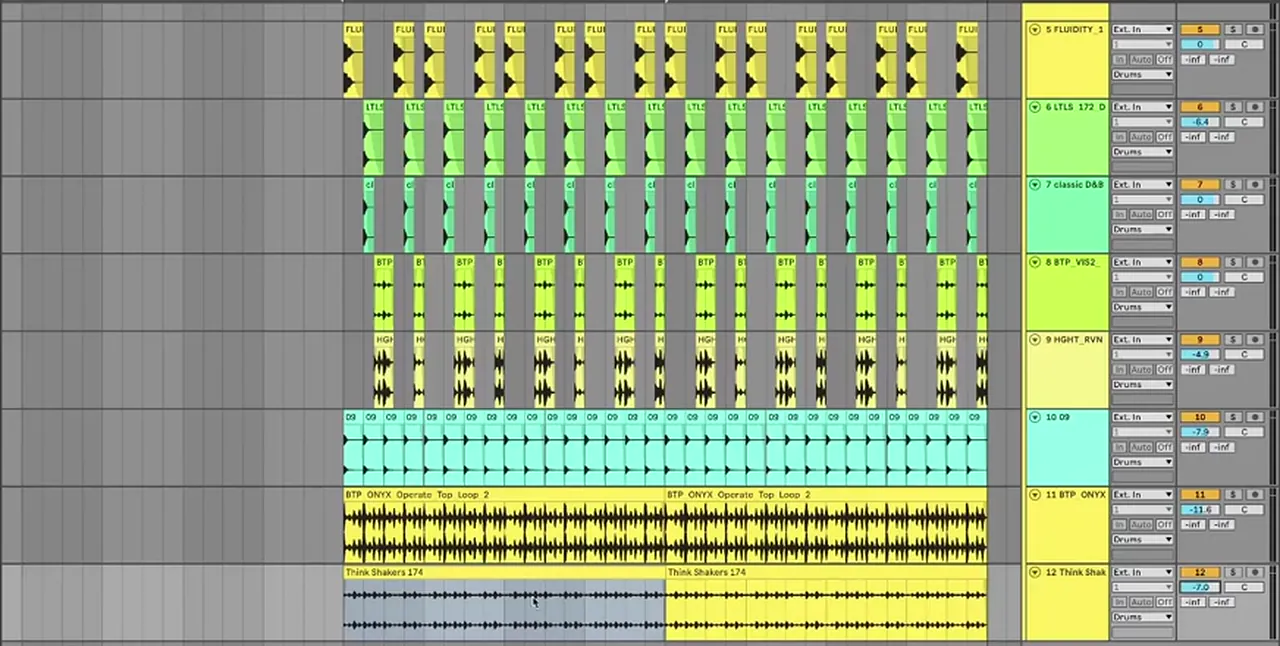
For a deeper look at building liquid beats, including slicing breaks so their swing matches and ducking the tops, read our how to make liquid DnB drums tutorial, also with Telomic.
4.Group and glue the drums
Group the drums so you can balance whole sections with one fader, then add a little processing to the group: a transient shaper to tighten it, a short room reverb on a send for life, and light compression and clipping to even out the peaks. Save the detailed per-drum processing for later.
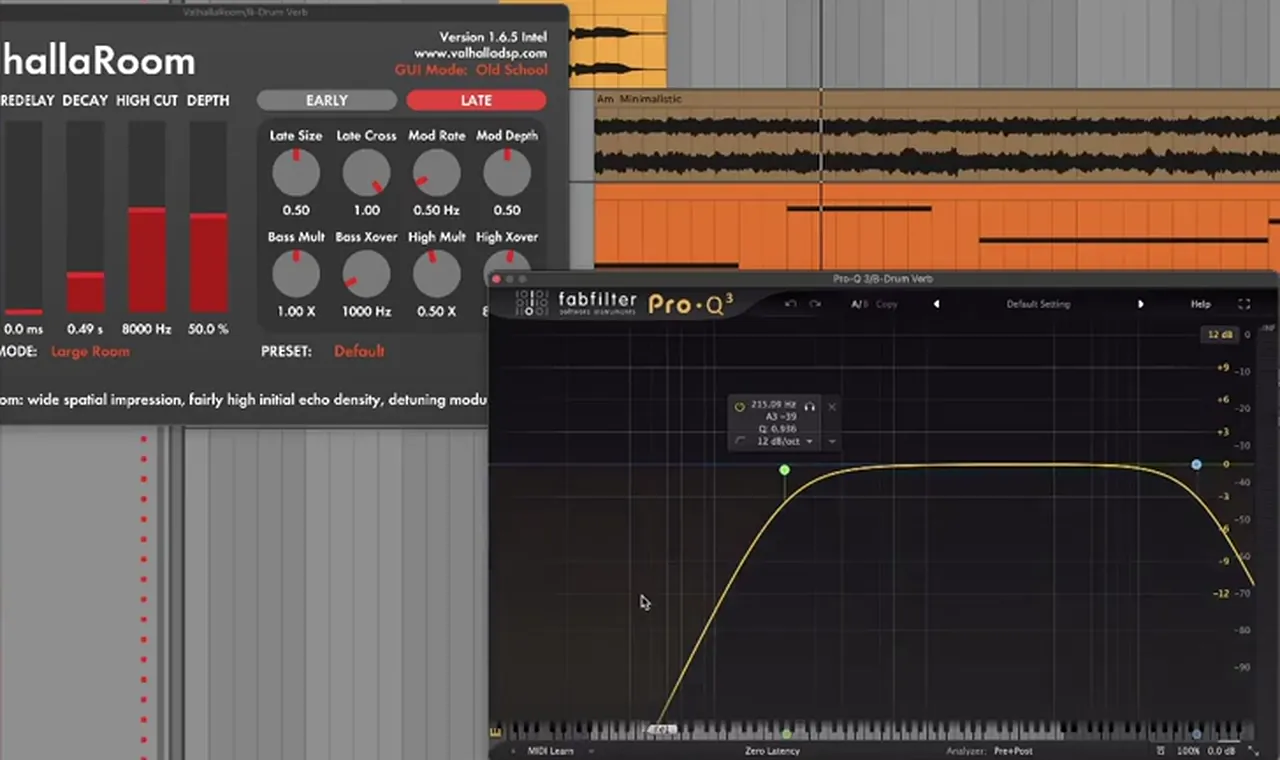
Telomic groups everything, with the snares in their own group inside the drum group (Ableton allows groups within groups), and always colours his drums white. Grouping means he can turn all the top loops down at once and still reach each layer (watch at 19:04). Kilohearts Transient Shaper on the group “just makes everything a little bit tighter”. A drum reverb send with ValhallaRoom on a very short decay, followed by Pro-Q 3 cutting the lows and highs, sounds like a small room when soloed but gives the drums much more life in context (watch at 21:17).
On the bus he adds a Glue Compressor that isn’t doing much beyond catching the louder hits, then KClip 3 set to a soft clip with the drums driven into it, and Pro-L 2 to catch anything left (watch at 22:36). That glues the one-shots and loops together and evens out spiky transients, which makes mastering easier later.
Listen: the loop at 22 minutes, with the layered drums, drum reverb, reese and pad10 sec
5.Sidechain the bass and add a clean sub
Duck the bass under the kick so the two don’t clash. The snare sits well above the sub, so it doesn’t need it. Then fix the reese’s uneven low end by giving the track a separate sine sub, high-passing the reese where the sub takes over.
Telomic does all his sidechaining with volume automation on Ableton’s Utility gain (watch at 24:26). He highlights roughly the length of the kick, draws the dip with a curve, and copies it across the whole pattern. Unlike a compressor, he can see exactly when it ducks to zero and how it comes back up, and shape it to the length of his kick so the tune doesn’t obviously pump. He tries a longer, deliberate pump on the pad and decides it doesn’t suit this tune. Instead he swaps the pad’s EQ curve for a low-pass and automates it to open slowly over 16 bars, then repeat.
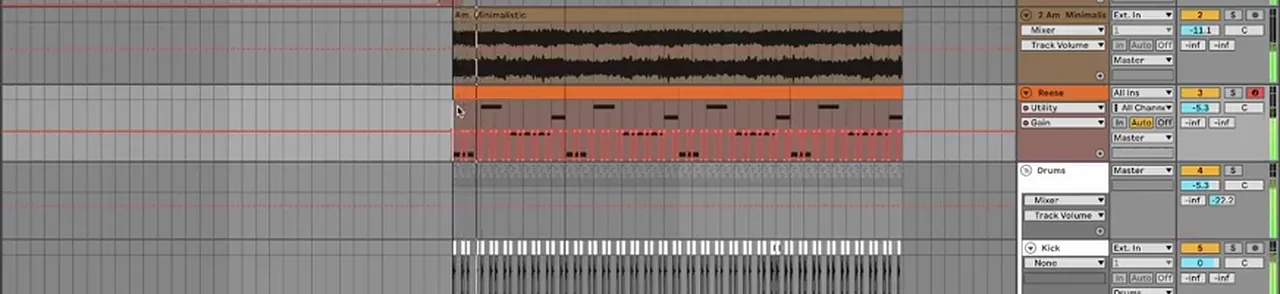
Later he explains why the reese’s volume jumps up and down even outside the sidechain (watch at 33:34): the two detuned saws have slightly different wavelengths, so they phase against each other. That gives the classic DnB warble, but also volume fluctuations in the low end. The fix is a really simple straight sub on its own track, with the same Utility automation copied over. The sub’s highest note sits at about 70 Hz, so he cuts everything below 70 Hz on the reese, “just for safety”, and sometimes saturates the sub slightly to give it a couple of harmonics so it gels with the reese. The full method is in our DnB sub bass guide.
6.Add atmospheres and vocal FX
Liquid lives on its atmosphere. Turn your main sample into a second, textural layer, add a second pad, and run everything into shared reverb sends with their low end cut so the space never muddies the sub.
Telomic copies the vocal onto Granulator II, a free Max for Live device that plays slices, or grains, of a sound depending on where you play the keyboard (watch at 28:25). He turns the spray up so it grabs grains from around the selected point, makes the grains really fine, raises the attack and release and turns the voices down to one. With the vocal effects copied over (not the delay yet), plus Baby Audio’s Crystalline reverb and an EQ dropping the lows and some of the highs, it becomes a wash of hits that he places where the vocal comes in, under the normal delay.
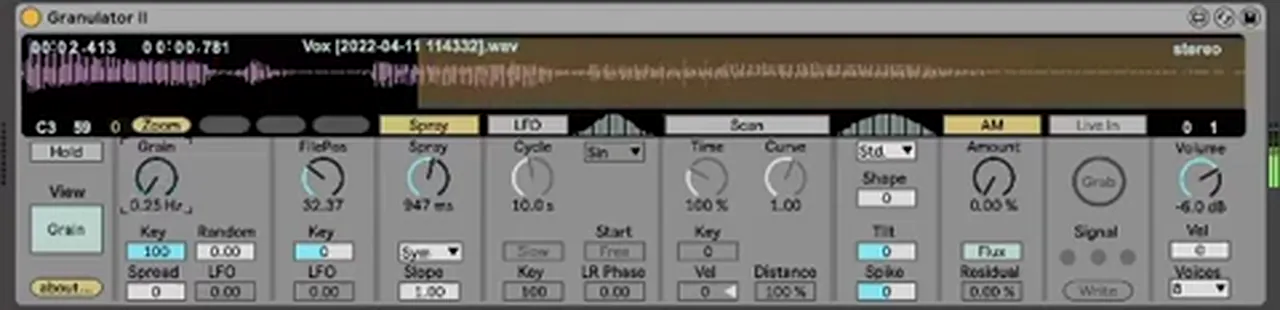
A second pad layer goes on top, with the filtering copied over, and both sit on a main reverb send: FabFilter Pro-R on fairly default settings, then a Pro-Q cutting all the low end for the same reason as the drum reverb. He uses Granulator for pads, pianos and arps too, and the approach of taking random slices of a sample stays the same whatever the source.
7.Make a filler bass by resampling
A filler bass is a short, moving bass hit for the gaps between the main notes. Make a reese with slowly moving notch filters, resample it to audio, play it from Simpler with the sample start, pitch and filters on macros, then tame it with band-pass filtering and saturation.
Telomic starts like the reese, two saws an octave down, but swaps the low-pass for a Notch 24 filter so he doesn’t lose the high end, with a slow LFO moving it, then drive, a lot of distortion and a bit of chorus (watch at 36:56). He wants slow movement over a long time, so he adds a second and third notch that move differently to each other, records a long MIDI clip and freezes it. He drags the audio to a new track and loads it into Simpler (rather than Sampler) with the voices set to one.
The rack is where it gets playable (watch at 40:36). Macro 1 moves the sample start point, so every hit plays a different part of the moving notches. A Pitch MIDI effect goes in front, and the transpose control goes on Macro 2, which he finds a better pitch-shifting tool than a pitch bend. Simpler’s pitch envelope, with a short decay, adds a kick-like punch at the start of each hit, the same way a kick drum is a sine wave pitching down. Portamento with a fairly high rate and mono mode finish the instrument. To tame the raw sound, he chains a band-pass, a notch and another band-pass and automates them (watch at 46:24), with OTT at the end. His second method links an Auto Filter band-pass and a low-pass slightly above it on one macro, so the top end has a much sharper cutoff than the bottom.

Trash replaces the Glue Compressor for saturation: a little on the lows, a lighter setting on the mids, and the tops “you can just go nuts with”, because there isn’t much up there (watch at 51:47). The fillers get the sidechain too. For variation he cuts the drums at the start of a phrase rather than the end, and does the fill “that everyone myself included does”: a high-pass and a reverb on everything, basses included, at the end of a phrase.
8.Block out the arrangement with empty clips
Lay the structure out early. Instead of locators, put empty MIDI clips on a track and name each one after its section (Intro, Verse, Drop A, Drop B), so you always know where you are in the tune when you decide what to add or cut.
Telomic doesn’t like how markers look, so he uses blank MIDI clips, renamed as sections (watch at 57:36). With the outline in place he moves a drum cut later, because you don’t want to lose the energy of the drums only eight or 16 bars after the drop has kicked in. “We’re making dance music, right? So you’re making it for DJs, and so structure matters.” A roller with a weird structure won’t feel right in a set. His finished outline runs Intro, Verse, Drop A, Drop B, Drop A, Drop C, then the second half repeats the pattern from a new verse. Our DnB BPM and structure guide explains phrase lengths and section order.

9.Add a lead and chords for the B section
Give the second drop its own musical layer. A plucky lead and short chord stabs that follow the bassline add interest without crowding the reese, and once several elements are in you can create sections by dropping parts out.
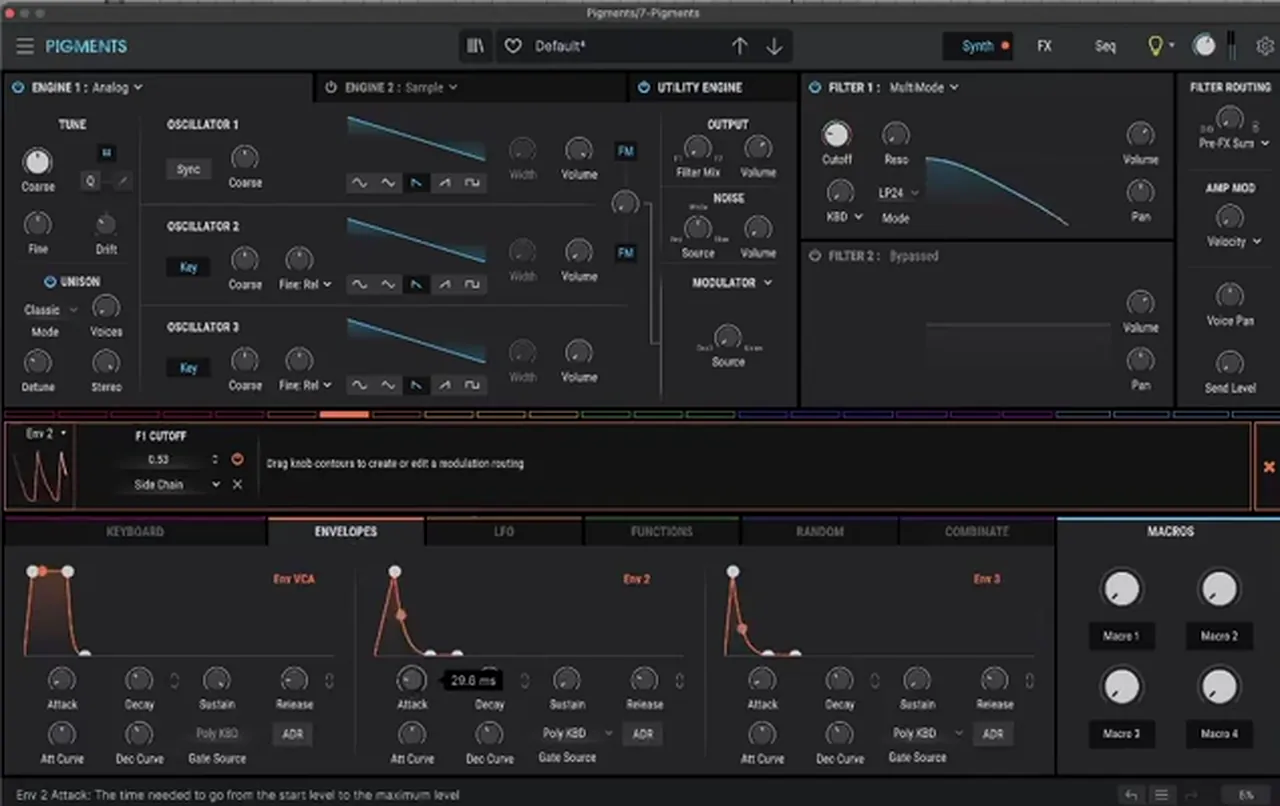
For the lead Telomic opens Arturia Pigments (watch at 60:01). He likes its drift dial, which lets the pitch wander very slightly: as a fan of hardware, he finds a perfectly clean, pristine mix sounds lifeless, and small imperfections make it sound more organic. For a pluck he brings the filter right down, maps envelope 2 to the cutoff and adds a bit more attack. Then he writes a lead that plays with semitones, going from G up to D sharp and G, then down to D. Unison is fine on high leads (he is more careful with it on basses), and a second filter on the same envelope, reverb, an EQ cutting the low end, H-Delay and a very slow LFO finish it.
The chords come from a simple Operator “techy chord stab” preset (watch at 67:12). “The chord sound doesn’t even matter that much”: what makes it is a lot of saturation, reverb, delay and a filter. He plays short plucked chords that follow the bassline in the B section, moves the last chord off the usual spot so the change lands differently, and EQs the low end out. Towards the end of the drop he takes the filter automation off and lets it open right at the end. More chord voicings are in our liquid DnB chords and pianos tutorial.

Listen: the drop as it stood once the lead and chord stabs were in10 sec
10.FX, the playthrough and what to fix in the mixdown
Use FX freely, because listeners don’t notice them in the same way as the main parts. Place impacts with intent, make tonal reverses from notes in your key, then play the whole tune through and write down what is missing before you move on to the mixdown.
Copying the drop arrangement over, Telomic varies the basslines with transpose automation on the fillers and a stronger pitch envelope on some of them (watch at 72:41). He calls drums in the intro “an absolute godsend”, and suggests starting with a couple of top loops and building into the full break. For impacts he removes the pre-delay and puts a big hit on the second beat of the drop, with the first snare, rather than right at the start (watch at 80:22). An atmospheric layer stays off the grid so it doesn’t loop in step with the tune.
Another trick is the tonal reverse (watch at 84:08): take the pluck’s G note (the key of the tune), put a big shimmer reverb on it, freeze it and reverse the long decaying tail. It makes a nice change from crashes and white-noise sweeps, and works on a vocal note too. He distorts it slightly with Soundtoys’ Devil-Loc and adds a Pro-Q dynamic band (double-click a band, hold Alt and drag down). For other FX he picks samples slightly above the key and pitches them down, and sidechains an FX layer so it starts pumping as soon as the drop hits.
Listen: the drop from the final playthrough of the rough tune11 sec
After about an hour and a half he plays the tune through (watch at 89:11) and lists what he would do next (watch at 92:17). SPAN shows one section has almost no low-mid energy, which a club needs, so he would add low-passed piano chords there, and something quiet to fill out the drop too. He might add a second vocal sample from the same pack, and vary the drums with a quiet ride every couple of beats and small fills into each section. A glitch delay preset can add a little chaos before a section comes back in. He would freeze the granulated vocal and arrange the cuts he likes, and put a Max for Live LFO on the filler bass’s sample start for more random movement. Then comes the technical mix he postponed at the start. Our DnB mixdown guide takes it from there.
Common mistakes making liquid DnB in Ableton
- Starting with a blank grid. Begin from one sample or progression and build the framework around it.
- Guessing the key. Check it early, for example with a tight Auto-Tune test, and use well-labelled sample libraries.
- EQing everything as you go. Get the creative parts down first; Telomic fixes the technical side later so he doesn’t get bogged down.
- Relying on the reese for low end. Detuned saws phase against each other. Put a clean sub under them and high-pass the reese.
- A sidechain you can hear. Shape the dip to the length of your kick, unless you want the pump on purpose.
- Straight hats only. A rolling shuffle from a break or top loop makes liquid move.
- No structure. Name your sections early, and don’t cut the drums eight bars after the drop lands.
- Copy-paste FX. Put impacts on the second beat, reverse a note in your key, and keep atmospheric layers off the grid.
Free download
Free liquid samples for your first track
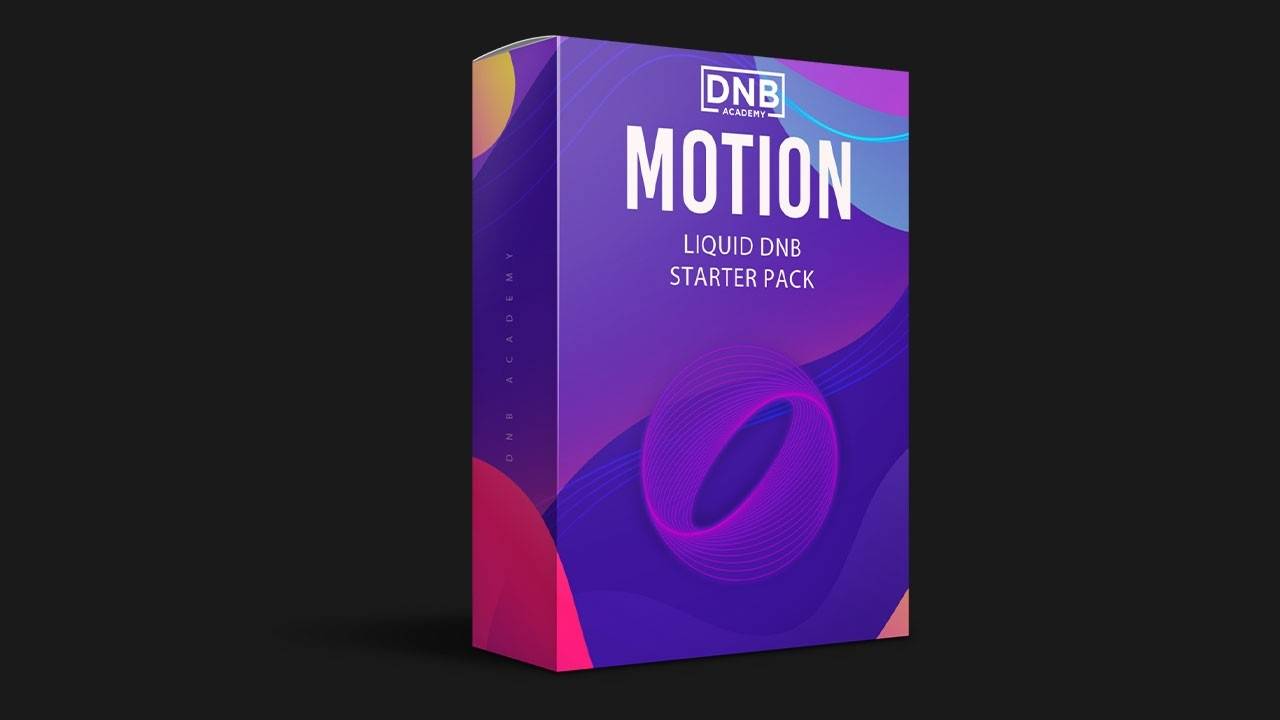
Building your own liquid tune is easier with a matched set of sounds to start from. The Motion Liquid DnB Starter Pack gives you:
- 16 kicks, snares and top loops for rolling liquid drums
- 10 musical and FX samples
- 26 royalty-free samples in total
- An FL Studio project file; the samples are audio, so they drop straight into Ableton Live
It’s one of seven free sample and preset packs in DNB Academy Free Access, alongside the mixing and mastering e-books and the 3‑day DnB challenge, which has an Ableton Live version. Join 40,000+ producers in Free Access. Free account, no card needed.
Go deeper
Telomic’s full course and liquid sounds
Want to go further than one 98-minute session, or start your own liquid tune with ready-made sounds?
 Production courseTelomic production courseA track from scratch in about 6 hours: music theory, bass synthesis and resampling, drums, atmospheres, arrangement, mixing and mastering, with the project file, stems, presets and samples.
 Preset bundleTelomic Serum presets100 Serum presets for liquid, jungle and deep DnB, including 30 basses, 35 pads and 21 plucks.
 Sample packNova Future Liquid DNB sample packFuture and liquid DnB sounds: 25 drum loops, 15 top loops and 30 drum one-shots, plus bass loops, chords, melodies and 20 Serum presets.
Every artist course, preset bundle and sample pack is also in The Vault. Browse courses
Related tutorials
All tutorials → Drums · LiquidHow to Make Liquid DnB Drums: Rolling, Atmospheric Beats Step by Step13 min read · Video + guide
 Liquid · ChordsHow to Write Liquid Drum and Bass Chords and Pianos18 min read · Video + guide
 Serum · BassHow to Make a Liquid DnB Bass Like Random Movement in Serum18 min read · Video + guide
 FL Studio · LiquidHow to Make Liquid Drum and Bass in FL Studio11 min read · Video + guide
FAQ: making liquid DnB in Ableton
How do you make liquid DnB in Ableton?
Start from one idea, such as a soulful vocal sample, and find its key. Write a reese bassline in that scale, add a kick, snare and high-passed top loops, group and glue the drums, sidechain the bass with Utility automation and add a sine sub. Then layer atmospheres, add a filler bass, block out the sections and finish with leads, chords and FX.
What key and scale should I use for liquid DnB?
Any key works. Our track is in G minor, using the natural minor scale: G, A, B flat, C, D, D sharp (E flat) and F. Telomic leans on the 1st, 3rd, 4th and 6th notes, uses the 5th and 7th freely and steers a little clear of the 2nd. A quick check for a sample’s key is a very tight Auto-Tune: if it doesn’t sound weird, you’re probably right.
How do you make a liquid DnB reese bass?
Load two saw waves, detune them slightly in opposite directions (+24 and -24 in our video), leave unison off, drop the patch an octave or two and key-track a low-pass filter so octave jumps stay full. Telomic uses Serum; any synth with two saws works, including the free Vital. Put a separate sine sub underneath and high-pass the reese where the sub takes over.
How do you sidechain bass to the kick in Ableton?
Telomic uses volume automation on a Utility device instead of a compressor. He highlights about the length of the kick, draws a curved dip in the Utility gain and copies it across the pattern. You can see exactly when it ducks and how it comes back, and shape it so the tune doesn’t obviously pump. The snare doesn’t need it, because it sits well above the sub.
What is a filler bass in liquid DnB?
A short, moving bass hit for the gaps between the main bass notes. In our video it is a reese with slowly moving notch filters, frozen to audio and played from Simpler, with the sample start and transpose on macros, a pitch envelope for punch, and band-pass filtering and saturation to tame it.
How do you arrange a liquid DnB track?
Lay out the sections early. Telomic puts empty MIDI clips on a track and names them Intro, Verse, Drop A, Drop B and so on, so he always knows where he is in the tune. Structure matters because DJs play it in a set; our track runs Intro, Verse, Drop A, Drop B, Drop A, Drop C, then the pattern again from a second verse.
Does the free Motion Liquid pack work in Ableton?
Yes. The Motion Liquid DnB Starter Pack comes with an FL Studio project file, but its 26 royalty-free samples are audio files, so they work in Ableton Live and any other DAW. It is one of seven free packs in DNB Academy Free Access.
Next steps
Open an empty Ableton project, pick one sample you love, find its key and get a reese and a kick and snare under it. Then follow the steps above in order. Where liquid sits among the other styles is in our drum and bass subgenres guide.
Free Access
Seven free DnB sample and preset packs, including the Motion Liquid DnB Starter Pack, plus mixing and mastering e-books and a 3-day challenge for Ableton Live and FL Studio.
Get free packsThe full guide
Tempo, drums, sub, mid bass, chords, arrangement and mixdown: every step of a DnB track.
Read the guideDNB Foundations
A structured drum and bass course with weekly live feedback calls on your tracks.
See Foundations1:1 Mentorship
Personal guidance on your music from a mentor, built around your goals.
See the mentorship50,000+ producers have joined DNB Academy, and our producer Discord has 5,300+ members.